How to Paint Scars and Tattoos on Miniatures (Realistic Skin Details, Battle Wounds & Fantasy Markings Guide)
Scars and tattoos are some of the most effective ways to add personality, history, and character to fantasy miniatures.
Whether you’re painting a battle-hardened barbarian, a mysterious assassin, a tribal warrior, a powerful sorcerer, or a veteran adventurer, carefully painted skin details can transform an ordinary miniature into a memorable character.
Unlike armor, weapons, or clothing, scars and tattoos are directly connected to the character’s body.
They follow the shape of the skin, interact with natural highlights and shadows, and often communicate important details about the miniature’s story.
A scar across a warrior’s face might suggest years of combat.
A collection of ritual tattoos could identify a member of an ancient magical order.
Glowing runes painted across a sorcerer’s arms might represent supernatural power.
However, realistic skin markings require more than simply drawing lines over the finished skin.
You need to understand skin undertones, subtle color transitions, fine brush control, anatomical placement, realistic scar texture, tattoo pigmentation, and magical Object Source Lighting (OSL).
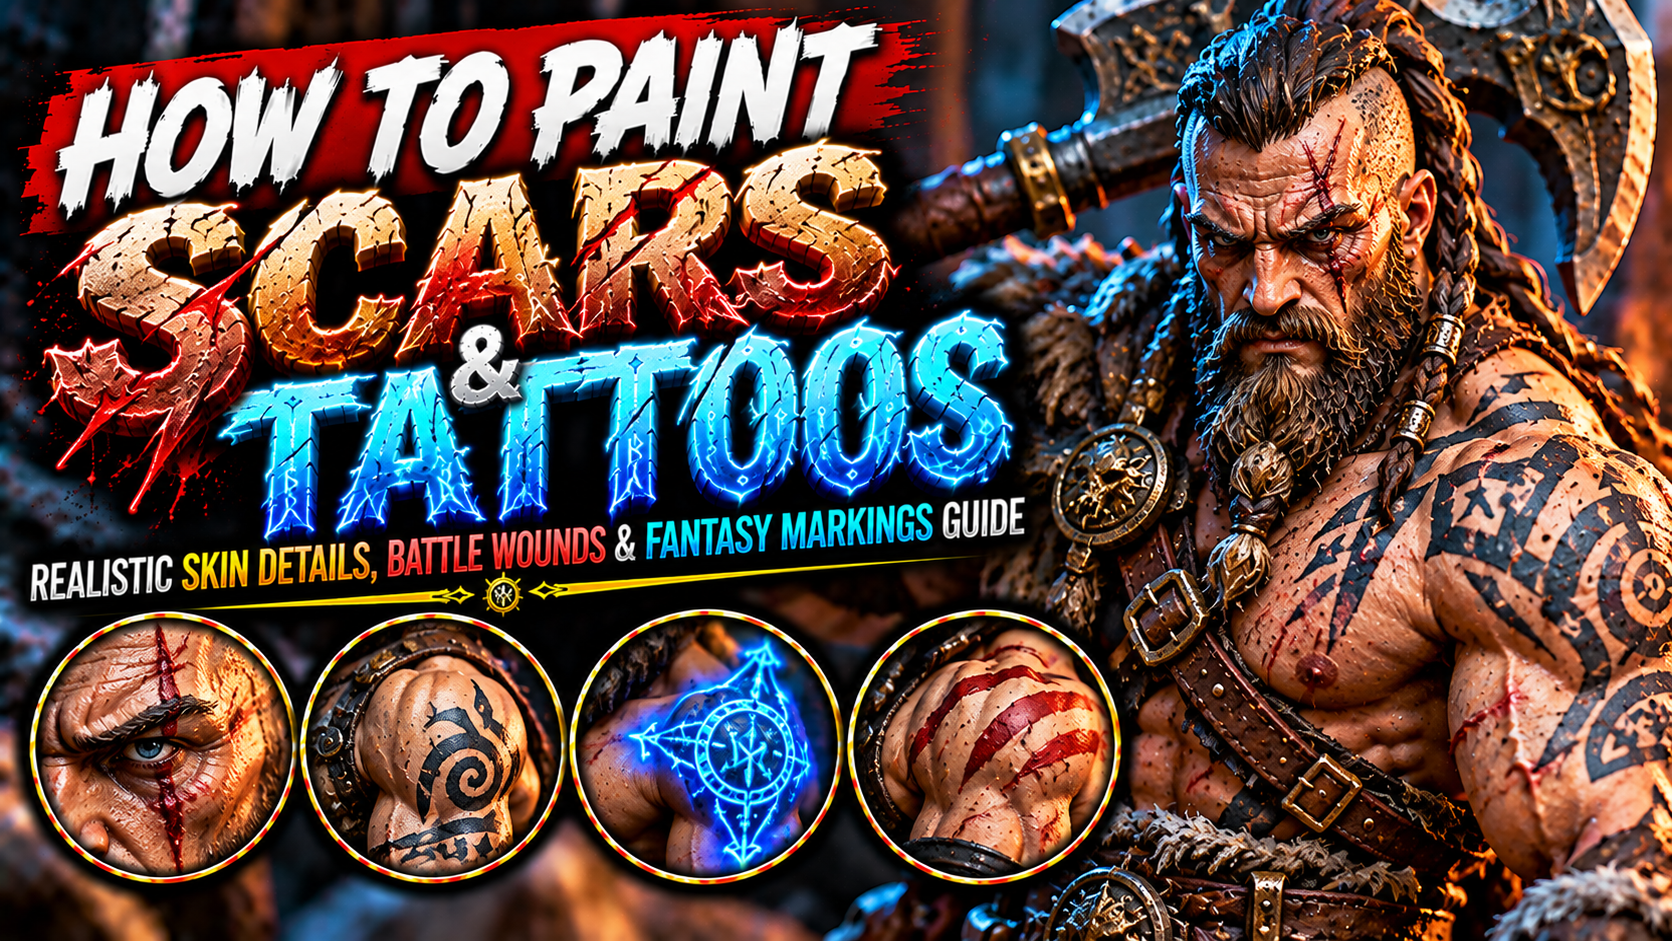
In this guide, you’ll learn how to paint realistic scars, healed wounds, facial scars, tribal tattoos, magical runes, war paint, glowing body markings, and cinematic fantasy skin effects.

Understanding How Scars and Tattoos Look
Scars and tattoos behave differently on human skin.
A scar forms when the skin repairs damaged tissue.
Its appearance depends on factors such as the original injury, healing process, age, and individual skin characteristics.
Some scars appear pale and relatively flat.
Others may be raised, darker, reddish, or irregular.
Tattoos are created by introducing pigment into the skin.
Unlike paint sitting on top of a surface, tattoo pigment appears beneath the skin’s outer layers.
This gives healed tattoos a slightly softened appearance.
For miniature painting, this distinction is extremely important.
Scars should look like changes in the skin itself.
Tattoos should appear integrated into the skin rather than floating above it.
Both effects require careful color choices and controlled contrast.
The goal is to create believable details without overwhelming the miniature’s face or anatomy.

Choosing the Best Scar and Tattoo Color Palette
Different skin tones and fantasy themes require different color combinations.
Fresh-looking scars may contain red or pink tones.
Older scars can appear lighter or darker than the surrounding skin.
Traditional tattoos often benefit from dark blue-grey rather than pure black.
Magical tattoos can use saturated colors and bright highlights.
| Effect | Color progression |
|---|---|
| Pale healed scar | Skin Base → Light Skin Tone → Ivory |
| Reddish scar | Dark Red-Brown → Muted Red → Pink-Skin |
| Dark healed scar | Skin Base → Warm Brown → Deep Brown |
| Black tattoo | Charcoal → Blue-Black → Dark Blue-Grey |
| Blue tribal tattoo | Navy → Dark Blue → Muted Blue |
| Glowing arcane tattoo | Dark Blue → Cyan → Ice Blue → White |
| Necromantic marking | Dark Green → Emerald → Lime → Pale Green |
| Ritual war paint | Dark Brown → Red → Orange-Red |
Choose colors appropriate to the character.
For realistic scars, keep the contrast relatively subtle.
For traditional tattoos, use dark, slightly desaturated colors.
For magical markings, stronger contrast can help communicate supernatural energy.
Avoid using pure white or pure black everywhere.
These extreme values are usually more effective when reserved for specific highlights and shadows.

Preparing the Miniature for Skin Details
Before painting scars or tattoos, complete the miniature’s basic skin colors.
Establish the shadows, midtones, and highlights.
Make sure the skin already looks convincing.
This provides a foundation for the additional details.
Next, identify where the markings will appear.
For facial scars, consider the forehead, cheek, eyebrow, or jaw.
For tattoos, useful locations include arms, shoulders, chest, back, and neck.
Avoid placing important details randomly.
Think about the character’s anatomy and pose.
A tattoo wrapping around an arm should follow the cylindrical shape of the limb.
A scar crossing the cheek should follow the contours of the face.
For larger display miniatures, you can plan more elaborate patterns.
For smaller tabletop figures, simpler markings are usually easier to read.

Painting the Base Skin Before Scars
Convincing scars depend on the quality of the underlying skin.
Begin with your chosen skin basecoat.
Apply darker tones to recesses.
Then gradually build lighter colors across raised areas.
For warm skin, use appropriate brown, tan, peach, or reddish undertones.
For cooler skin, introduce subtle grey, violet, or blue undertones where appropriate.
Keep the transitions smooth.
Avoid excessive dry brushing across faces.
Smooth layering generally produces better results for small facial features.
Once the skin is complete, allow the paint to dry fully.
Then begin adding scars.
Working over finished skin makes it easier to control how strongly the markings contrast with the surrounding surface.

Painting Thin Healed Scars
Thin healed scars are excellent for warriors, rogues, veterans, and adventurers.
Begin with a slightly darker or lighter version of the surrounding skin tone, depending on the appearance you want.
Use a fine brush.
Paint a thin irregular line.
Avoid making it perfectly straight.
Then add a subtle highlight along one side.
For a pale scar, use a lighter skin tone.
For a darker scar, use muted brown.
Keep the effect restrained.
A healed scar should not automatically look like a fresh wound.
For additional depth, you can introduce a very thin darker line beside a raised scar.
This suggests subtle surface relief.
Avoid excessive contrast on very small miniatures.

Painting Raised Scars
Raised scars can create a dramatic appearance on fantasy characters.
They are particularly effective on barbarians, gladiators, and heavily battle-scarred warriors.
Begin with a muted version of the skin color.
Paint an irregular line where the scar will appear.
Then add a thin highlight along the upper portion.
Place a slightly darker line along one side.
This creates the illusion of raised tissue.
For pale raised scars, use light skin tones.
For reddish scars, introduce muted pink or red-brown.
Avoid using bright red unless the scar is intended to appear recently irritated or still healing.
The highlight and shadow should follow the direction of the miniature’s lighting.
This helps the scar appear integrated with the anatomy.

Painting Facial Scars
Facial scars are among the most noticeable details on a miniature.
Even a small mark can change the character’s expression.
Begin by choosing a location.
A scar across the eyebrow can create a battle-hardened appearance.
A cheek scar can suggest an old injury.
A scar crossing the nose may become a strong focal point.
Use a fine brush and thin paint.
Start with a muted color close to the surrounding skin.
Paint a narrow irregular line.
Then add a subtle highlight.
Avoid making the scar excessively thick.
At tabletop scale, a single carefully placed line can be enough.
For larger miniatures, you can add small changes in color along the scar.

Painting Old Battle Scars
Old battle scars should appear integrated into the character’s skin.
They may be paler, darker, smoother, or more textured than the surrounding area.
Begin with a subtle color difference.
For a pale scar, use a lighter version of the skin tone.
For a darker scar, introduce muted brown.
Avoid using strong red across the entire marking.
Older scars generally benefit from softer transitions.
You can add several small scars across the arms, chest, or shoulders.
Vary their length and direction.
Avoid making every scar identical.
A few carefully placed marks create a more believable battle history than covering the entire miniature with random lines.

Painting Fresh-Looking Scars and Healing Marks
Some fantasy characters may have relatively recent injuries or partially healed marks.
These can contain more visible reddish or pink tones.
Begin with muted red-brown.
Introduce a slightly lighter reddish skin tone.
Then blend the surrounding edges into the normal skin.
Keep the transitions controlled.
Avoid making every mark bright red.
For a healing scar, subtle color variation is usually more convincing.
You can introduce a few darker sections along the line.
However, the effect should remain consistent with the miniature’s overall style.
For a heavily weathered warrior, combining older pale scars with a few newer reddish marks can create interesting visual storytelling.

Painting Claw Marks on Fantasy Characters
Claw marks are excellent for characters who have survived encounters with monsters.
They work particularly well on rangers, barbarians, hunters, and monster slayers.
Begin by planning several parallel or slightly diverging lines.
Avoid making them perfectly identical.
Paint the marks using a muted scar color.
Vary their lengths.
Some can be deeper or more noticeable than others.
For healed claw marks, use pale or darker skin tones.
For more recent-looking marks, introduce subtle red-brown.
Keep the surrounding skin visible.
Avoid making every mark extremely thick.
The goal is to suggest an encounter with a dangerous creature without overwhelming the character’s anatomy.

Painting Traditional Black Tattoos
Black tattoos are common on fantasy warriors, assassins, monks, and tribal characters.
However, pure black can sometimes appear too harsh on miniature skin.
A dark blue-grey or charcoal often creates a more convincing appearance.
Begin with a thin dark line.
Paint the main tattoo shape.
Then gradually build the design.
For larger areas, use thin layers rather than one thick application.
Keep the edges controlled.
Avoid making every line excessively sharp.
A subtle glaze of the surrounding skin tone can soften the tattoo and help it appear beneath the skin.
This technique is especially effective on larger display miniatures.

Painting Blue Tribal Tattoos
Blue tattoos create a distinctive fantasy appearance.
They work beautifully for northern warriors, tribal shamans, barbarians, and magical clans.
Begin with dark navy.
Introduce muted blue.
Use thin lines to create the design.
Avoid making the tattoo excessively bright.
Traditional-looking tattoos generally benefit from desaturated colors.
You can add small geometric shapes, curved lines, or symbolic patterns.
Keep the design consistent.
For tattoos wrapping around an arm, follow the limb’s curvature.
A subtle skin-colored glaze can soften the finished markings.
This helps integrate them into the painted skin.

Painting Tribal Tattoo Patterns
Tribal tattoos can include geometric shapes, spirals, angular lines, and repeated symbols.
Begin by choosing a consistent design language.
For example, a barbarian clan might use angular markings.
A forest tribe could use curved organic patterns.
A magical order might use symmetrical symbols.
Start with the largest shapes.
Then add smaller connecting lines.
Avoid beginning with tiny details before establishing the overall composition.
Keep the pattern readable.
At tabletop scale, simple bold shapes are usually more effective.
For larger miniatures, you can introduce additional decorative elements.
The design should follow the anatomy rather than appearing like a flat drawing placed over the skin.

Painting Tattoos That Follow Muscles
One of the most important techniques for realistic tattoos is respecting the character’s anatomy.
A tattoo on a shoulder should curve around the deltoid.
A tattoo on a forearm should follow the cylindrical shape of the limb.
A chest tattoo should respond to the underlying muscles.
Begin by identifying the major anatomical forms.
Then sketch the tattoo using thin lines.
Allow the pattern to curve around raised areas.
Avoid painting a perfectly flat design across multiple muscle groups.
For large tattoos, break the design into smaller sections.
This makes it easier to maintain consistent proportions.
Once complete, apply subtle highlights and shadows according to the underlying skin.
The tattoo should appear attached to the body rather than floating above it.

Painting Facial Tattoos
Facial tattoos can create a powerful character identity.
They work especially well for shamans, warlocks, tribal warriors, and mystical characters.
Begin with a simple design.
Small lines around the eyes, forehead, or cheeks can create a dramatic appearance.
Use a fine brush.
Keep the paint thin.
Avoid covering important facial features.
For symmetrical markings, paint one side first.
Then carefully reproduce the design on the opposite side.
Small differences may be acceptable depending on the intended style.
For magical characters, introduce subtle color variation.
Dark blue, violet, and green can create distinctive supernatural appearances.

Painting Red Ritual War Paint
War paint differs from permanent tattoos.
It often appears more opaque and can sit visibly on top of the skin.
Red ritual markings are particularly effective for barbarians, berserkers, cultists, and fantasy warriors.
Begin with dark red-brown.
Introduce saturated red.
Then add small orange-red highlights where appropriate.
Keep the shapes bold.
You can paint lines across the face, arms, or chest.
For a rough appearance, use irregular edges.
Avoid making every marking perfectly smooth.
War paint can also contain small gaps where the underlying skin remains visible.
This creates the impression of pigment applied by hand.

Painting White Ritual Markings
White ritual markings create strong contrast against darker skin tones and can also work beautifully on fantasy creatures.
Begin with muted grey or off-white.
Paint the main shapes.
Then introduce ivory highlights.
Avoid using pure white across the entire design.
Small variations create a more natural appearance.
For rough ceremonial paint, introduce irregular edges and tiny gaps.
You can also add subtle grey shadows where the markings cross recessed areas.
White markings work particularly well for shamans, tribal warriors, druids, and supernatural creatures.
Keep the design consistent with the character’s overall theme.

Painting Glowing Blue Magical Tattoos
Glowing tattoos can transform a fantasy character into a powerful magical figure.
They work beautifully for sorcerers, monks, warlocks, and arcane warriors.
Begin with dark blue lines.
Then introduce saturated blue.
Add cyan highlights.
Finish selected sections with pale blue or white.
Keep the brightest highlights concentrated.
For additional realism, apply subtle blue glazes around the markings.
This creates the impression that the magical energy is illuminating the surrounding skin.
Avoid covering the entire arm or chest with bright cyan.
The dark skin areas between the markings help create contrast.
The tattoos themselves should remain brighter than the reflected light.

Painting Purple Eldritch Tattoos
Purple magical markings create an eerie supernatural atmosphere.
They are especially effective for warlocks, eldritch cultists, and characters connected to otherworldly powers.
Begin with black-purple.
Introduce violet.
Then add saturated purple.
Finish with pale lavender or magenta highlights.
You can paint irregular symbols, spirals, or arcane lines.
Keep the pattern readable.
For glowing effects, introduce subtle violet reflections on nearby skin.
Avoid making every marking equally bright.
A few concentrated highlights create a stronger magical appearance.
Purple tattoos work particularly well against pale or desaturated skin.

Painting Green Necromantic Markings
Green magical tattoos can suggest necromancy, poison, corruption, or supernatural transformation.
Begin with dark green.
Introduce emerald.
Build toward lime green.
Finish selected sections with pale yellow-green.
Keep the deepest lines darker.
For a corrupted appearance, introduce subtle dark green discoloration around the markings.
For a glowing magical effect, add small bright highlights.
Nearby skin can receive faint green reflections.
Avoid making the entire body uniformly green.
The contrast between ordinary skin and supernatural markings creates a more convincing result.

Creating Object Source Lighting from Magical Tattoos
Object Source Lighting can make magical tattoos appear genuinely luminous.
Imagine a sorcerer with glowing blue runes across one arm.
The runes act as small light sources.
Nearby skin reflects their color.
Begin with thin blue glazes.
Apply them around the brightest markings.
Keep the strongest reflections close to the lines.
Gradually reduce the intensity farther away.
The runes should remain brighter than the surrounding skin.
For purple tattoos, use violet reflections.
For green tattoos, use emerald or lime.
For red magical markings, use crimson or orange-red.
Avoid applying the glow equally across the entire miniature.
Directional lighting and controlled brightness are essential.

Painting Tattoos on Fantasy Creatures
Tattoos are not limited to human characters.
Orcs, goblins, giants, demons, and other fantasy creatures can also display ritual markings.
Begin by painting the creature’s skin normally.
Then choose a tattoo color that contrasts with the underlying skin.
For green orc skin, dark blue or black markings can work well.
For red demon skin, pale grey or black symbols can create strong contrast.
For pale undead skin, purple or dark green markings may reinforce the supernatural appearance.
Keep the designs appropriate to the creature’s anatomy.
Large creatures can support more elaborate patterns.
Small creatures generally benefit from simpler markings.

Painting Tattoos on Monks and Martial Artists
Monks and martial artists often feature exposed arms, shoulders, and torsos.
These areas provide excellent opportunities for detailed tattoos.
Begin with smooth skin highlights.
Then introduce the tattoo design.
For a disciplined martial artist, geometric patterns or symbolic markings can create a controlled appearance.
For a mystical monk, glowing runes may suggest supernatural abilities.
Keep the markings aligned with the muscles.
Avoid overcrowding the skin.
A few carefully placed symbols can create a stronger visual identity than covering every exposed area.
For magical tattoos, use subtle reflected light to connect the markings with the character’s abilities.

Painting Scars and Tattoos Together
Combining scars and tattoos can create especially interesting characters.
A veteran warrior might have old scars crossing an elaborate tattoo.
A cursed sorcerer could display magical runes surrounding damaged skin.
A barbarian might carry both tribal markings and battle scars.
Begin by painting the skin normally.
Then establish the larger tattoo patterns.
Add scars afterward, considering whether the scar tissue interrupts the tattoo.
A scar that formed after a tattoo may distort or break the original design.
This can create convincing visual storytelling.
Keep the color differences controlled.
Avoid making every detail equally prominent.
Choose one or two focal points.
The remaining markings should support the overall composition.

Creating Cinematic Character Details
Scars and tattoos can become the main focal point of a fantasy miniature.
To achieve this, use controlled contrast.
Keep the surrounding skin relatively smooth.
Concentrate the strongest details around the face, shoulders, or arms.
For scars, use subtle highlights and shadows.
For tattoos, create clear shapes that follow the anatomy.
For magical markings, introduce bright colors and reflected light.
You can also use the miniature’s pose to emphasize the details.
A warrior raising a tattooed arm naturally draws attention to the markings.
A sorcerer casting magic with glowing hands creates a clear visual connection between the tattoos and the spell.
Avoid adding unnecessary details to every exposed surface.
A strong focal point creates a more memorable miniature.

Common Mistakes When Painting Scars and Tattoos
One of the most common mistakes is painting scars with extremely bright colors.
Realistic healed scars usually benefit from subtle differences in skin tone.
Another mistake is making every scar perfectly straight.
Natural scars often contain irregular shapes.
Avoid painting tattoos with excessively thick lines.
Fine controlled strokes create more convincing details.
Don’t use pure black for every tattoo.
Dark blue-grey or charcoal can produce a softer appearance.
Another problem is ignoring anatomy.
Tattoos should follow the curvature of arms, shoulders, and other body parts.
For magical tattoos, avoid excessive OSL.
The markings should remain brighter than the reflected light.
Finally, avoid overcrowding the miniature.
A few carefully placed details can communicate more personality than dozens of random markings.

Final Thoughts
Painting convincing scars and tattoos requires careful brush control, realistic skin colors, anatomical awareness, subtle shading, and thoughtful character design.
Start by painting the skin normally.
Establish smooth shadows and highlights.
Then decide where the scars or tattoos will appear.
For healed scars, use subtle color differences and thin irregular lines.
For raised scars, introduce a small highlight and shadow to suggest surface texture.
For traditional tattoos, use dark, slightly desaturated colors.
Keep the lines controlled and follow the character’s anatomy.
For ritual war paint, introduce bolder shapes and more opaque colors.
For magical tattoos, use saturated colors and carefully placed bright highlights.
Blue markings create a classic arcane appearance.
Purple suggests eldritch energy.
Green can communicate necromancy or corruption.
Red can represent dangerous ritual magic.
When the markings emit light, use subtle Object Source Lighting to illuminate nearby skin.
These techniques work beautifully for barbarians, rogues, monks, sorcerers, warlocks, shamans, assassins, orcs, demons, and fantasy display miniatures.
The most important principle is that scars and tattoos should feel connected to the character.
They should follow the anatomy, interact with the lighting, and contribute to the miniature’s story.
When painted effectively, even a small facial scar or a few carefully placed runes can transform an ordinary miniature into a character with history, personality, and supernatural presence.
Frequently Asked Questions
What colors should I use for realistic scars?
Use lighter or darker versions of the surrounding skin tone, depending on the scar’s appearance. Muted pink and brown can also be useful.
How do I paint healed scars on miniatures?
Paint a thin irregular line using a subtle skin-tone variation, then add a small highlight or shadow if needed.
What is the best color for black tattoos?
Dark blue-grey, charcoal, and blue-black often create a more convincing appearance than pure black.
How do I paint tiny tattoos on miniature skin?
Use a fine brush with a sharp point, thin paint, and simple designs that remain readable at tabletop scale.
How do I make tattoos follow the character’s anatomy?
Curve the lines around muscles, shoulders, and limbs rather than painting flat patterns across the surface.
How do I paint glowing magical tattoos?
Begin with a dark saturated color, build toward brighter highlights, and finish selected sections with pale or white details.
How do I paint realistic facial scars?
Use thin controlled lines, subtle color transitions, and carefully placed highlights that follow the shape of the face.
How do I create OSL from magical tattoos?
Apply thin glazes of the tattoo’s color to nearby skin, keeping the brightest reflections closest to the glowing markings.
If you would like free D&D STL miniatures, visit our homepage and download yours now: