How to Paint Dragon Skin and Scales on Miniatures (Realistic Reptile Texture Guide)
Dragons are some of the most impressive miniatures you can place on a tabletop, but their enormous areas of scales can also make them intimidating to paint.
A dragon covered entirely with one red, green, or blue color quickly loses detail. Individual scales disappear, large surfaces become flat, and even an incredible sculpt can start looking like plastic.
The secret to realistic dragon skin is variation.
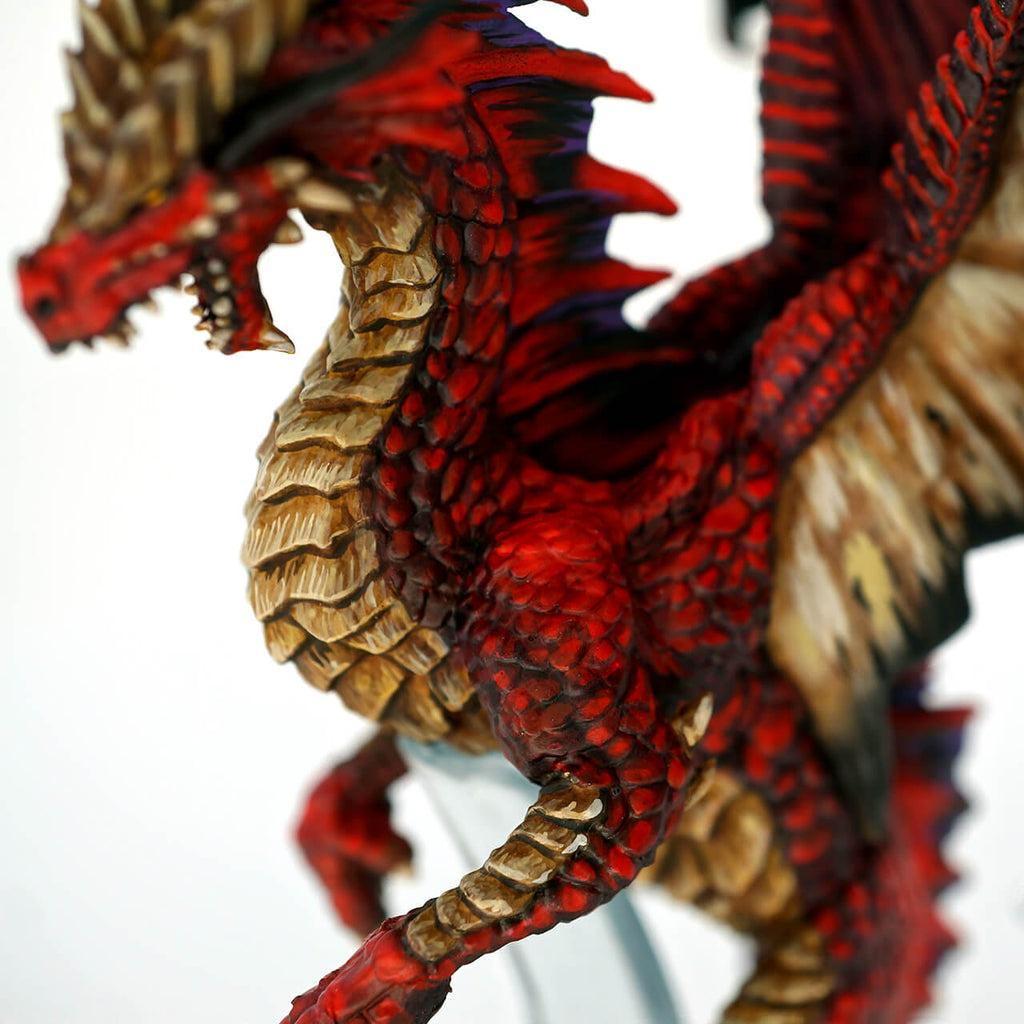
Deep shadows between scales create separation, gradual color transitions give the body volume, selective highlights define individual scales, and subtle changes in color make the creature feel organic rather than artificial.
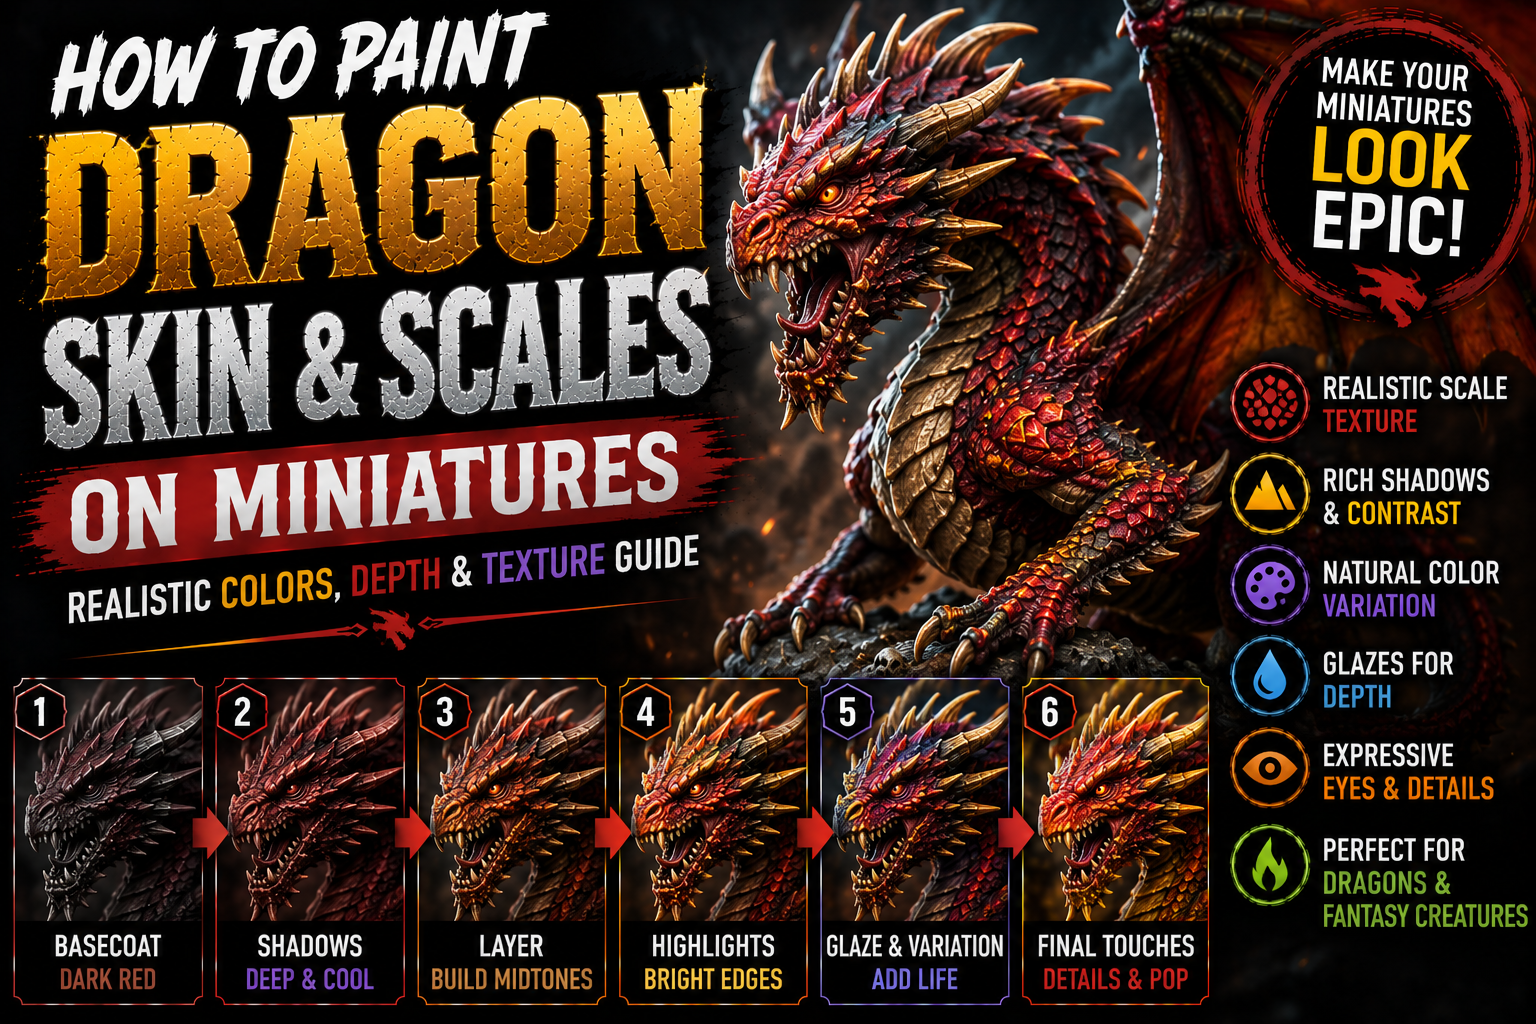
In this guide, you’ll learn how to paint realistic dragon skin and scales using layering, dry brushing, glazing, controlled highlighting, and natural reptile-inspired color variation.
Understanding Dragon Scales
Before painting, look carefully at the sculpt.
Not every scale should receive the same amount of attention.
Large scales around the head, shoulders, spine, and legs often catch more light, while smaller scales beneath the body naturally remain darker.
Think of the dragon’s body as a large three-dimensional shape first.
Establish the overall lighting before worrying about every individual scale.
This prevents the miniature from becoming visually noisy.
Choosing Your Dragon Color Palette
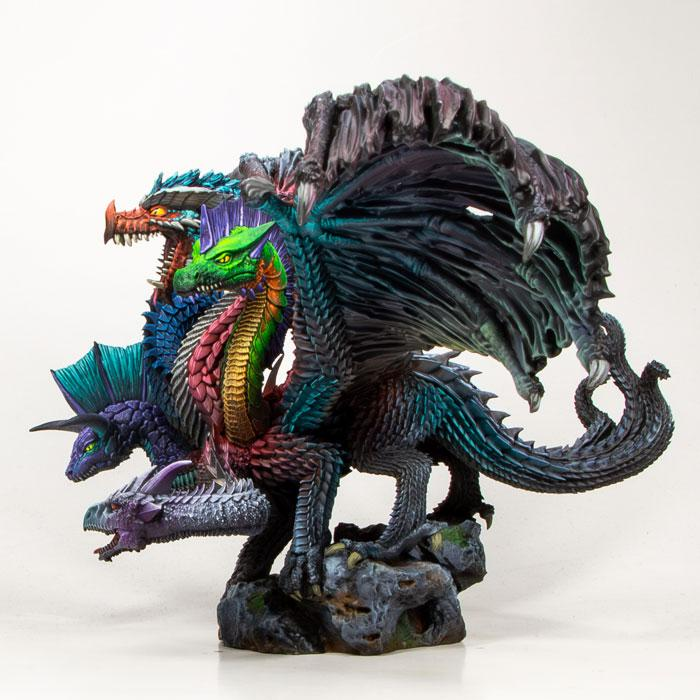
Fantasy dragons can use almost any color, but your palette should contain more than one version of that color.
For a red dragon, for example:
- Dark Burgundy
- Deep Red
- Crimson
- Red-Orange
- Orange
- Pale Yellow
A green dragon could progress from dark forest green through olive and yellow-green.
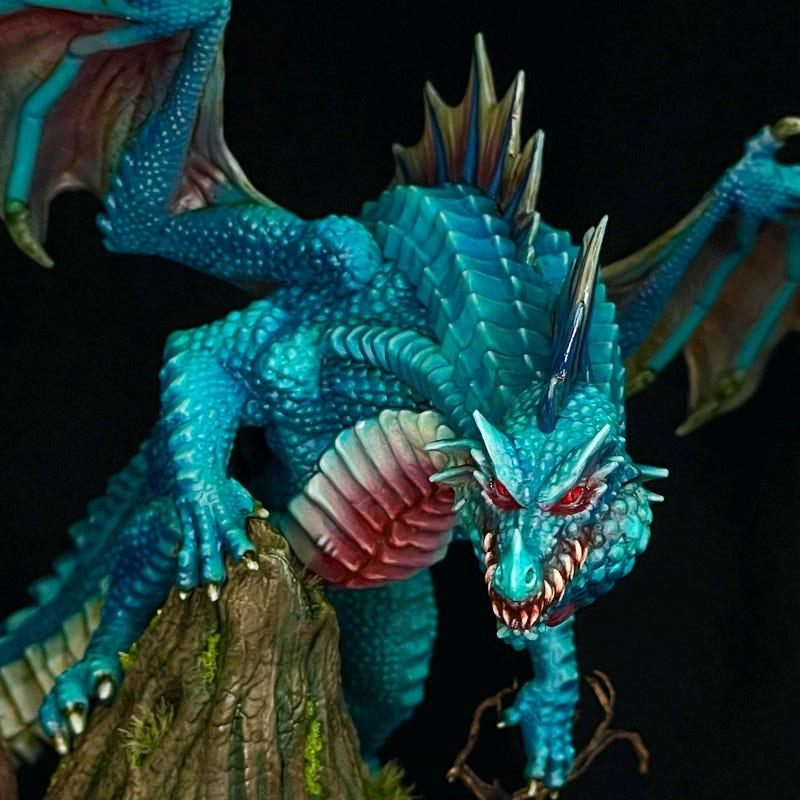
Blue dragons can transition from navy through turquoise toward pale blue.
The exact colors change, but the principle remains the same:
dark shadows → saturated midtones → brighter highlights.
Painting the Base Coat
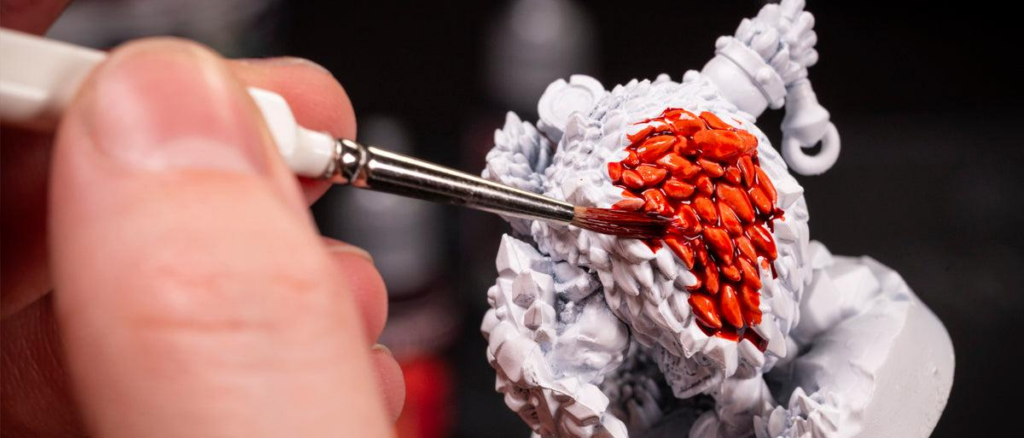
Start with a medium-dark version of your main dragon color.
Apply several thin coats until you achieve consistent coverage.
Don’t begin with your brightest color.
A darker foundation naturally remains visible between scales and creates instant depth.
Large dragon miniatures can take time to cover, but resist the temptation to use extremely thick paint.
Preserving the sculpted scale texture is essential.
Creating Deep Shadows Between Scales
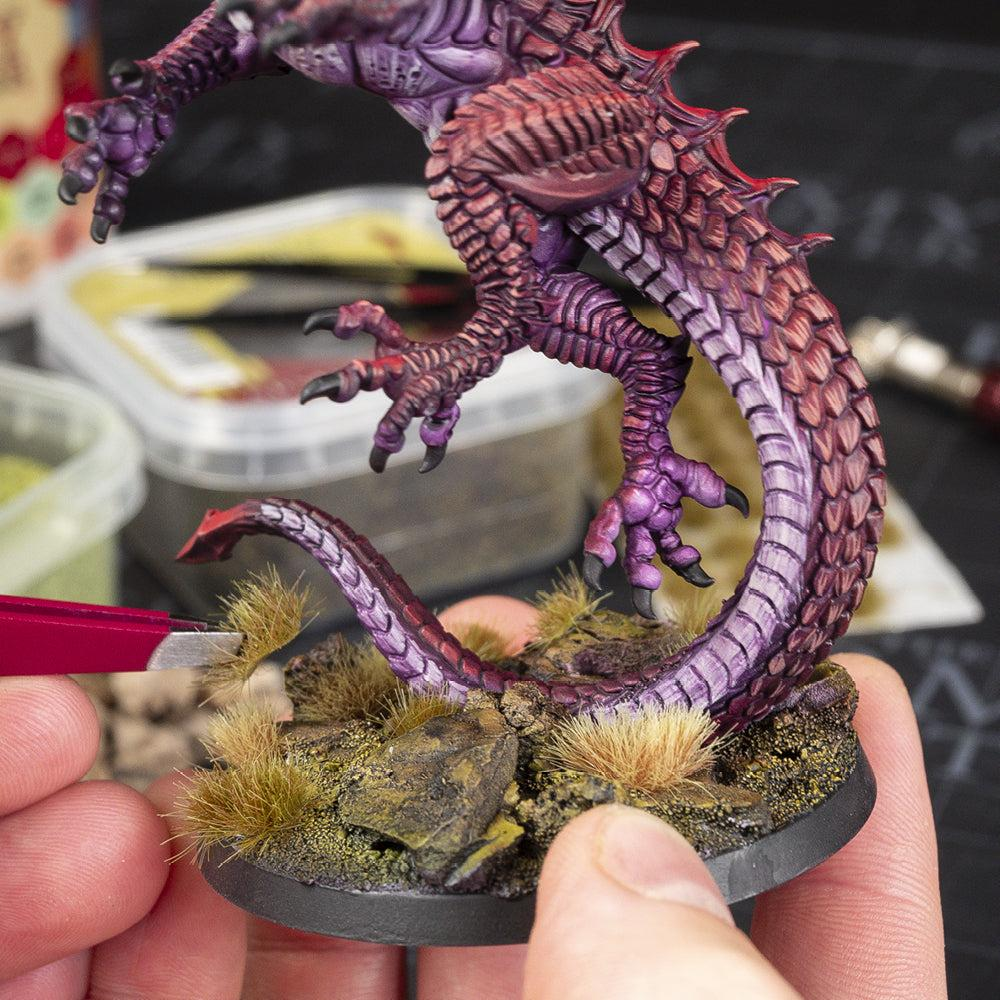
The spaces between scales should usually remain darker than their raised surfaces.
Apply a controlled wash or thin glaze across the scaled areas.
Instead of using pure black, try darker versions of your main color.
For red dragons, burgundy or dark purple works beautifully.
For green dragons, deep green or brown can create natural shadows.
For blue dragons, navy or dark purple works particularly well.
Allow the darker color to settle between scales while keeping the raised areas relatively clean.
Building the Midtones
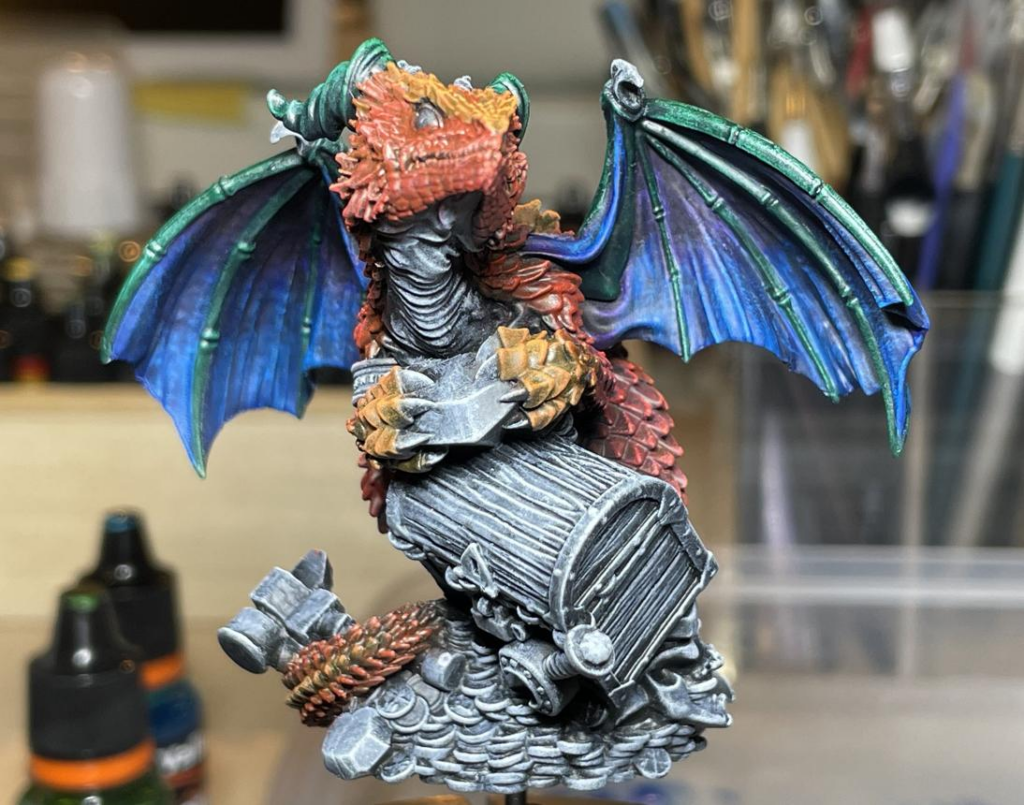
Once your shadows are established, restore the main body color across the raised areas.
Use thin layers and gradually increase brightness.
Large muscles and body sections should receive broader highlights first.
The upper portions of the back, shoulders, head, wings, and legs will generally receive more light.
The underside can remain considerably darker.
This creates overall volume before you begin highlighting individual scales.
Highlighting Individual Scales
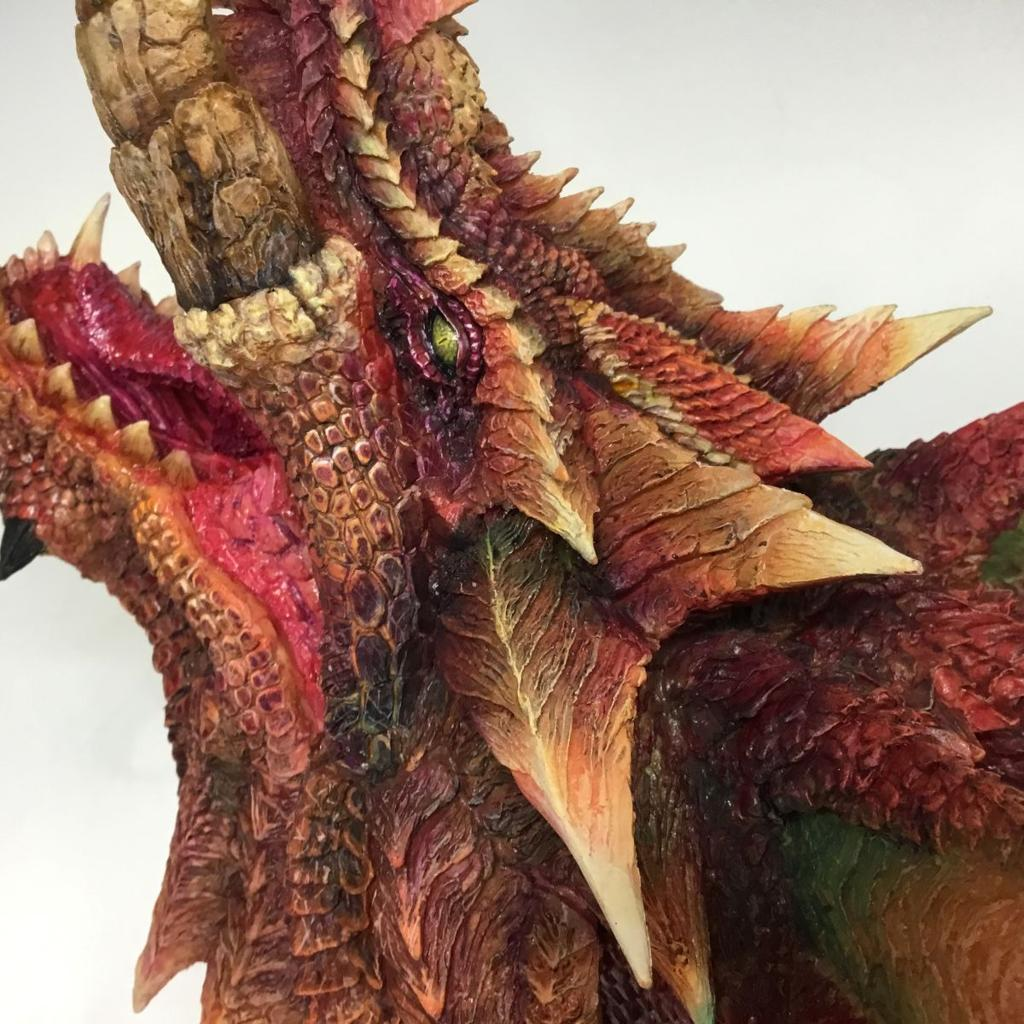
Now you can begin defining selected scales.
Using a lighter version of your main color, carefully paint the upper edge of prominent scales.
Don’t highlight every scale equally.
Concentrate your strongest highlights around:
- Head
- Brow
- Shoulders
- Spine
- Upper legs
- Wing joints
Smaller scales can receive lighter dry brushing or softer highlights.
This combination prevents the dragon from looking overly uniform.
Using Dry Brushing on Large Dragons
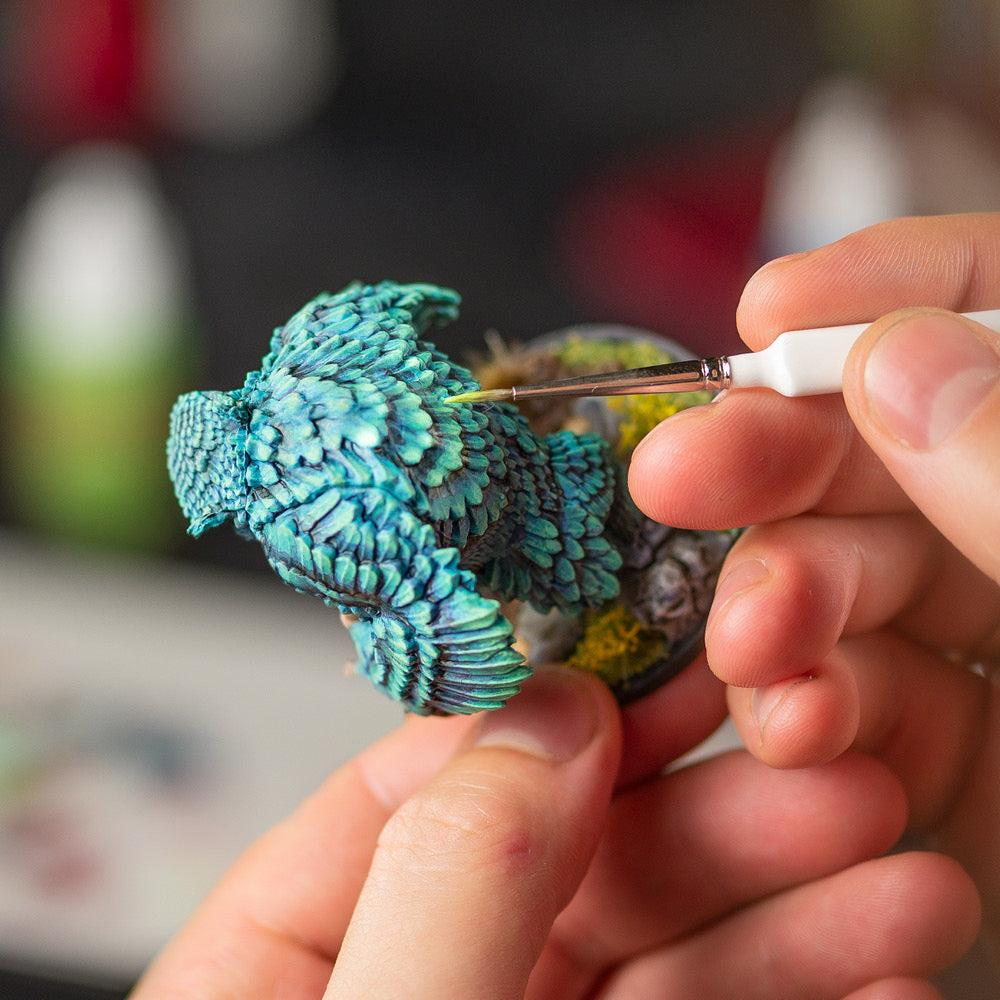
Dry brushing can save enormous amounts of time on large scaled creatures.
Load your brush with a lighter color, remove most of the paint, and gently drag the brush across the texture.
Raised scales will naturally catch the pigment.
Use progressively lighter colors with increasingly gentle pressure.
However, avoid relying exclusively on dry brushing.
Combining dry brushing with controlled edge highlights produces a cleaner and more professional result.
Adding Natural Color Variation
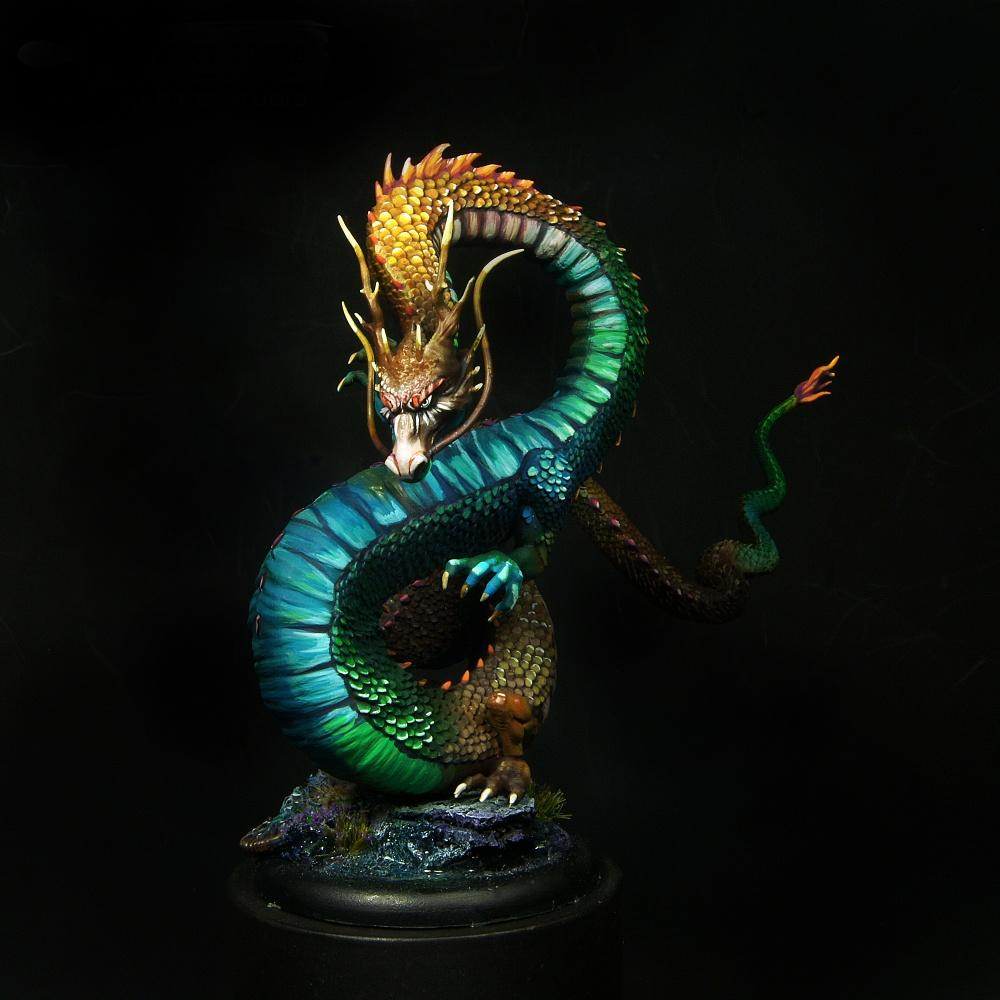
Real reptiles rarely have perfectly uniform skin.
You can apply the same principle to dragons.
Use transparent glazes to introduce subtle secondary colors across selected areas.
For example:
A green dragon might contain yellow around the face and brown along the legs.
A red dragon might contain purple shadows and orange around the head.
A blue dragon might transition toward turquoise around the wings.
These variations make large surfaces much more interesting.
Painting the Dragon’s Belly
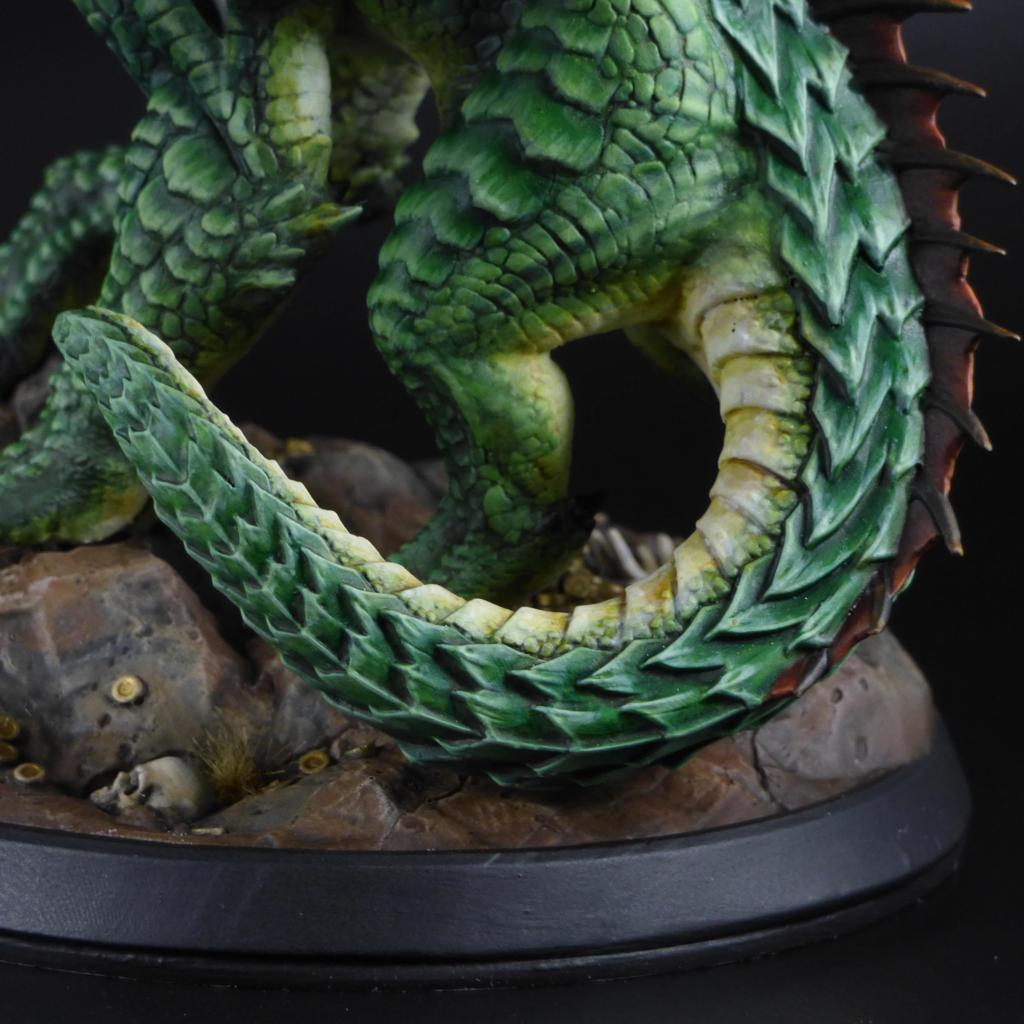
The large plates running along a dragon’s chest and belly provide an opportunity to introduce another color.
Beige, tan, pale grey, or desaturated versions of the main body color work particularly well.
Keep darker shadows between each plate.
Then highlight the lower or upper edges depending on your chosen light direction.
Avoid making every belly plate identical.
Small variations in tone create a more natural appearance.
Painting Dragon Wings
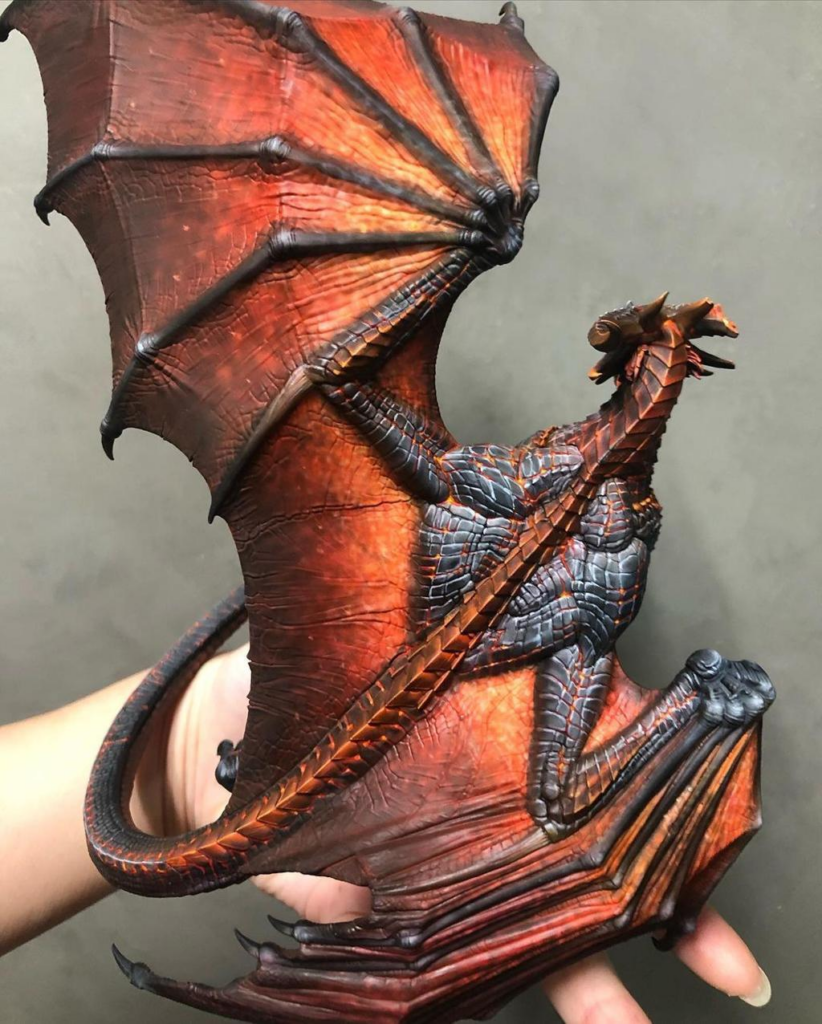
Dragon wings usually contain both hard structural elements and thin membranes.
Paint the wing bones similarly to the main body.
For the membrane, use slightly lighter or warmer colors.
Thin glazes can create subtle transitions between each section.
You can also introduce darker colors near the wing bones and lighter colors toward the center of the membrane.
This creates the illusion that the thinner material allows more light to pass through.
Painting Horns, Claws and Spikes
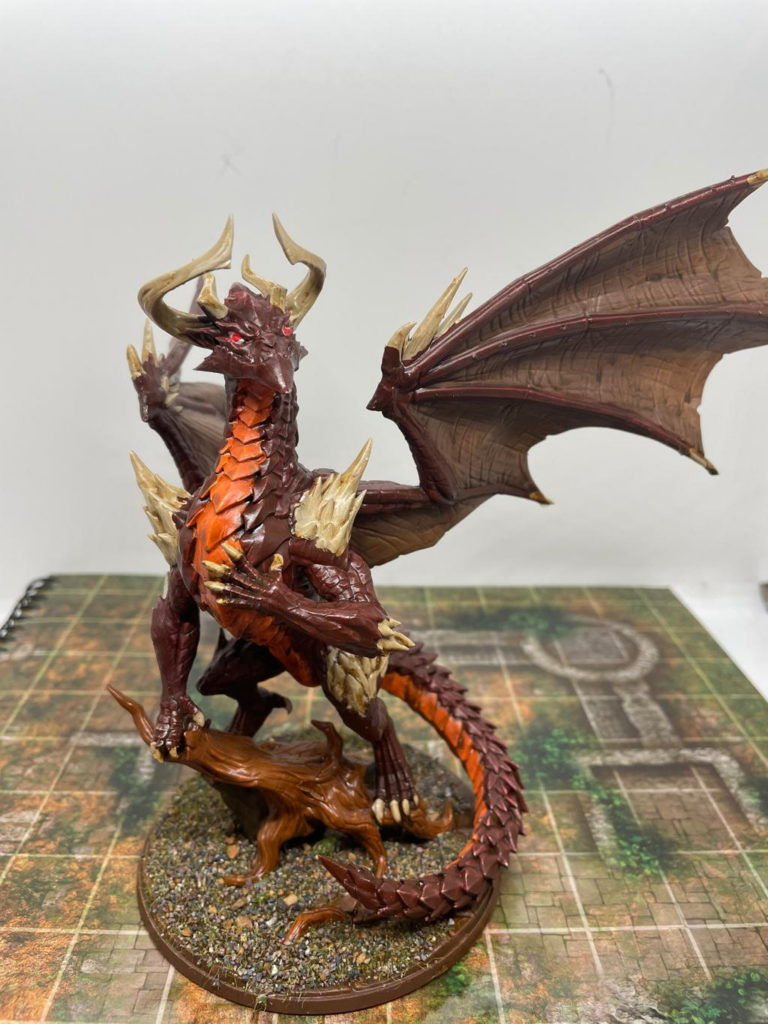
Horns and claws create strong visual contrast against colorful scales.
Start with dark brown or nearly black near the base.
Gradually transition through brown, beige, and ivory toward the tips.
For darker dragons, black horns with grey edge highlights can also look fantastic.
Keeping these elements relatively neutral prevents them from competing with the dragon’s main color.
Painting the Dragon’s Face and Eyes
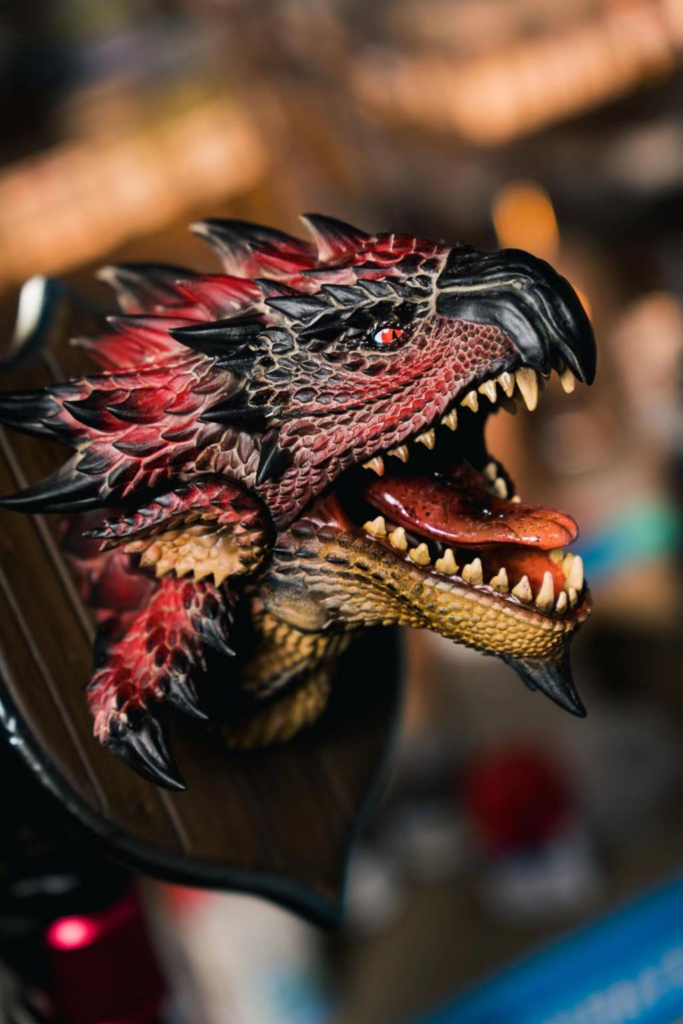
The face should receive some of your strongest contrast.
Deepen the shadows around the eyes, nostrils, mouth, and horns.
Then carefully highlight the brow, nose, cheek scales, and upper edges of the face.
Bright yellow, orange, green, or icy blue eyes can create an excellent focal point.
A tiny white reflection inside the eye can make the dragon immediately appear more alive.
Creating Magical Dragon Scales
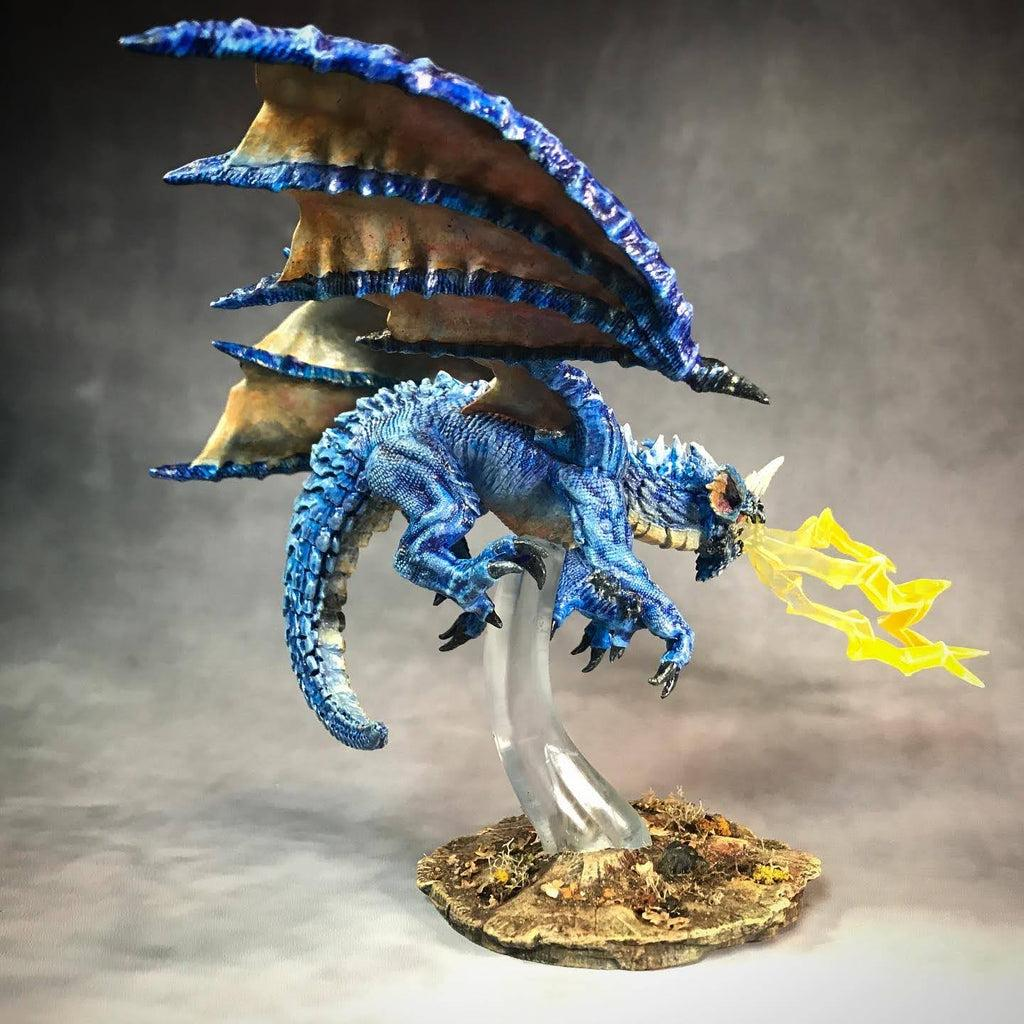
Dragons don’t need to follow natural reptile colors.
Magical energy can appear between scales, around the chest, inside cracks, or along the wings.
Blue, green, purple, orange, or even pink energy can create spectacular fantasy effects.
Keep the brightest color concentrated at the source.
Then apply subtle transparent glazes onto nearby scales to simulate reflected light.
This works particularly well for elemental dragons.
Common Mistakes to Avoid
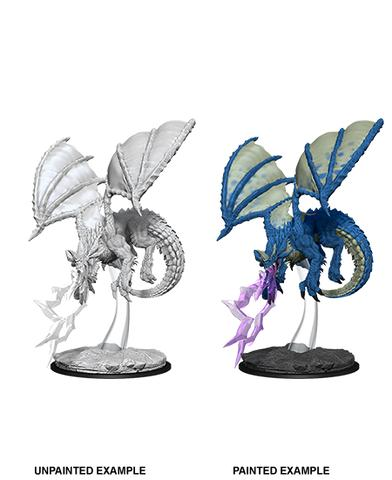
Avoid these common mistakes:
- Painting the entire dragon one color.
- Highlighting every scale equally.
- Using pure black for every shadow.
- Applying extremely heavy washes.
- Dry brushing the entire miniature with the same pressure.
- Ignoring the overall direction of light.
- Making wings and body identical in color.
- Painting horns pure white.
The dragon should look like one living creature, not thousands of individually painted scales.
Final Thoughts
Painting dragon scales can look overwhelming when you first see hundreds—or thousands—of tiny details covering the miniature.
But you don’t need to paint every scale individually.
Start by establishing the overall color and lighting of the creature. Build deep shadows between the scales, restore your midtones, and gradually increase brightness across the areas receiving the most light.
Then selectively highlight the most important scales and introduce subtle color variation with transparent glazes.
Finish the miniature by giving extra attention to the face, eyes, wings, horns, and claws.
These techniques work beautifully on chromatic dragons, ancient dragons, wyverns, drakes, hydras, reptilian monsters, and countless D&D miniatures.
The goal isn’t to make every scale perfect.
It’s to make thousands of scales work together to create one enormous, believable creature.
Frequently Asked Questions
What’s the easiest dragon color for beginners?
Green and red are excellent choices because both have many natural shadow and highlight options.
Do I need to paint every dragon scale individually?
No. Establish the overall lighting first and individually highlight only the most important scales.
Is dry brushing good for dragon miniatures?
Yes. It’s extremely useful for large areas of scales, especially when combined with more controlled highlights afterward.
How do I make dragon scales look more realistic?
Use several shades of your main color, keep deep shadows between scales, and introduce subtle secondary colors with glazes.
What color should dragon horns be?
Brown-to-ivory gradients work beautifully, although dark grey or black horns can also create excellent contrast.
How do I make a dragon look magical?
Introduce glowing eyes, elemental colors, magical cracks, or illuminated scales and use subtle OSL on the surrounding surfaces.
If you would like free D&D STL miniatures, visit our homepage and download yours now: https://echoartstudios.net/