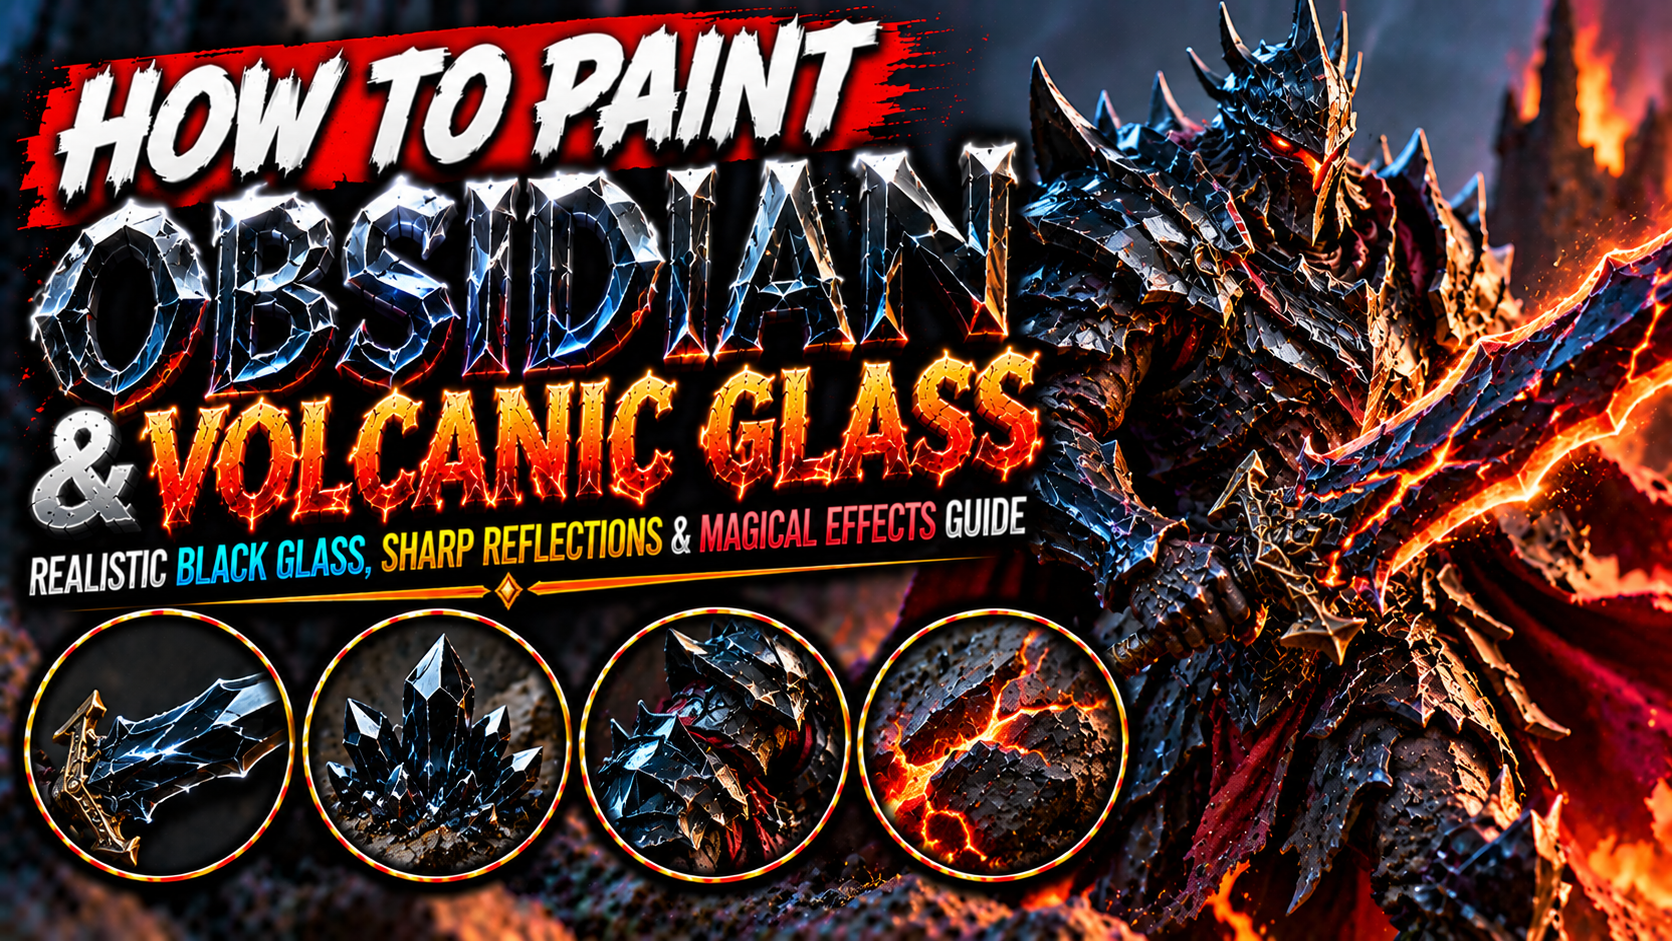
How to Paint Obsidian and Volcanic Glass on Miniatures (Realistic Black Glass, Sharp Reflections & Fantasy Armor Guide)
Obsidian is one of the most dramatic materials you can recreate on fantasy miniatures.
Its deep black appearance, sharp edges, glass-like reflections, and volcanic origins make it perfect for dark fantasy characters, magical weapons, ancient artifacts, and terrifying monsters.
Whether you’re painting an obsidian sword carried by a dark elf, volcanic armor worn by a demon lord, a mysterious black crystal, or an ancient altar surrounded by lava, realistic obsidian can give your miniature a powerful and distinctive appearance.
Unlike ordinary black stone, obsidian is a natural volcanic glass.
Its surface can appear extremely dark, but polished sections often produce sharp reflections.
Fractured edges may reveal subtle grey, blue, brown, or even translucent-looking highlights.
This combination of darkness and intense reflected light makes obsidian particularly interesting to paint.
However, painting convincing black glass requires more than applying black paint and adding a few grey highlights.
You need to understand glossy reflections, sharp edge highlights, angular surfaces, controlled contrast, color temperature, volcanic textures, and how light interacts with glass-like materials.
In this guide, you’ll learn how to paint realistic obsidian, black glass weapons, volcanic crystals, dark fantasy armor, shattered obsidian, magical reflections, glowing volcanic cracks, and cinematic fantasy display pieces.

Understanding What Makes Obsidian Unique
Obsidian forms when silica-rich volcanic lava cools rapidly enough that crystals do not have time to grow.
The result is a natural glass rather than a typical crystalline rock.
This distinction is important for miniature painting.
Ordinary stone usually has a rough, relatively diffuse surface.
Polished obsidian can reflect light much more sharply.
Its surface may contain nearly black regions interrupted by sudden bright reflections.
Broken obsidian also develops distinctive curved fracture surfaces known as conchoidal fractures.
These curved, shell-like breaks create sharp edges and interesting reflective patterns.
For miniature painting, focus on three characteristics:
- Deep, nearly black surfaces.
- Sharp, concentrated reflections.
- Angular or curved fracture highlights.
The contrast between these elements is what makes obsidian recognizable.
If every surface is highlighted evenly, the material may resemble ordinary grey stone.
If the reflections are too broad and smooth, it may resemble painted metal.
The goal is to create the appearance of a dark, glass-like material with carefully controlled reflections.

Choosing the Best Obsidian Color Palette
Obsidian is commonly black, but different lighting conditions and material variations can introduce subtle color shifts.
Cool blue-grey reflections create a mysterious appearance.
Neutral grey highlights produce a more natural black glass effect.
Purple reflections work beautifully for magical artifacts.
Warm brown reflections can suggest volcanic environments.
| Obsidian style | Color progression |
|---|---|
| Natural black obsidian | Black → Charcoal → Neutral Grey → Pale Grey → White |
| Blue-black obsidian | Black → Navy → Blue-Grey → Ice Blue → White |
| Purple obsidian | Black-Purple → Deep Violet → Lavender-Grey → Pale Lavender |
| Volcanic obsidian | Black → Dark Brown → Warm Grey → Ivory |
| Green magical obsidian | Black-Green → Dark Emerald → Jade → Pale Green |
| Red volcanic glass | Black-Red → Burgundy → Dark Crimson → Orange-Red |
| Ancient obsidian armor | Black → Charcoal → Blue-Grey → Silver-Grey |
For most realistic obsidian effects, begin with black and use a cool grey highlight progression.
Reserve pure white for the strongest reflections.
Avoid covering too much of the surface with light colors.
Obsidian should remain predominantly dark.

Preparing the Miniature for Obsidian Effects
Before painting obsidian, examine the miniature’s sculpted surfaces.
Look for sharp edges, flat armor panels, crystal faces, curved blades, and fractured details.
These shapes determine where the reflections should appear.
Smooth surfaces can support broad, sharp reflections.
Angular crystal faces benefit from abrupt changes between dark and light.
Fractured surfaces may require thin highlights along irregular edges.
Remove mold lines carefully.
Obsidian is a smooth material, so unwanted sculpting imperfections can be particularly noticeable.
Apply primer evenly.
Black primer is an excellent choice for dark obsidian.
Grey primer can also work, especially if you want to establish a lighter underpainting.
Keep your paint layers thin to preserve the sculpted geometry.

Painting the Deep Black Foundation
Begin with a smooth black basecoat.
Cover the entire obsidian surface.
If necessary, apply two thin coats rather than one thick coat.
The foundation should appear consistent and smooth.
Avoid visible brush texture.
For a polished glass appearance, surface smoothness is especially important.
Once the black paint is dry, examine the miniature under your painting light.
Identify the areas that would naturally catch reflections.
These might include:
- Upper armor edges.
- Curved sword surfaces.
- Exposed crystal faces.
- Raised volcanic glass fragments.
Do not highlight every surface immediately.
Leave large sections completely black.
This creates the contrast necessary for convincing glass.

Establishing the First Reflections
The first highlights should define the material’s overall shape.
Use charcoal or very dark grey.
Apply the color to selected exposed surfaces.
For flat armor panels, create angular patches of reflected light.
For curved blades, follow the curvature of the surface.
For crystals, choose individual faces rather than highlighting everything equally.
Keep the transitions relatively controlled.
Unlike skin or cloth, polished obsidian often benefits from sharper changes in brightness.
However, not every reflection needs a hard edge.
Some surfaces can have a soft transition into black.
The key is variation.
Leave the darkest areas untouched.

Building Sharp Glass Highlights
Once the first reflections are established, introduce medium grey.
Apply it within smaller areas of the existing highlights.
Then add pale grey.
Concentrate the pale highlights along selected edges and reflective surfaces.
Finally, use tiny amounts of white.
These bright points should be extremely limited.
A few white reflections can make a nearly black surface appear glossy.
Avoid highlighting every edge equally.
This can make the material resemble ordinary edge-highlighted armor.
Instead, vary the intensity.
Some edges can remain black.
Others can receive dark grey.
A few selected edges can become almost white.

Painting Realistic Obsidian Reflections
The secret to convincing obsidian is understanding reflected light.
Because polished obsidian is glass-like, reflections can appear sharp and intense.
Begin by imagining the main light source.
If the light comes from above, upper surfaces may receive brighter reflections.
However, glass-like materials can also reflect surrounding objects and environments.
This means a dark surface may contain unexpected bright patches.
For miniature painting, use simplified reflection shapes.
A long narrow reflection can work beautifully on a curved blade.
A sharp triangular highlight can emphasize a crystal face.
A small white dot can create a convincing glossy reflection.
Avoid making the reflections perfectly symmetrical.
Natural variation produces a more believable appearance.

Painting Obsidian Swords
Obsidian swords are excellent subjects for fantasy miniature painting.
They can appear ancient, dangerous, and supernatural.
Begin with a smooth black basecoat.
Introduce dark grey reflections along selected blade surfaces.
Then add medium grey.
Keep the brightest areas relatively narrow.
For a curved blade, follow the blade’s shape.
For a straight blade, use angular reflection patterns.
Add pale grey highlights along selected edges.
Finish with tiny white accents.
Avoid painting the entire blade grey.
The majority of the sword should remain black.
For a magical weapon, you can introduce subtle blue, purple, or red reflections.

Painting Obsidian Daggers and Ritual Blades
Obsidian daggers are common in dark fantasy and ritual-themed designs.
Their small size makes strong contrast especially important.
Begin with black.
Add a narrow dark grey reflection along the blade.
Introduce a smaller pale grey highlight.
Finish the sharpest edge with a tiny white accent.
For chipped obsidian daggers, paint irregular highlights along the cutting edge.
These can suggest small fractures.
Keep the pattern controlled.
Avoid making the blade look like rough stone.
The main surfaces should remain relatively smooth and dark.
For ritual weapons, subtle red or purple reflections can create a supernatural atmosphere.

Painting Obsidian Armor
Obsidian armor can create a striking appearance for dark knights, demons, and fantasy warriors.
Its reflective surfaces make it an excellent alternative to traditional metallic armor.
Begin with a black foundation.
Then identify the main armor panels.
For each panel, decide where the reflection will appear.
Use charcoal to establish the first reflective areas.
Introduce medium grey.
Then add pale grey highlights.
Keep the transitions relatively sharp.
For larger panels, you can introduce broad reflections interrupted by dark regions.
For smaller armor plates, use simple angular highlights.
Avoid making every panel identical.
Variation helps the armor look more natural.

Painting Blue-Black Obsidian
Blue-black obsidian creates a mysterious and magical appearance.
It works beautifully for dark elves, shadow warriors, enchanted armor, and arcane artifacts.
Begin with black.
Introduce very dark navy.
Then add blue-grey highlights.
Build toward pale blue-grey.
Finish selected edges with ice blue or white.
Keep most of the surface dark.
The blue should appear primarily in the reflections.
Avoid making the entire object bright blue.
For a more natural appearance, use muted blue-grey tones.
For a magical appearance, increase the saturation slightly.
Blue-black obsidian looks particularly dramatic against warm gold or orange surroundings.

Painting Purple Magical Obsidian
Purple obsidian can create a supernatural appearance for cursed weapons and arcane artifacts.
Begin with black-purple.
Introduce deep violet.
Then add muted purple highlights.
Build toward lavender-grey.
Finish selected edges with pale lavender.
Keep the brightest areas limited.
For a magical effect, you can add thin violet reflections along selected surfaces.
Avoid making the entire object uniformly purple.
The material should still appear predominantly black.
Purple obsidian works especially well for warlocks, necromancers, and dark fantasy characters.

Painting Obsidian Crystals
Obsidian crystals in fantasy settings often have angular, exaggerated shapes, even though natural obsidian is a glass rather than a crystal mineral.
These fantasy forms provide excellent opportunities for dramatic lighting.
Begin with black.
Choose selected faces for dark grey highlights.
Leave neighboring faces darker.
Introduce medium grey on a few surfaces.
Then add pale grey or white along selected edges.
Avoid highlighting every face equally.
The contrast between adjacent surfaces creates the illusion of angular geometry.
For magical crystals, introduce subtle colored reflections.
Blue, purple, and green can work beautifully.

Painting Shattered Obsidian
Broken obsidian has a distinctive appearance.
Its fractured surfaces often contain curved, shell-like patterns and extremely sharp edges.
Begin with black.
Introduce dark grey on selected fracture surfaces.
Then add thin pale grey highlights along the sharpest edges.
For larger fragments, paint subtle curved lines following the fracture pattern.
Keep these lines irregular.
Avoid making every fragment identical.
Some broken surfaces can remain almost completely black.
Others can contain bright reflections.
This variation creates a more convincing shattered-glass appearance.

Painting Chipped Obsidian Weapons
Chipped obsidian weapons have a rugged and dangerous appearance.
They work particularly well for primitive fantasy warriors, ancient civilizations, and ritual weapons.
Begin with a black basecoat.
Then paint irregular dark grey patches along the chipped edges.
Introduce smaller pale grey highlights.
Finish selected sharp points with white.
Keep the central blade surfaces darker.
For larger weapons, you can add subtle curved fracture patterns.
Avoid making the chipped edges perfectly symmetrical.
The irregular geometry is what gives the weapon its character.

Painting Volcanic Obsidian
Volcanic obsidian can incorporate warm environmental reflections.
This is especially effective for miniatures standing near lava, fire, or molten rock.
Begin with black.
Introduce dark warm grey.
Then add subtle brown or orange reflections on selected surfaces.
Keep the warm colors restrained.
The material should remain predominantly black.
For the brightest reflections, use pale orange or warm ivory.
Avoid covering the entire surface with orange.
A few carefully placed reflections can suggest nearby volcanic heat.
This technique works beautifully for demons, fire giants, and volcanic fantasy creatures.

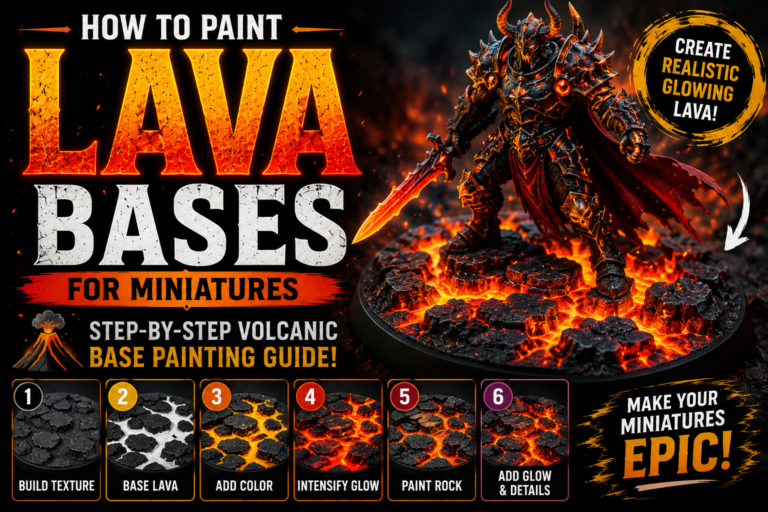
Painting Glowing Lava Cracks in Obsidian
Glowing lava cracks can create one of the most dramatic fantasy obsidian effects.
Begin by painting the surrounding material black.
Identify the cracks.
Paint the deepest sections dark red.
Introduce saturated red.
Then add orange.
Build toward bright yellow.
Finish the hottest points with pale yellow or ivory.
For a convincing effect, keep the surrounding obsidian dark.
You can also add subtle orange reflections along the edges of the cracks.
Avoid making the entire surface glow equally.
The brightest colors should remain concentrated inside the cracks.
This creates the impression of intense heat beneath a dark volcanic surface.

Creating Object Source Lighting from Lava Cracks
Glowing lava can illuminate nearby obsidian surfaces.
This creates an excellent opportunity to practice Object Source Lighting.
Begin with thin orange glazes.
Apply them to surfaces facing the glowing cracks.
Keep the strongest reflections closest to the light source.
Gradually reduce the intensity farther away.
For extremely hot lava, introduce small yellow highlights.
Avoid making the reflected light brighter than the lava itself.
The cracks should remain the main source of illumination.
For glossy obsidian, reflections can be relatively sharp.
This creates a distinctive contrast between black glass and glowing volcanic energy.

Painting Magical Runes on Obsidian
Obsidian is an excellent material for magical runes.
Its dark surface creates strong contrast against bright magical colors.
Begin by painting the obsidian normally.
Then sketch the runes using a dark version of the magical color.
For blue runes, use dark blue.
Introduce cyan.
Finish the center of each rune with pale blue or white.
For purple runes, use violet and lavender.
For green runes, use emerald and pale green.
Keep the lines controlled.
Avoid making every rune equally bright.
A few stronger highlights can create a more natural magical effect.
You can also introduce subtle reflected light around the rune edges.

Painting Obsidian Golems
Obsidian golems can become spectacular fantasy miniatures.
Their bodies may contain large glass-like plates, sharp fragments, and glowing magical cores.
Begin with black.
Establish dark grey reflections across selected surfaces.
Then add medium grey and pale grey highlights.
Keep the transitions angular.
For a magical core, use blue, purple, green, or orange.
The surrounding obsidian can reflect the magical color.
Avoid making every body section equally bright.
Keep some surfaces nearly black.
This helps preserve the creature’s overall silhouette.
For additional detail, paint subtle fracture lines along selected armor plates.

Painting Obsidian Dragon Scales
Obsidian-inspired dragon scales can create a dramatic appearance.
They work particularly well for black dragons, volcanic dragons, and supernatural creatures.
Begin with black.
Introduce charcoal highlights along selected scales.
Then add blue-grey or neutral grey reflections.
Keep the brightest highlights concentrated on exposed edges.
For a glossy appearance, add tiny pale grey or white accents.
Avoid highlighting every scale equally.
Some scales should remain darker.
This creates depth.
For volcanic dragons, introduce subtle orange reflections near the mouth, chest, or glowing cracks.
For magical dragons, use cool blue or purple reflections.

Painting Obsidian Weapons with Colored Reflections
Colored reflections can make obsidian weapons appear enchanted.
For a blue magical sword, begin with black.
Introduce navy reflections.
Then add blue-grey highlights.
Finish selected edges with pale blue.
For a purple cursed blade, use dark violet and lavender-grey.
For a volcanic weapon, introduce subtle orange reflections.
Keep the brightest highlights concentrated.
Avoid covering the entire weapon with the magical color.
The black glass should remain visible.
This creates a convincing combination of natural obsidian and supernatural energy.

Painting Ancient Obsidian Artifacts
Ancient obsidian artifacts can appear mysterious, weathered, and powerful.
They work beautifully for temples, ruins, magical altars, and dark fantasy scenery.
Begin with black.
Introduce dark grey reflections.
For weathered surfaces, add subtle scratches or irregular matte patches.
Keep some areas glossy.
This contrast suggests that parts of the artifact have experienced more wear than others.
For magical artifacts, introduce glowing runes.
For volcanic artifacts, add warm orange reflections.
Avoid making every surface equally polished.
Natural variation creates a more believable appearance.

Painting Obsidian on Miniature Bases
Obsidian can create striking fantasy bases.
It works particularly well for volcanic landscapes, demonic environments, and magical ruins.
Begin by painting the terrain dark grey or black.
Identify the obsidian fragments.
Paint these sections with a smoother black finish.
Introduce sharp grey highlights along selected edges.
Keep surrounding rocks more matte.
This contrast helps distinguish glass from ordinary stone.
For volcanic bases, introduce orange or red reflections near lava.
For magical bases, use blue or purple highlights.
Avoid making every rock glossy.
The obsidian should remain visually distinct from the surrounding terrain.

Creating Realistic Surface Texture
Although polished obsidian can appear smooth, natural pieces may contain scratches, imperfections, and fractured areas.
For miniature painting, these details should remain subtle.
Begin with the main black and grey reflections.
Then introduce small irregular scratches.
Use dark grey rather than bright white for most scratches.
Keep them concentrated on exposed surfaces.
For fractured obsidian, add thin curved highlights.
Avoid using heavy drybrushing across polished surfaces.
Drybrushing can create a dusty texture that makes the material resemble ordinary stone.
For glass-like effects, controlled layering and fine brush highlights usually produce better results.

Using Gloss Varnish for Obsidian
Gloss varnish can enhance the appearance of polished obsidian.
It creates real surface reflections.
However, varnish should support the painted effect rather than replace it.
Begin by painting the reflections normally.
Allow the paint to dry completely.
Then apply a thin coat of gloss varnish.
For weathered obsidian, consider using satin varnish instead.
You can also combine finishes.
Glossy obsidian fragments can contrast against matte rocks and leather.
Avoid applying thick varnish.
Excessive varnish can pool around details and obscure the sculpt.
For display miniatures, selective gloss varnish can create a particularly convincing glass-like appearance.

Creating Cinematic Obsidian Effects
Cinematic obsidian relies on strong contrast.
Keep the main material extremely dark.
Introduce sharp reflections on selected surfaces.
Use small pale highlights to emphasize the glass-like finish.
For magical miniatures, combine obsidian with glowing runes or colored reflections.
For volcanic creatures, introduce orange lava light.
For dark fantasy warriors, cool blue reflections can create a mysterious appearance.
Avoid making every surface equally bright.
Choose a clear focal point.
This could be a sword, helmet, magical crystal, or glowing volcanic crack.
Keep the surrounding details slightly less prominent.
The goal is to create a dramatic material that supports the miniature’s overall composition.

Common Mistakes When Painting Obsidian
One of the most common mistakes is highlighting every surface with the same grey.
This can make obsidian resemble ordinary stone.
Instead, use irregular and concentrated reflections.
Another mistake is making the material too bright.
Obsidian should remain predominantly black.
Avoid using broad white highlights everywhere.
White should be reserved for the strongest reflections.
Another problem is excessive drybrushing.
This creates a rough texture that can destroy the glass-like appearance.
Use controlled layering for polished surfaces.
Don’t make every crystal face identical.
Variation in brightness helps establish geometry.
For volcanic obsidian, avoid excessive orange reflections.
The material should still appear black.
Finally, don’t rely entirely on gloss varnish.
Painted reflections are essential for maintaining the effect under different lighting conditions.

Final Thoughts
Painting convincing obsidian and volcanic glass requires deep black foundations, sharp reflections, controlled highlights, angular surface definition, subtle color variation, and selective glossy finishes.
Begin with a smooth black basecoat.
Establish dark grey reflections.
Gradually introduce lighter highlights.
Keep the majority of the surface dark.
Use pale grey and white only for the strongest reflections.
For natural obsidian, focus on neutral or cool grey tones.
For magical obsidian, introduce subtle blue, purple, or green reflections.
For volcanic obsidian, use warm orange highlights to suggest nearby lava.
For fractured glass, emphasize irregular edges and curved fracture patterns.
For glowing volcanic cracks, create strong contrast between the dark surface and bright internal energy.
These techniques work beautifully for dark fantasy knights, obsidian swords, ritual daggers, demons, volcanic dragons, magical golems, ancient artifacts, and fantasy scenic bases.
The most important principle is that obsidian should look like a dark, reflective material rather than ordinary black stone.
Its dramatic appearance comes from the contrast between nearly black surfaces and carefully placed bright reflections.
When painted effectively, obsidian can become one of the most visually striking materials on any fantasy miniature.
Frequently Asked Questions
What colors should I use to paint realistic obsidian?
Black, charcoal, neutral grey, pale grey, and small white highlights create a convincing natural obsidian appearance.
How do I make black obsidian look glossy?
Use sharp concentrated reflections, smooth paint layers, and selective gloss varnish.
How do I paint an obsidian sword?
Begin with black, add controlled grey reflections, and finish selected edges with pale grey or white highlights.
What is the difference between painting obsidian and ordinary stone?
Obsidian benefits from smooth surfaces and sharp reflections, while ordinary stone usually has rougher textures and more diffuse highlights.
How do I paint glowing lava cracks in obsidian?
Paint the surrounding material black, then build the cracks from dark red through orange and yellow toward pale yellow or ivory.
Can I use blue highlights on black obsidian?
Yes. Cool blue-grey highlights create a convincing stylized black glass appearance, especially on magical armor and weapons.
Should I use gloss varnish on obsidian miniatures?
Gloss varnish can enhance polished obsidian, but the main reflections should still be painted for consistent visual impact.
How do I paint shattered obsidian?
Use black surfaces, irregular dark grey fracture patterns, and sharp pale highlights along selected broken edges.
If you would like free D&D STL miniatures, visit our homepage and download yours now:https://echoartstudios.net/