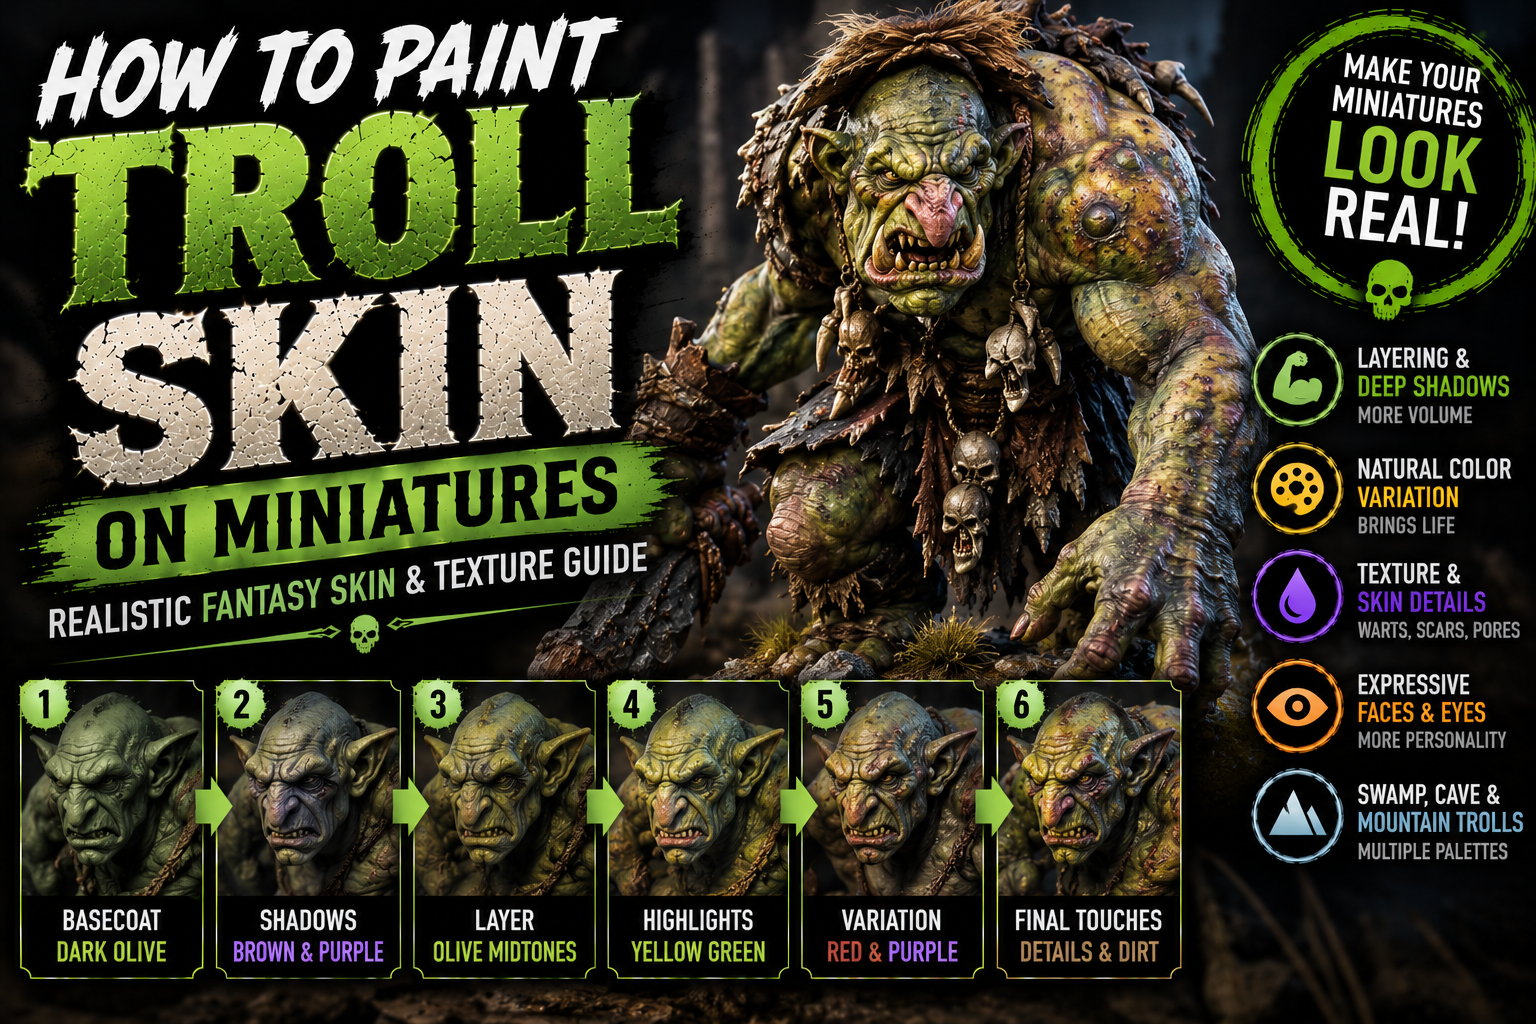
How to Paint Troll Skin on Miniatures (Realistic Fantasy Skin & Texture Guide)

Trolls are perfect miniatures for experimenting with skin because their large bodies provide much more space for shadows, color variation, scars, warts, and rough textures than smaller fantasy characters.
Whether you’re painting a massive cave troll, a swamp creature, a bridge troll, or a terrifying D&D monster, the skin should feel thick, weathered, and distinctly non-human.
The biggest mistake is painting the entire creature with one green or grey color.
Realistic troll skin becomes far more interesting when olive greens, browns, greys, purple shadows, warm flesh tones, and carefully controlled highlights appear across different areas of the body.
In this guide, you’ll learn how to paint realistic troll skin using layering, glazing, texture painting, color modulation, and detailed weathering.
Understanding Troll Skin

Troll skin should feel heavier and rougher than human, goblin, or even orc skin.
Large muscles create broad surfaces where light can gradually transition between shadows and highlights.
Wrinkles, scars, warts, and folds create smaller areas of contrast.
Instead of trying to create perfectly smooth skin everywhere, allow controlled texture to remain visible.
Trolls benefit from imperfections.
Rough surfaces help communicate age, strength, and the harsh environments these creatures usually inhabit.
Choosing Your Troll Skin Palette

Trolls can use many different skin colors depending on their environment.
A versatile palette might include:
- Dark Olive
- Grey Green
- Forest Green
- Earth Brown
- Khaki
- Purple Grey
- Pale Beige
- Ivory
Swamp trolls can lean toward olive and green.
Cave trolls work beautifully with grey and desaturated flesh tones.
Mountain trolls can contain brown, grey, and colder blue-grey colors.
Don’t be afraid to combine several colors.
Variation makes large areas of skin much more interesting.
Painting the Base Coat

Begin with a medium-dark desaturated skin color.
Olive green, grey-green, or brown-green are excellent choices.
Apply several thin coats until you achieve smooth coverage without filling the sculpted texture.
Starting darker gives you plenty of room to build highlights later.
Large troll miniatures can require patience at this stage.
Avoid applying one extremely thick layer simply to finish the base coat faster.
Preserving the sculpted skin texture will make every later step easier.
Creating Deep Shadows

Large troll anatomy needs strong shadows.
Mix your base color with dark brown, purple, or deep green.
Concentrate shadows around:
- Under the jaw
- Beneath the chest
- Between muscles
- Under the arms
- Around the stomach
- Between fingers and toes
- Inside wrinkles
- Around armor and straps
Purple can be particularly useful because it creates interesting contrast against olive skin.
Avoid relying entirely on black.
Colored shadows usually produce much richer results.
Building the Skin Midtones

Once the shadows are established, gradually restore your original skin color across the raised surfaces.
Then begin mixing lighter green, khaki, or beige into the base.
Follow the shape of the muscles.
Highlights should wrap around shoulders, arms, chest, legs, and facial features rather than appearing as random lines.
Each new layer should cover slightly less area.
This creates natural transitions while preserving the darker colors underneath.
Adding Skin Texture

Large monsters are perfect for stippling.
Instead of creating completely smooth transitions, use tiny irregular dots and marks across selected areas.
Apply slightly lighter colors across shoulders, arms, back, and upper legs.
Then introduce a few darker spots.
This creates the appearance of pores, rough skin, pigmentation, and environmental damage.
Don’t make the pattern uniform.
Natural skin texture should remain irregular.
Adding Color Variation

Transparent glazes can dramatically improve troll skin.
Try subtle red or purple around:
- Nose
- Ears
- Elbows
- Knuckles
- Knees
- Scars
Brown works beautifully around hands, feet, and rough skin.
Cold blue-grey can be introduced into deeper shadow areas.
These colors should remain subtle.
The viewer shouldn’t immediately notice individual purple or red sections—they should simply see more believable skin.
Painting Warts, Spots and Bumps

Trolls often contain exaggerated skin details.
Warts and bumps can be highlighted individually using a lighter version of the surrounding skin.
Add a tiny shadow underneath larger bumps to increase their apparent volume.
You can also introduce brown, purple, or reddish coloration around selected growths.
Avoid highlighting every bump equally.
Variation keeps the skin from becoming visually noisy.
Painting Troll Faces

The face should receive your strongest contrast.
Deepen the eye sockets, wrinkles, and areas beneath the cheekbones.
Then highlight:
- Forehead
- Nose
- Eyebrows
- Cheekbones
- Upper lip
- Chin
Large troll noses often look excellent with subtle red or purple glazing.
Keep the eyes clearly defined so they don’t disappear inside the heavy facial structure.
A tiny bright reflection inside each eye can immediately give the creature more personality.
Painting Teeth and Tusks

Troll teeth shouldn’t look clean.
Start with dark brown or beige.
Gradually highlight toward dirty ivory while leaving darker colors near the gums and between individual teeth.
Large tusks can transition from brown at the base toward ivory at the tips.
Small stains and irregular colors help reinforce the creature’s rough appearance.
Perfect white teeth usually look unnatural on a massive fantasy monster.
Creating Swamp Troll Skin

For swamp trolls, push the palette toward olive, brown, and mossy green.
Add subtle green-brown glazes around the feet and lower legs.
You can even introduce tiny moss-like textures across the back and shoulders.
Gloss varnish applied selectively around wet areas can suggest moisture.
Combined with a muddy or swamp base, these effects make the creature feel directly connected to its environment.
Creating Cave Troll Skin

Cave trolls can use a completely different palette.
Start with grey-green or cold beige and gradually highlight toward pale grey or ivory.
Introduce purple and blue-grey into the shadows.
Because cave creatures rarely see sunlight, reducing the warm colors creates a convincing subterranean appearance.
Dark equipment and stone bases provide excellent contrast against the pale skin.
Common Mistakes to Avoid

Avoid these common mistakes:
- Painting the entire troll one green color.
- Making the skin perfectly smooth.
- Using black for every shadow.
- Highlighting every muscle equally.
- Making every wart identical.
- Ignoring environmental colors.
- Painting teeth pure white.
- Applying thick paint over sculpted texture.
Large monsters reward variation.
Use the extra surface area to tell a story through their skin.
Final Thoughts
Painting troll skin is an excellent opportunity to combine traditional skin painting with more aggressive texture techniques.
Start with a dark, desaturated foundation and establish deep colored shadows. Gradually build lighter midtones while following the creature’s anatomy.
Then introduce stippling, subtle glazes, pigmentation, warts, scars, and environmental weathering.
These techniques work beautifully on trolls, ogres, giants, swamp monsters, cave creatures, fantasy bosses, and countless D&D miniatures.
Unlike human skin, troll flesh doesn’t need to look perfect.
The wrinkles, stains, rough textures, strange colors, and imperfections are exactly what make these creatures convincing.
Frequently Asked Questions
What’s the best base color for troll skin?
Olive green, grey-green, and desaturated brown-green are excellent starting points.
Do trolls need to be green?
No. Grey, brown, blue-grey, pale flesh, and even unusual fantasy colors can create excellent trolls.
How do I make troll skin look rough?
Use controlled stippling, irregular highlights, pigmentation, and individual details such as warts and scars.
What’s the best shadow color for troll skin?
Dark brown, purple, and deep green all create richer shadows than pure black.
How do I paint a swamp troll?
Use olive and mossy greens, brown weathering, subtle wet effects, and environmental dirt around the lower body.
What’s the biggest mistake when painting trolls?
Treating their huge areas of skin as one uniform color instead of using the extra space for texture, variation, shadows, and environmental storytelling.
If you would like free D&D STL miniatures, visit our homepage and download yours now:
https://echoartstudios.net/