How to Paint Lava Bases for Miniatures (Step-by-Step Volcanic Base Guide)

A great miniature deserves an equally impressive base. One of the most striking basing styles is a volcanic lava base, capable of transforming an ordinary figure into the centerpiece of any Dungeons & Dragons, Pathfinder, or Warhammer collection.
Many painters focus entirely on the miniature while leaving the base unfinished. In reality, the base frames the model, establishes the environment, and helps tell the story. A glowing lava base instantly suggests danger, heat, and epic battles, making dragons, demons, fire elementals, and legendary warriors feel even more dramatic.
In this guide, you’ll learn how to paint realistic lava effects using simple techniques that create the illusion of intense heat and molten rock.
Building a Convincing Lava Base

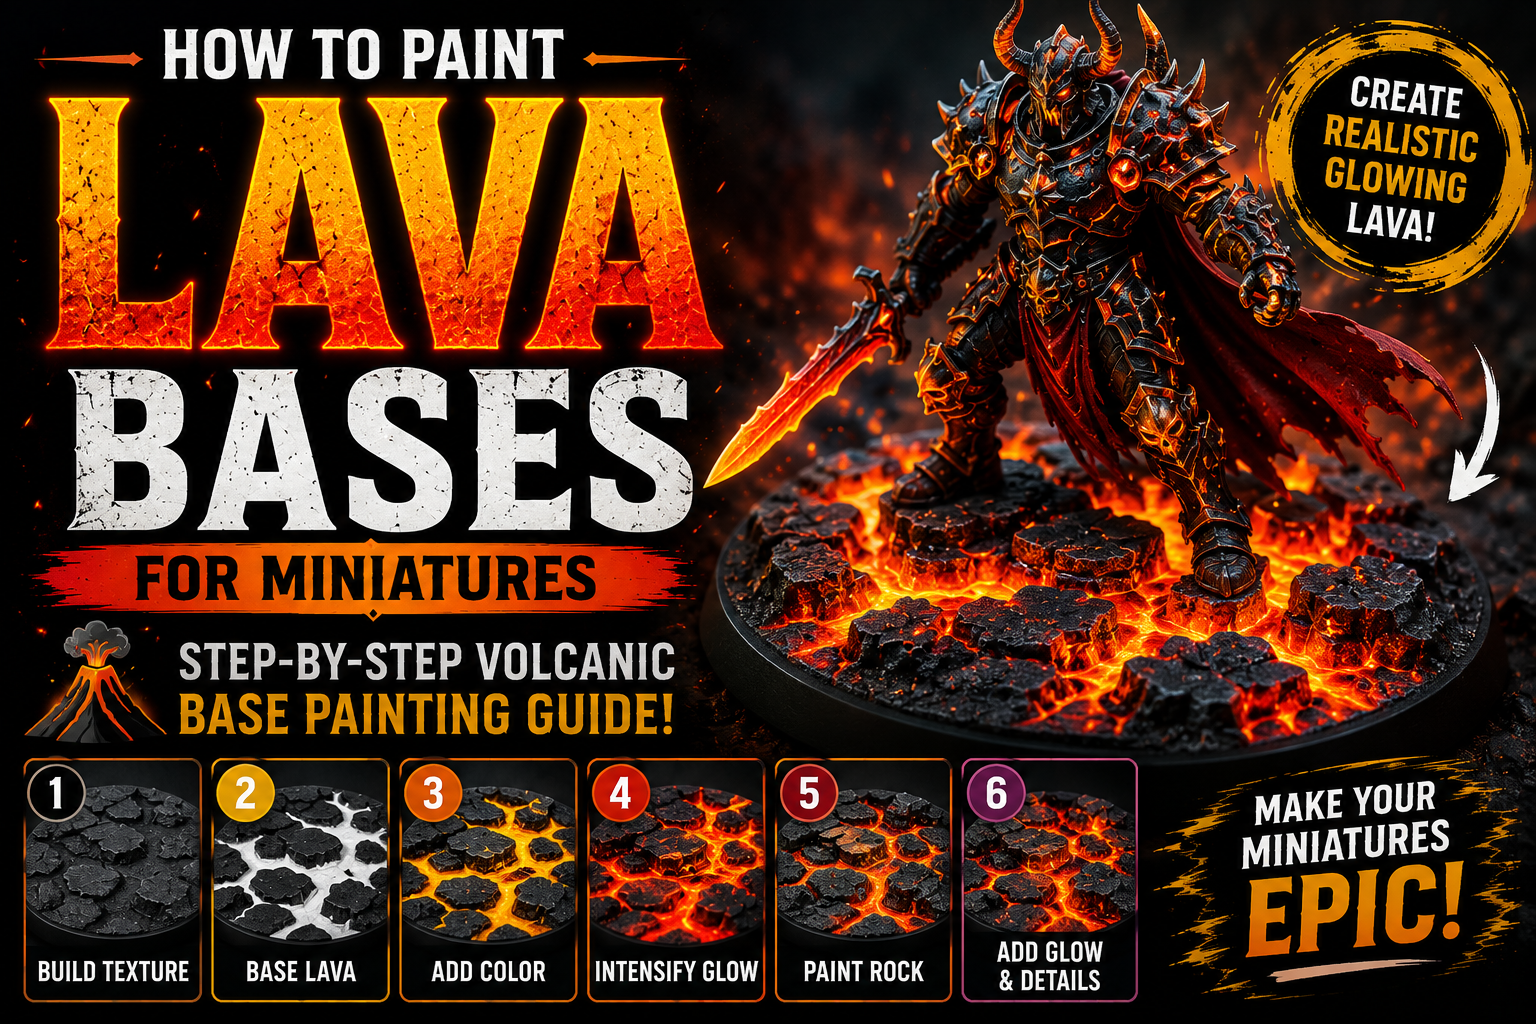
Before painting, make sure the base has enough texture to sell the illusion. Cracked earth works best because it naturally exposes glowing lava beneath solid rock.
You can create this effect using cork, texture paste, sculpting materials, or pre-made resin bases. The cracks should vary in width and direction, avoiding perfectly symmetrical patterns.
Deep recesses give the lava room to glow, while raised surfaces become cooled volcanic rock.
Choosing the Right Color Palette

Real lava is hottest at its center and gradually darkens as it cools.
A reliable color palette includes:
- White
- Bright Yellow
- Orange
- Bright Red
- Dark Red
- Dark Brown
- Black
Keeping these colors in the correct order creates the illusion of extreme temperature rather than simply painting random fiery colors.
Painting the Molten Lava

Begin by painting the deepest cracks pure white. This may seem unusual, but white acts as the brightest source of heat.
Next, carefully layer yellow around the white, followed by orange, bright red, and finally dark red toward the outer edges.
Allow each color to overlap slightly with the previous one. These gradual transitions create the appearance of molten rock glowing beneath the surface.
Thin paints work far better than thick coats because they preserve smooth blends.
Painting the Volcanic Rock

Once the lava is complete, paint the surrounding rock using very dark colors.
Start with black or dark charcoal before dry brushing progressively lighter greys across the raised texture. This contrast makes the glowing lava appear significantly brighter.
Avoid using light grey over the entire surface. Keeping most of the rock dark reinforces the illusion that it has been scorched by intense heat.
Creating the Glow Effect

The glow surrounding the lava is what makes the base feel alive.
Thin orange or yellow paint into a glaze and gently apply it around the edges of nearby rocks, boots, cloaks, or armor that sit close to the molten cracks.
This subtle lighting effect should remain soft and controlled. Too much glow can overwhelm the miniature and reduce realism.
Focus the brightest reflected light only where the lava is closest.
Adding Ash and Burnt Details

Volcanic environments are rarely clean.Add small patches of ash using light grey dry brushing or weathering pigments around the highest areas of the base. Tiny pieces of black gravel, cork fragments, or burnt vegetation help create a more believable landscape.
Keeping these details understated prevents them from competing with the glowing lava.
Finishing Touches

Before calling the base complete, inspect it from multiple angles.
Strengthen the brightest lava cracks if necessary, clean any accidental paint marks, and ensure the glow remains consistent with your chosen light direction.
A neat black rim around the base provides a professional finish and naturally draws attention toward the miniature itself.
Small corrections at this stage often make the biggest visual difference.
Common Mistakes to Avoid
Avoid these common errors:
- Painting lava without a white center.
- Making every crack the same width.
- Using bright grey rocks.
- Applying too much glow everywhere.
- Skipping smooth color transitions.
- Forgetting to clean the base rim.
Correcting these issues produces a far more realistic volcanic environment.
Final Thoughts
A well-painted lava base transforms an already impressive miniature into a complete display piece. Strong contrast, smooth color transitions, and carefully controlled lighting create the illusion of intense heat flowing beneath cracked volcanic rock.
Whether you’re painting dragons, demons, fire giants, or elemental creatures, mastering lava bases is a valuable skill that adds drama and storytelling to every fantasy miniature.
Frequently Asked Questions
Why should I paint the lava white first?
White represents the hottest part of the lava and makes subsequent yellow and orange layers appear much brighter.
Can I use dry brushing on lava?
Dry brushing works best on the surrounding volcanic rock, not the molten lava itself.
What miniatures work best with lava bases?
Dragons, demons, fire elementals, tieflings, warriors, and any fantasy character set in volcanic environments.
How do I make lava look brighter?
Increase the contrast by keeping the rocks dark while using bright white, yellow, and orange inside the deepest cracks.
Should I add glow to the miniature?
Yes, but only where the lava would realistically illuminate nearby surfaces.
If you would like free D&D STL miniatures, visit our homepage and download yours now: