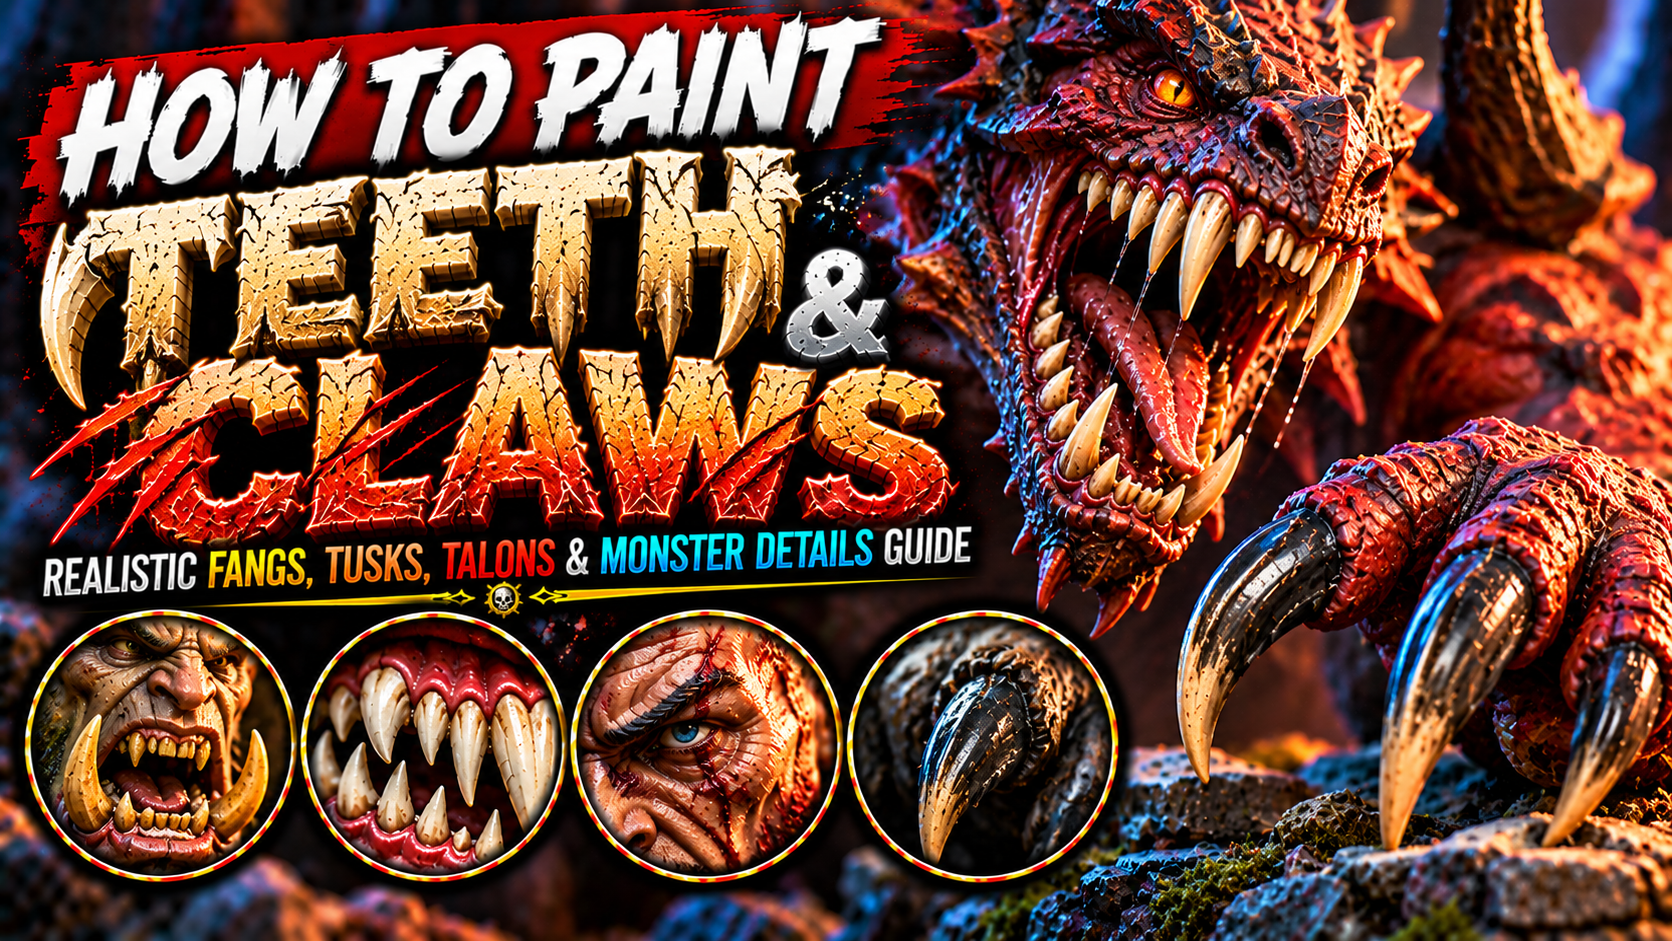
How to Paint Teeth and Claws on Miniatures (Realistic Fangs, Monster Tusks & Sharp Claw Guide)
Teeth and claws are some of the most important details on fantasy monster miniatures.
Whether you’re painting a terrifying dragon, a snarling werewolf, a monstrous troll, a ferocious demon, or a giant prehistoric creature, convincing teeth and claws can dramatically improve the miniature’s appearance.
These details may be small, but they play a major role in defining a creature’s personality.
Sharp white fangs can make a vampire appear dangerous and predatory.
Large yellowed tusks can give an orc or troll a brutal, battle-hardened appearance.
Dark claws can make a werewolf, dragon, or demonic creature look even more threatening.
However, realistic teeth and claws require more than painting every pointed surface pure white.
Natural teeth, tusks, and claws contain subtle variations in color, texture, transparency, and wear.
Their appearance also depends on the creature’s anatomy, age, environment, and fantasy design.
Creating convincing results requires controlled shading, realistic ivory colors, smooth highlights, sharp edge definition, natural discoloration, and an understanding of how light interacts with curved surfaces.
In this guide, you’ll learn how to paint realistic teeth, sharp fangs, monster tusks, dragon claws, black talons, aged ivory, damaged teeth, glowing supernatural fangs, and cinematic fantasy creature details.

Understanding How Teeth and Claws Look
Teeth and claws may appear similar because both can have pointed shapes, but their materials and structures are different.
Teeth have an outer enamel layer over dentin, while claws are primarily made from keratin.
Tusks are elongated teeth and may show exposed dentin, surface wear, and staining.
These differences influence how they reflect light.
Healthy tooth enamel can have a relatively smooth appearance.
Claws often contain more visible ridges and may appear matte or slightly glossy depending on the creature.
Tusks can develop scratches, discoloration, and worn tips.
For miniature painting, the most important principle is to create a believable transition from the darker base toward the lighter tip.
The roots of teeth often appear darker because they sit inside the mouth.
Claws may have darker bases where they emerge from skin or scales.
The tips usually receive stronger highlights.
However, avoid making every tooth and claw identical.
Natural variation helps create a convincing organic appearance.

Choosing the Best Teeth and Claw Color Palette
Different creatures require different colors.
Fresh-looking fangs may appear pale ivory.
Ancient monster teeth can contain yellow and brown discoloration.
Black claws work beautifully for dragons, demons, and predatory creatures.
Large tusks often benefit from warm beige and bone colors.
| Teeth or claw type | Color progression |
|---|---|
| Clean ivory teeth | Dark Brown → Beige → Bone → Ivory |
| Yellowed monster teeth | Umber → Ochre → Tan → Pale Ivory |
| Ancient tusks | Dark Brown → Warm Brown → Khaki → Bone |
| Black claws | Black → Charcoal → Dark Grey → Pale Grey |
| Brown claws | Black-Brown → Dark Brown → Tan → Beige |
| Dragon talons | Dark Grey → Brown-Grey → Bone → Ivory |
| Demonic red claws | Black-Red → Burgundy → Crimson → Orange-Red |
| Magical blue fangs | Navy → Royal Blue → Cyan → Ice Blue |
Choose colors that complement the creature.
For a dark dragon, pale ivory teeth create strong contrast.
For a green troll, yellowed tusks can reinforce a rough, monstrous appearance.
For a pale demon, black claws create a threatening silhouette.
Avoid using pure white as the main color for every tooth.
Reserve it for the brightest highlights.

Preparing the Miniature for Teeth and Claw Details
Before painting teeth or claws, examine the sculpted anatomy.
Identify where each tooth emerges from the gums.
Look for the curvature of fangs and tusks.
For claws, observe where they connect to fingers, paws, or talons.
These areas should usually remain darker.
Paint the surrounding skin, scales, or fur first.
For an open mouth, complete the interior before highlighting the teeth.
This helps prevent accidental paint marks on finished ivory surfaces.
Use thin paint.
Small teeth can lose definition quickly if the paint is too thick.
For larger monster miniatures, you can introduce additional texture and weathering.
For smaller tabletop creatures, focus on clean separation and readable highlights.

Painting the Dark Tooth Base
Begin with a dark brown or warm grey-brown.
Apply the color across the teeth.
Make sure the paint reaches the spaces between individual teeth.
These dark recesses are essential.
They separate the teeth and prevent them from looking like one solid white shape.
For a monster with an open mouth, the surrounding gums and mouth interior can remain even darker.
This increases contrast.
Once the basecoat is dry, begin introducing lighter colors.
Avoid covering the entire dark foundation.
The darkest sections should remain near the roots and between adjacent teeth.

Building Realistic Ivory Highlights
Ivory is one of the most useful colors for painting teeth.
It creates a natural appearance without the harsh brightness of pure white.
Begin with your dark brown base.
Introduce medium beige across the raised surfaces.
Then add bone color.
Concentrate the lighter paint toward the tips.
Finish selected areas with ivory.
For very sharp fangs, a tiny white highlight can emphasize the point.
Keep the transitions controlled.
Avoid painting every tooth entirely ivory.
The darker roots create depth.
For larger teeth, use smooth layering to establish a gradual transition.
For smaller teeth, a simple basecoat and carefully placed highlight may be enough.

Painting Sharp Monster Fangs
Fangs are often longer and more curved than ordinary teeth.
They are common on vampires, werewolves, dragons, demons, and predatory monsters.
Begin with dark brown near the base.
Introduce beige along the main body.
Then add bone-colored highlights.
Finish the tip with ivory.
For a curved fang, place the brightest highlight along the surface facing the light.
Keep the opposite side slightly darker.
This helps establish the fang’s cylindrical shape.
Avoid making every fang perfectly symmetrical.
Small differences in length and curvature can make the creature look more natural.
For especially large fangs, add a subtle thin highlight along the outer edge.

Painting Yellowed Monster Teeth
Yellowed teeth can create a dirty, aggressive appearance.
They work particularly well for trolls, ogres, orcs, goblins, and ancient monsters.
Begin with dark brown.
Introduce ochre.
Then build toward tan.
Add pale bone highlights near the tips.
Keep the roots darker and warmer.
You can introduce small irregular brown stains.
Avoid making every tooth equally yellow.
Some teeth can be lighter.
Others can appear more heavily discolored.
This variation creates a more convincing result.
For creatures with large mouths, the contrast between dark gums and yellowed teeth can be especially effective.

Painting Vampire Fangs
Vampire fangs are often small but visually important.
They should appear sharp, clean, and predatory.
Begin by painting the mouth interior using dark red or burgundy.
Keep the spaces between the teeth dark.
Then paint the fangs using beige or bone.
Introduce ivory highlights.
Finish the sharpest points with tiny white highlights.
Avoid making the fangs excessively thick.
For small vampire miniatures, two carefully highlighted teeth can be enough.
The contrast against the dark mouth is what makes them stand out.
You can also add subtle highlights to the lower lip and surrounding skin.
This helps frame the facial expression.

Painting Werewolf Teeth
Werewolves benefit from slightly irregular teeth.
Unlike elegant vampire fangs, werewolf teeth can appear more animalistic and aggressive.
Begin with dark brown.
Introduce warm beige.
Then add bone highlights.
Finish selected tips with ivory.
Keep some teeth darker than others.
For large canine teeth, emphasize the curvature.
Smaller teeth can receive simpler highlights.
Paint the gums using muted red-brown.
Keep the interior of the mouth dark.
The contrast between fur, gums, and teeth creates a convincing predatory appearance.

Painting Dragon Teeth
Dragon teeth can become a major focal point on large fantasy miniatures.
Their size allows for more elaborate shading.
Begin with dark brown or grey-brown.
Introduce beige along the main surfaces.
Build toward bone.
Then add ivory highlights.
For large curved teeth, use smooth transitions to emphasize the shape.
Keep the roots darker.
You can also introduce subtle scratches and discoloration.
Avoid painting every tooth exactly the same color.
A few slightly darker teeth can create a more organic appearance.
For dragons with open mouths, the dark interior helps the teeth stand out dramatically.

Painting Orc and Troll Tusks
Tusks are excellent details for orcs, trolls, ogres, and other fantasy monsters.
They often appear larger and more weathered than ordinary teeth.
Begin with dark umber.
Introduce warm brown.
Then build toward tan.
Add bone-colored highlights.
Finish the tips with ivory.
Keep the base darker.
For older tusks, introduce subtle yellow-brown discoloration.
You can also paint small scratches along the surface.
Avoid making every tusk perfectly clean.
A little weathering reinforces the creature’s rough appearance.
For large tusks, consider adding subtle directional highlights to emphasize their curvature.

Painting Ancient and Weathered Tusks
Ancient tusks can appear worn, stained, and heavily textured.
They work beautifully for giant beasts, mammoth-like monsters, ancient trolls, and massive fantasy creatures.
Begin with dark brown.
Introduce warm ochre.
Then add khaki and bone.
Keep the deepest recesses dark.
For additional texture, paint thin irregular lines along the tusk.
These can suggest natural growth patterns and surface wear.
Avoid making the lines too thick.
You can also introduce small darker patches near the base.
Finish with pale ivory highlights along selected exposed areas.
The goal is to create the appearance of an old, durable material that has experienced years of wear.

Painting Black Monster Claws
Black claws are particularly effective for dragons, demons, werewolves, and predatory creatures.
Begin with pure black or near-black.
Introduce charcoal grey along the raised surfaces.
Then add dark grey highlights.
Finish selected edges with pale grey.
Keep the majority of the claw dark.
Avoid covering the entire surface with grey.
For a sharp claw, concentrate the brightest highlight near the tip.
You can also paint a thin reflection along one side.
This creates the impression of a hard, slightly reflective surface.
Black claws work beautifully against pale skin, bright scales, or warm-colored fur.

Painting Brown and Natural Claws
Brown claws create a more natural appearance for beasts and animal-like creatures.
Begin with black-brown.
Introduce dark brown.
Then add medium brown highlights.
Finish selected areas with tan or beige.
Keep the base darker.
For larger claws, you can introduce subtle lengthwise lines.
These suggest natural keratin growth.
Avoid making every line perfectly straight.
The tips can receive slightly brighter highlights.
For a rugged creature, introduce small scratches and irregular color variation.
Brown claws work especially well for bears, wolves, trolls, and other forest monsters.

Painting Dragon Talons
Dragon talons are often large, curved, and extremely sharp.
They can be painted using ivory, black, brown, or dark grey depending on the creature’s design.
Begin with a dark basecoat.
Introduce a medium tone along the exposed surfaces.
Then add brighter highlights.
Keep the roots darker where the talons emerge from the scales.
For pale talons, use beige and bone.
For dark talons, use charcoal and grey.
For larger dragons, add subtle lengthwise texture.
Avoid making the claws look perfectly smooth if the creature is intended to appear ancient or weathered.
A few scratches can reinforce the impression of a powerful predator.

Painting Bird and Griffin Talons
Griffins, harpies, giant eagles, and other avian fantasy creatures often have distinctive curved talons.
These claws should appear sharp and functional.
Begin with dark brown or charcoal.
Introduce medium grey-brown highlights.
Then add pale grey or beige along selected edges.
Keep the tips sharply defined.
For large griffin talons, use thin highlights to emphasize the curvature.
Avoid making every claw identical.
Some can be partially hidden by the creature’s pose.
You can also paint subtle texture where the talons connect to the feet.
This helps create a believable transition between skin and claw.

Painting Demonic Claws
Demonic claws can use unnatural colors to reinforce the creature’s supernatural appearance.
Black claws are a classic choice.
However, dark red, purple, and glowing orange can also work beautifully.
For red claws, begin with black-red.
Introduce burgundy.
Then add crimson highlights.
Finish selected tips with orange-red.
For purple claws, use black-purple, violet, and pale lavender highlights.
Keep the darkest areas near the base.
Avoid making the entire claw equally bright.
A strong dark-to-light progression helps establish the shape.
For magical demons, subtle reflected light can connect the claws to surrounding supernatural energy.

Painting Chipped and Broken Teeth
Broken teeth can add character to battle-hardened monsters.
They work particularly well for trolls, ogres, dragons, and ancient beasts.
Begin by painting the tooth normally.
Then identify the damaged area.
For a chipped tip, use a darker tone to establish the broken surface.
Add a small lighter highlight along the exposed edge.
Avoid making the damage perfectly symmetrical.
You can also introduce subtle discoloration around the chipped section.
For large teeth, tiny irregular lines can suggest cracks.
Keep these details restrained.
Too many cracks can make the tooth resemble stone rather than enamel or dentin.

Painting Scratches and Wear on Claws
Claws experience wear through movement, combat, and contact with the environment.
Small scratches can make them appear more realistic.
Begin by painting the claw normally.
Then use a lighter version of the base color to add thin irregular marks.
Keep the scratches subtle.
Some can follow the length of the claw.
Others can cross the surface.
Avoid making every scratch equally bright.
For black claws, use dark grey.
For brown claws, use tan.
For ivory claws, use pale beige.
Concentrate wear on exposed areas.
The goal is to create natural surface variation without overwhelming the claw’s shape.

Painting Bloody-Looking Teeth and Claws
For battle-focused fantasy miniatures, subtle red staining can add visual storytelling.
Begin by painting the teeth or claws normally.
Then introduce small amounts of dark red near selected areas.
Keep the application controlled.
Avoid covering every tooth.
For a creature that has recently fought, small irregular stains can suggest contact with an opponent.
Use darker red in recessed areas.
A tiny brighter red highlight can suggest fresh moisture.
If you want a wet appearance, apply selective gloss varnish after the paint has dried.
Keep the effect restrained.
The underlying ivory or claw color should remain visible.

Painting Glowing Magical Fangs
Magical fangs can create a supernatural appearance for vampires, demons, dragons, and enchanted creatures.
Begin with a dark version of the magical color.
For blue fangs, use navy.
Introduce royal blue.
Then add cyan.
Finish with pale blue or white highlights.
For green fangs, use dark green, emerald, lime, and pale yellow-green.
Keep the brightest sections concentrated near the tips.
You can also introduce subtle colored reflections onto nearby gums and skin.
The fangs themselves should remain brighter than the reflected light.
Avoid making the entire mouth uniformly luminous.

Creating Object Source Lighting from Magical Teeth
Object Source Lighting can make supernatural teeth or claws appear genuinely magical.
Imagine a demon with glowing red claws.
The claws act as small light sources.
Nearby fingers, scales, or skin reflect their color.
Begin with thin red glazes.
Apply them to surfaces facing the claws.
Keep the strongest reflections closest to the source.
Gradually reduce the intensity farther away.
For blue magical teeth, use cyan reflections.
For green claws, use emerald or lime.
For purple fangs, use violet or magenta.
Avoid applying the glow equally across the entire miniature.
Directional lighting and controlled brightness create a more convincing effect.

Painting Teeth and Claws on Giant Monsters
Large monsters provide more space for detailed painting.
Their teeth and claws can become major visual elements.
Begin by establishing the overall color palette.
Use dark roots and gradually brighter tips.
For large tusks, introduce subtle growth lines.
For giant claws, add small scratches and directional highlights.
Keep the texture consistent with the material.
Avoid making every tooth identical.
Large monsters benefit from natural variation.
Some teeth can appear more yellowed.
Others may be chipped or worn.
The overall effect should reinforce the creature’s age, anatomy, and environment.

Creating Cinematic Monster Details
Teeth and claws can become powerful focal points in fantasy miniature painting.
To achieve this, use strong contrast.
Keep the mouth interior relatively dark.
Highlight the teeth carefully.
For claws, emphasize the curvature and sharp tips.
Avoid making every surface equally bright.
A creature’s pose can also reinforce the effect.
An open mouth naturally draws attention to the fangs.
A raised claw creates a threatening silhouette.
For magical creatures, glowing teeth or claws can introduce additional drama.
Keep the brightest highlights concentrated around the most important details.
This helps guide the viewer’s attention.

Common Mistakes When Painting Teeth and Claws
One of the most common mistakes is painting every tooth pure white.
This removes depth and makes the teeth appear artificial.
Use darker roots and warmer ivory tones.
Another mistake is making all teeth identical.
Natural variation creates a more convincing appearance.
Avoid applying thick paint between small teeth.
This can obscure the sculpted separation.
Don’t make black claws completely featureless.
Subtle grey highlights help reveal their shape.
Another problem is excessive weathering.
Too many scratches and stains can make teeth resemble stone.
For magical fangs, avoid excessive OSL.
The source should remain brighter than the reflected light.
Finally, remember to keep the surrounding anatomy readable.
Teeth and claws should enhance the creature rather than overwhelm it.

Final Thoughts
Painting convincing teeth and claws requires controlled contrast, natural color variation, careful highlights, realistic texture, and an understanding of organic shapes.
Start with a dark foundation.
Build gradually toward lighter colors.
Keep the roots darker.
Concentrate the brightest highlights near exposed edges and tips.
For clean teeth, use beige, bone, and ivory.
For yellowed monster teeth, introduce ochre and warm brown.
For ancient tusks, add subtle discoloration and wear.
For black claws, use charcoal and grey highlights.
For natural brown claws, introduce warm brown and tan.
For magical creatures, experiment with glowing blue, green, purple, or red effects.
When the teeth or claws emit light, use subtle Object Source Lighting to illuminate nearby surfaces.
These techniques work beautifully for dragons, werewolves, vampires, trolls, orcs, ogres, demons, griffins, giant beasts, and fantasy display miniatures.
The most important principle is that teeth and claws should look like believable parts of the creature’s anatomy.
Their shape, color, texture, and lighting should support the miniature’s overall design.
When painted effectively, even a few carefully highlighted fangs or talons can transform an ordinary fantasy monster into a terrifying and memorable creature.
Frequently Asked Questions
What colors should I use for realistic monster teeth?
Dark brown, beige, bone, ivory, and small white highlights create an effective progression.
How do I paint sharp fangs on miniatures?
Keep the roots dark, build lighter colors along the fang, and concentrate the brightest highlight near the tip.
How do I paint yellowed monster teeth?
Begin with dark brown, introduce ochre and tan, and finish with pale bone highlights.
What is the best color for black claws?
Use black, charcoal, dark grey, and small pale grey edge highlights.
How do I paint realistic orc tusks?
Start with dark umber, build toward warm brown and tan, then highlight the tips with bone and ivory.
How do I make dragon teeth look realistic?
Use smooth dark-to-light transitions, subtle color variation, and carefully placed highlights that follow the curvature of each tooth.
How do I paint scratches on claws?
Use thin irregular lines in a slightly lighter version of the claw color, concentrating the wear on exposed areas.
How do I paint glowing magical fangs?
Use a dark saturated base, build toward brighter colors, and finish with pale highlights and subtle reflected light.
If you would like free D&D STL miniatures, visit our homepage and download yours now:https://echoartstudios.net