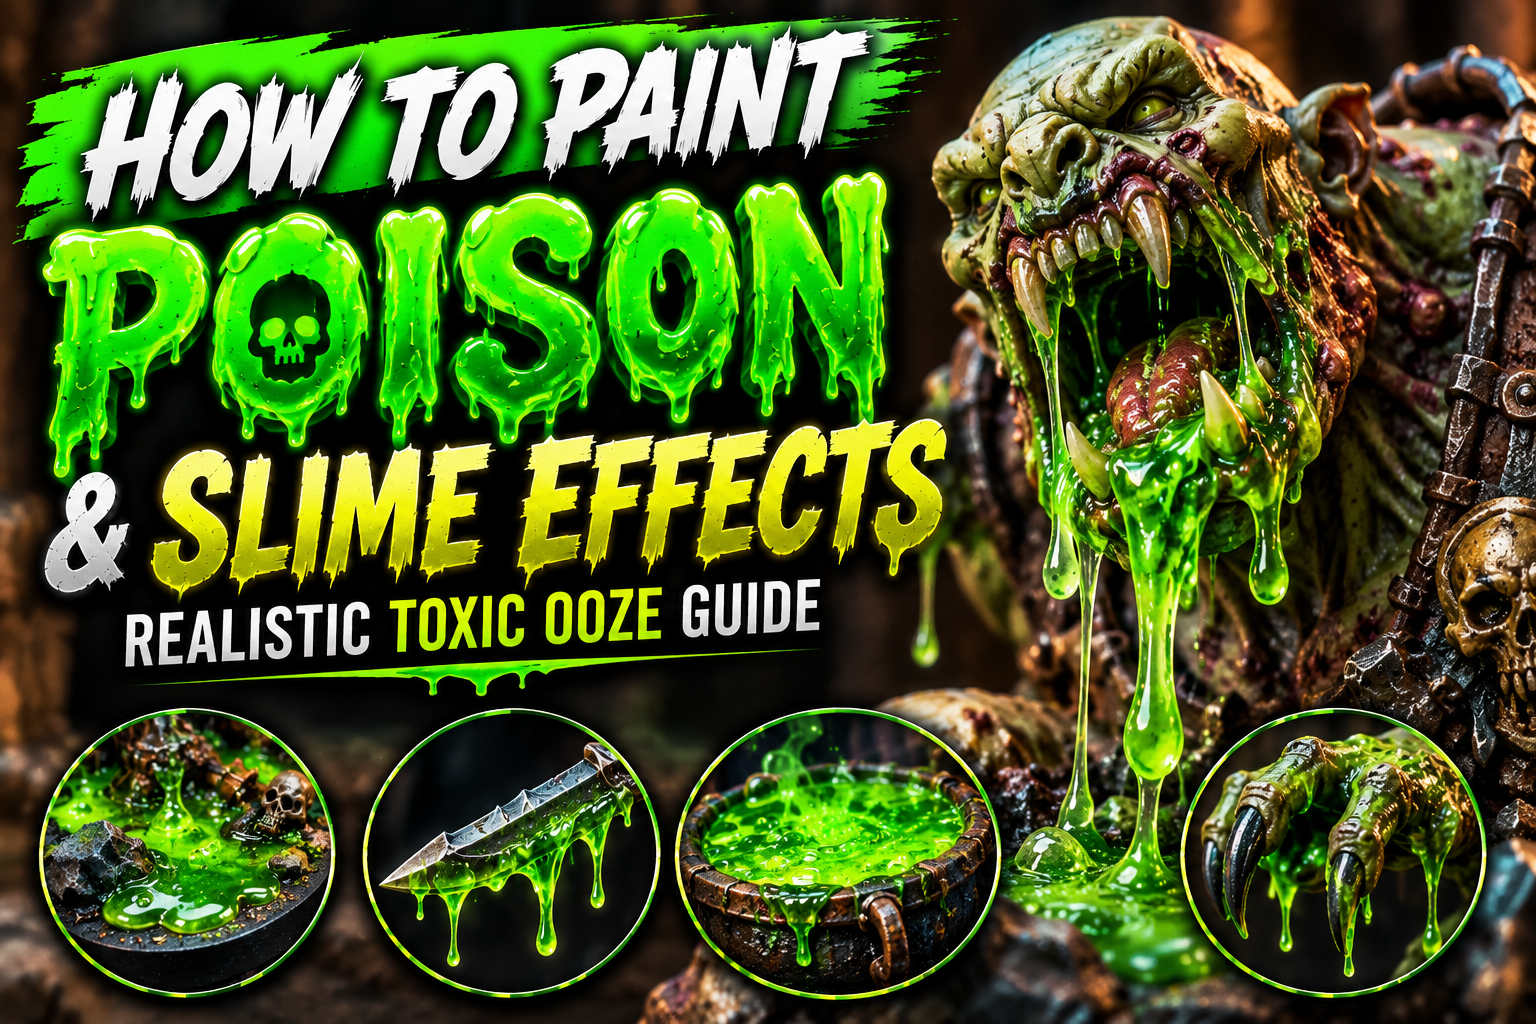
How to Paint Poison and Slime Effects on Miniatures (Realistic Toxic Ooze Guide)
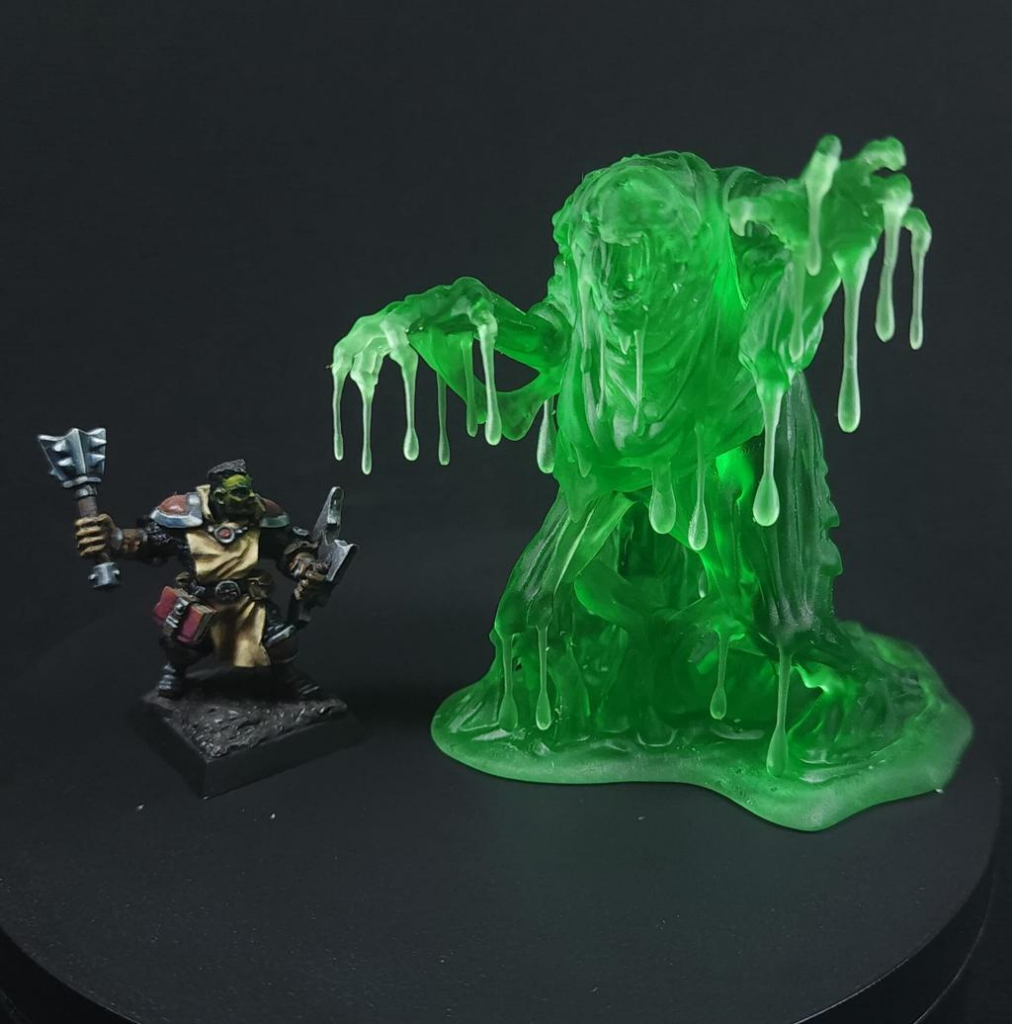
Poison, slime, acid, and toxic ooze are some of the most visually striking effects you can add to fantasy miniatures.
They work especially well on monsters, undead creatures, mutated beasts, dungeon bases, poisoned weapons, swamp creatures, alchemists, demons, and corrupted environments. A small amount of bright green slime can immediately transform an ordinary miniature into something dangerous and unnatural.
The challenge is making slime look wet, translucent, and organic instead of simply painting an area bright green.
Convincing toxic effects rely on contrast, color transitions, glossy surfaces, irregular shapes, and carefully placed highlights.
In this guide, you’ll learn how to paint realistic poison and slime effects using simple miniature painting techniques that can be adapted to almost any fantasy model.
Understanding How Slime Should Look
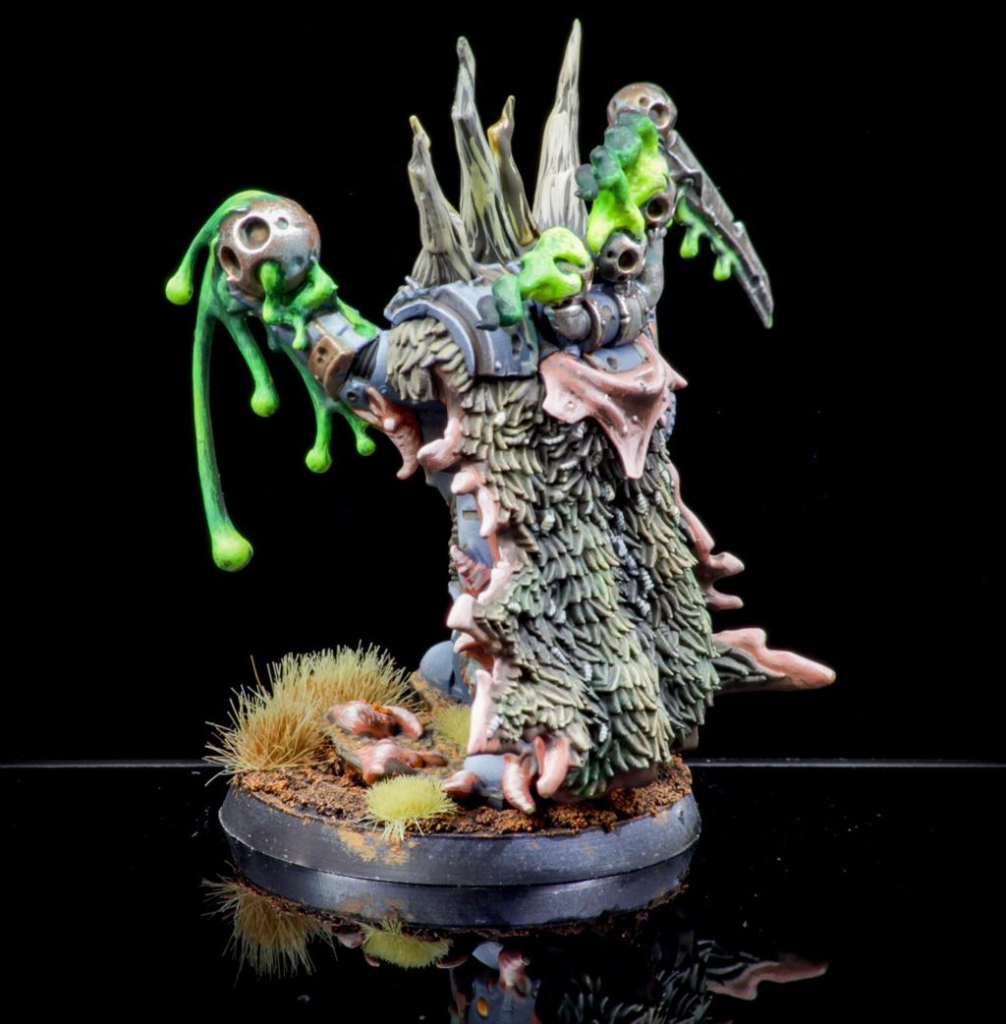
Slime is fundamentally different from materials such as cloth, stone, or skin.
Most slime appears partially transparent and extremely reflective. Thick areas usually look darker and more saturated, while thin areas catch brighter reflections.
This means your color range should be much wider than simply using one fluorescent green.
A useful toxic slime progression is:
Dark Green → Emerald Green → Yellow-Green → Fluorescent Green → Pale Yellow → White
Dark colors provide depth while yellow-green and pale highlights create the illusion of glowing, wet material.
The strongest reflections should occupy very little space.
If everything is equally bright, the slime will look flat.
Choosing a Poison Color Palette
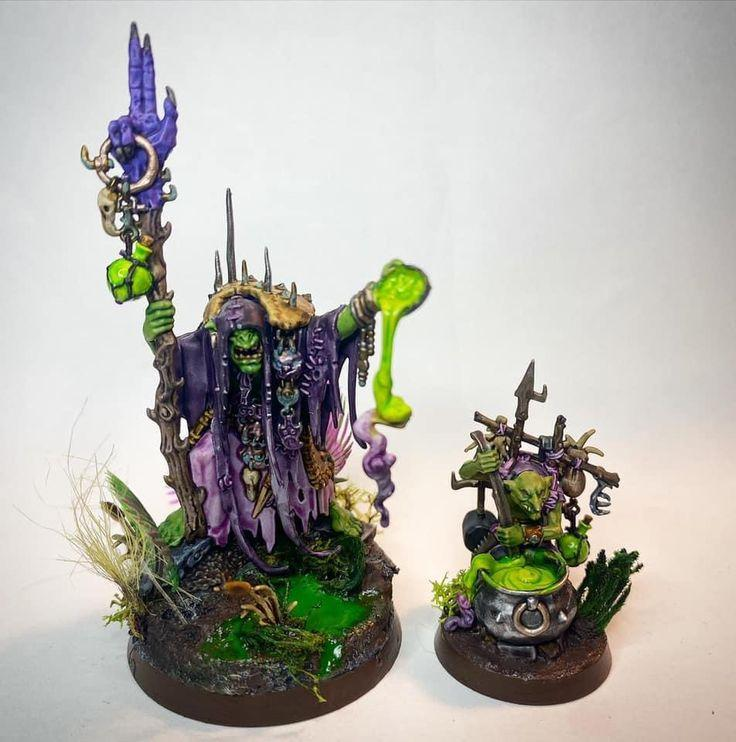
Green is the classic choice for fantasy poison, but it isn’t your only option.
Bright green works particularly well because viewers immediately associate it with toxic chemicals, venom, mutation, and supernatural corruption.
For a traditional toxic effect, begin with a deep green and gradually introduce emerald, lime, yellow-green, and pale yellow.
For magical poison, you can increase the saturation even further with fluorescent paints.
Purple also works extremely well for supernatural venom.
A purple poison palette could transition from nearly black violet into purple, magenta, pink, and pale lavender.
Acid can even be painted yellow, orange, turquoise, or unnatural blue depending on the miniature.
Whatever color you choose, prioritize contrast.
Painting the Dark Slime Base
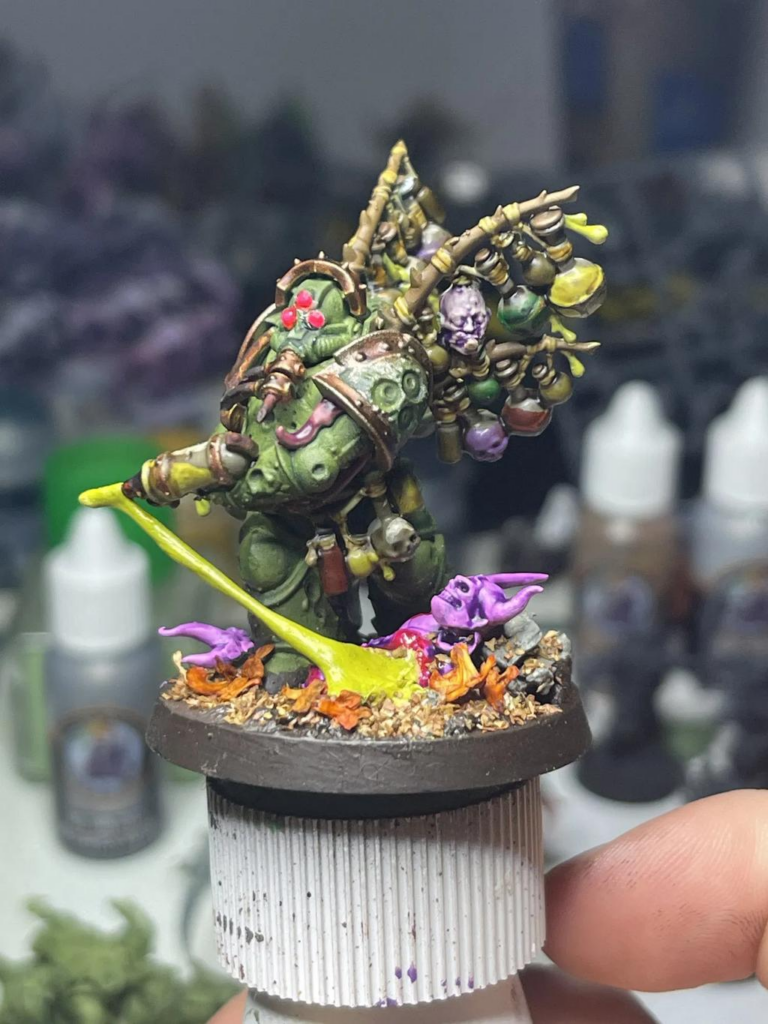
Start with the darkest version of your slime color.
For green poison, use deep forest green or green mixed with a small amount of black or dark blue.
Apply this color wherever the slime is thickest.
If you’re painting a puddle, keep deeper areas dark.
If slime is dripping from a monster’s mouth, the darkest green should remain near the mouth and between thicker strands.
If poison is covering a weapon, concentrate dark colors in recesses and around areas where liquid would collect.
Starting dark is important because it gives you enough room to create progressively brighter layers.
A fluorescent green applied directly over a white surface might look bright, but it often lacks convincing depth.
Building the Toxic Green Midtones
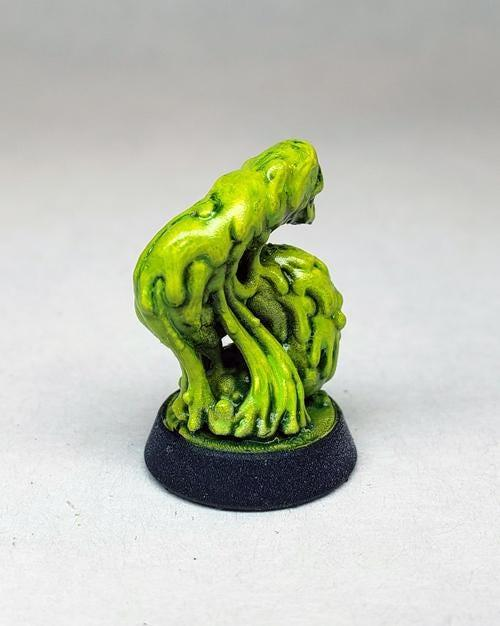
Once the dark foundation is established, begin introducing your primary green.
Apply brighter green across raised portions of the slime while allowing dark green to remain visible underneath.
Use irregular shapes.
Slime should not have perfectly smooth or symmetrical highlights.
Create small patches, streaks, bubbles, and transitions.
Then mix yellow-green into your main color and reduce the size of each new highlight.
This creates a natural progression from dark liquid into brighter reflective areas.
Thin glazing can help smooth transitions, but don’t overblend.
Some sharp differences in color actually help make the slime look wet and reflective.
Painting Slime Drips
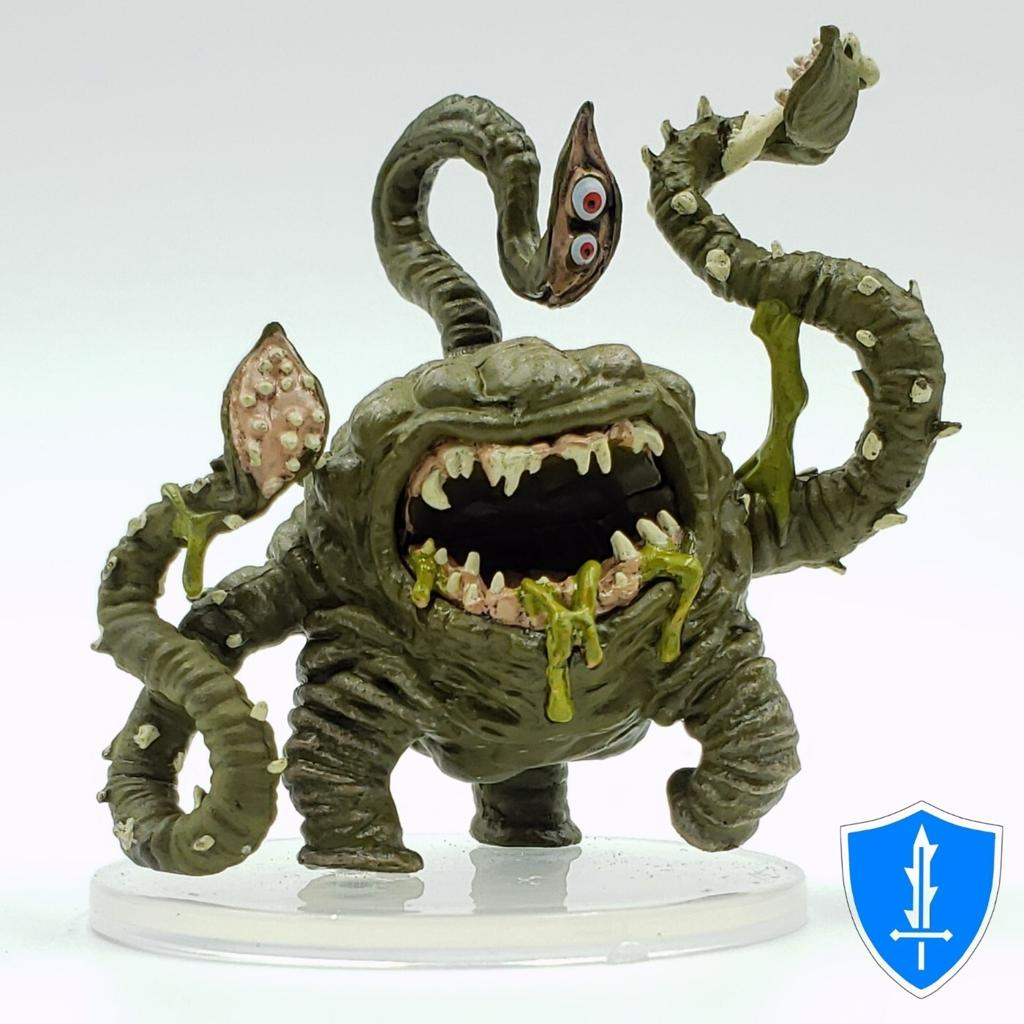
Dripping slime can make a monster look dramatically more disgusting and dangerous.
Paint the main strand using your medium green.
Keep the upper section darker where the liquid is thicker.
As the drip becomes thinner, introduce brighter yellow-green.
At the lowest point of the droplet, add a small pale yellow or white reflection.
This tiny highlight creates the illusion of a glossy liquid surface.
If the sculpt contains several drips, vary their brightness.
Some should remain dark.
Others can become extremely bright.
This prevents the effect from becoming repetitive.
Slime dripping from teeth, claws, wounds, weapons, or armor works particularly well.
Creating Slime Strings Between Surfaces
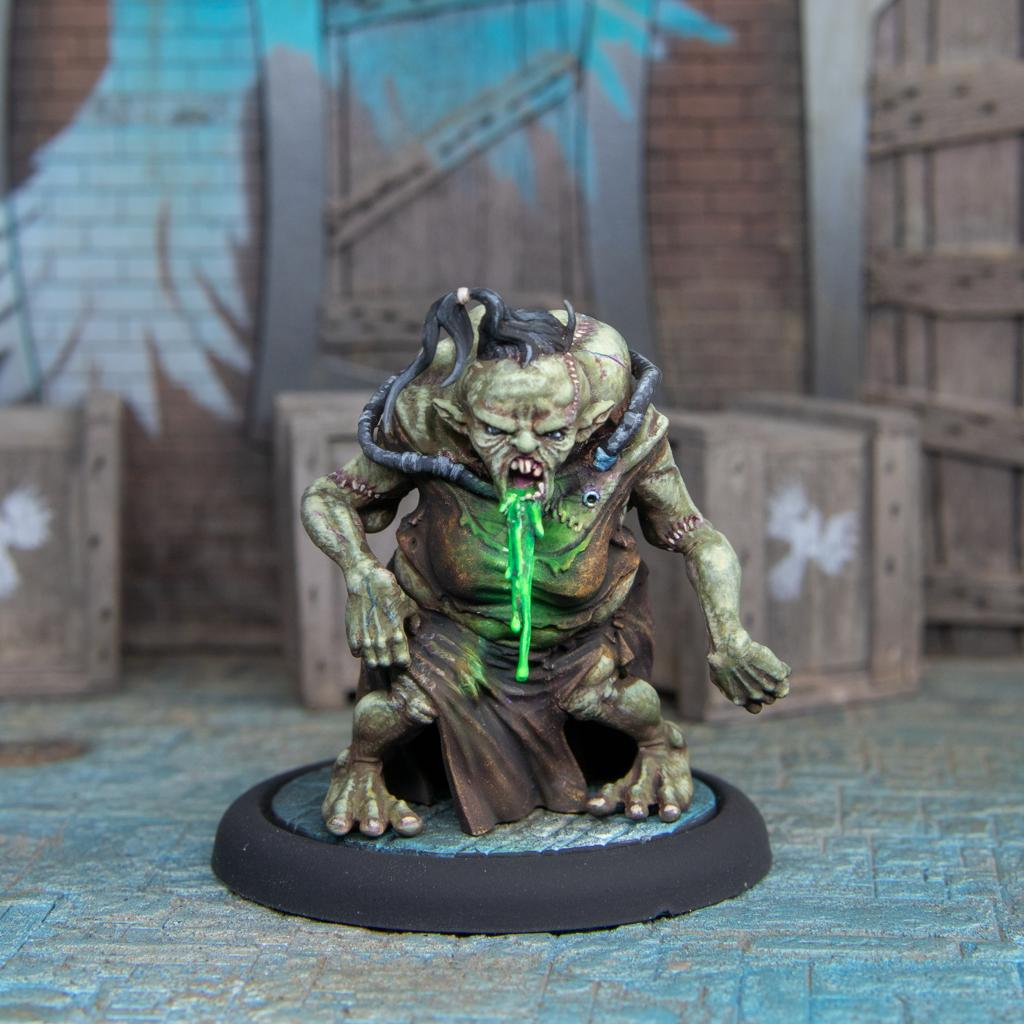
Thin strands of slime stretching between teeth, claws, jaws, or pieces of terrain can create an incredible wet effect.
If the sculpt already includes these strands, paint them using the same gradient as your main slime.
Keep the attachment points darker and make selected portions of the strand brighter.
For custom slime strings, miniature painters sometimes use transparent materials or modeling products to physically create the strand before painting.
Once the structure exists, use translucent or thin layers of your slime colors rather than completely opaque paint whenever possible.
Finish with tiny reflections.
The thinner the strand, the more important those small highlights become.
Painting Toxic Bubbles
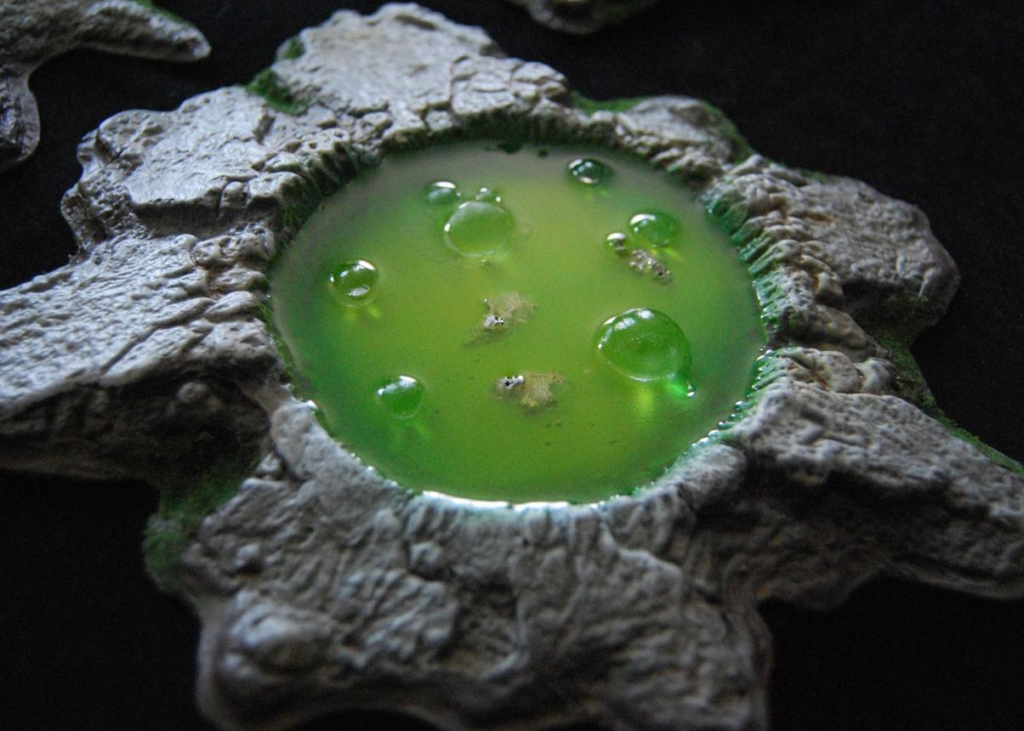
Bubbles immediately make a poison puddle look active.
Start by painting each bubble with the darker slime color.
Then create a brighter crescent along one side.
Add an even smaller pale highlight inside that crescent.
Finally, place a tiny white dot at the strongest reflection point.
This creates the illusion of a rounded glossy bubble.
Don’t make every bubble identical.
Some should be tiny.
Others can be larger.
Vary their brightness and spacing.
Clusters of bubbles work particularly well around objects submerged in the slime, such as bones, rocks, pipes, weapons, or dead vegetation.
Painting Poisoned Weapons
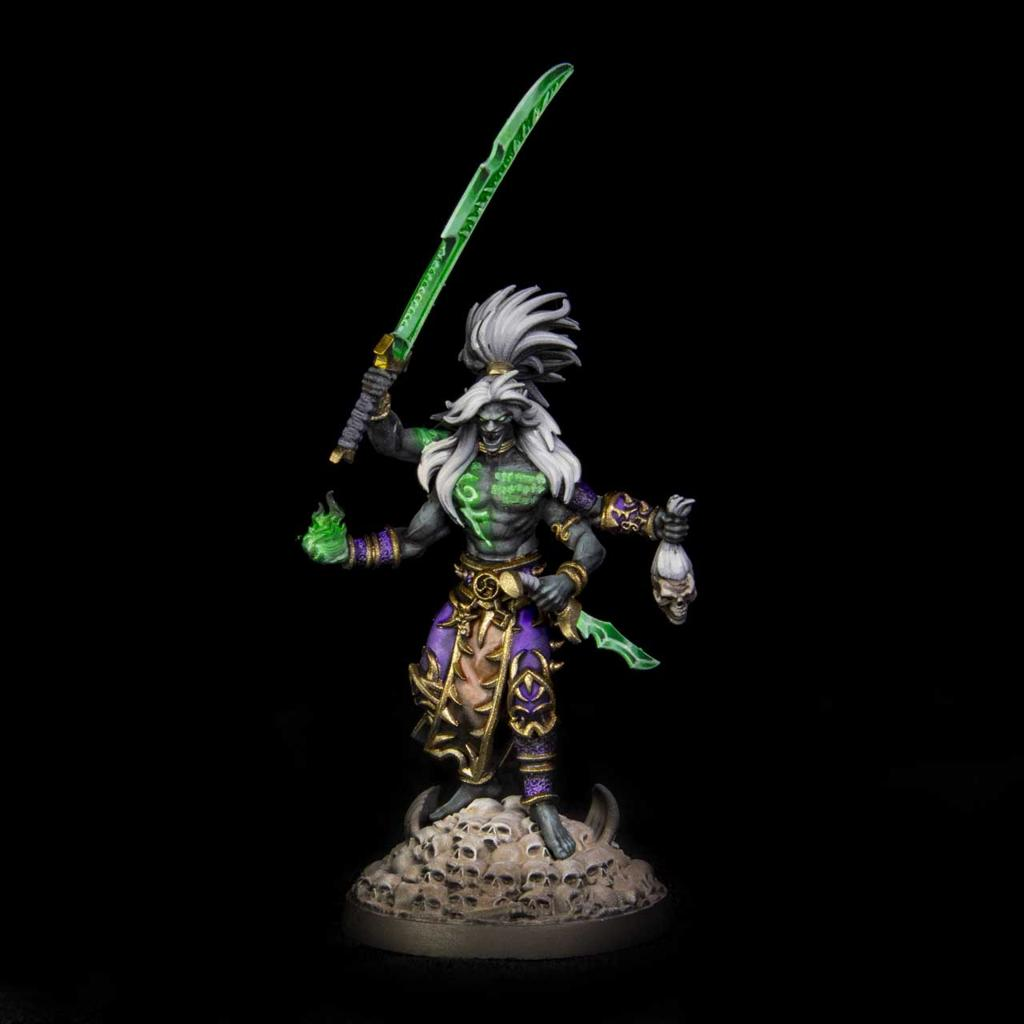
Poisoned daggers, swords, arrows, claws, and spears are perfect places for small toxic effects.
Paint the weapon normally first.
Then decide where the poison has been applied.
Instead of covering the entire blade, concentrate poison along the cutting edge, tip, grooves, or lower portions where liquid might collect.
Begin with dark green and gradually introduce brighter green.
Add tiny yellow-green reflections near the most saturated areas.
For a particularly dramatic fantasy effect, allow a small amount of poison to drip from the weapon.
The metallic blade should remain visible underneath.
This contrast between cold metal and saturated poison makes the toxic coating much easier to read.
Painting Toxic Monster Mouths
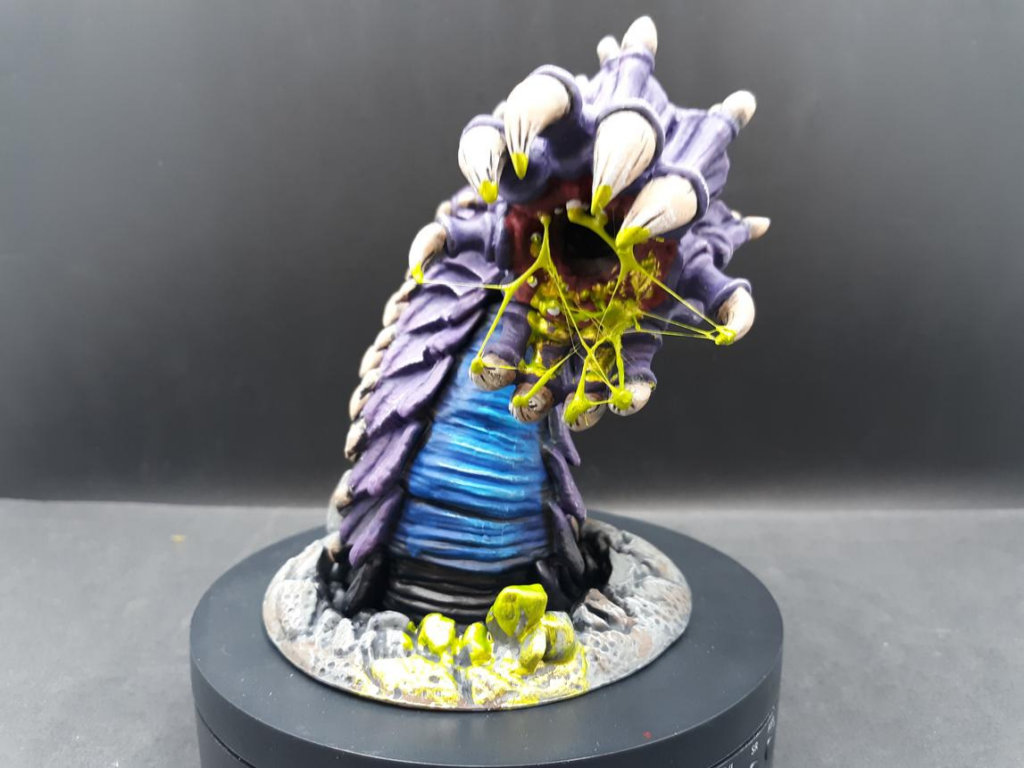
Monsters are excellent candidates for slime because the effect naturally integrates with teeth, tongues, and gums.
Paint the mouth normally first.
Use deep red, burgundy, and purple for the interior.
Paint teeth using brown, beige, and ivory.
Only then introduce the slime.
Green slime against a red mouth creates powerful complementary contrast.
Place darker green around the corners of the mouth and between teeth.
Introduce brighter green along drips and exposed liquid.
A few small pale reflections will make the material appear wet.
Selective gloss varnish can dramatically improve this effect.
Creating Toxic Puddles on Bases
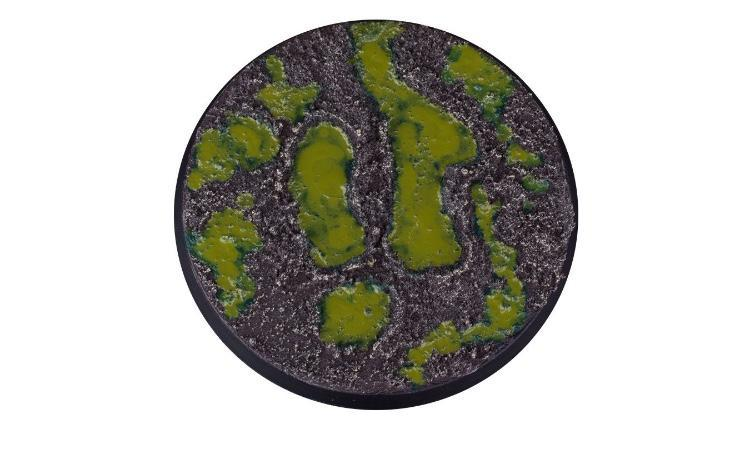
A toxic puddle can completely change the atmosphere of a miniature base.
Begin by painting the depression extremely dark green.
Then introduce brighter green toward selected areas.
Unlike ordinary water, fantasy poison often benefits from exaggerated color variation.
Create irregular patches of emerald, lime, and yellow-green.
Keep some areas extremely dark.
This creates the impression that the puddle has different depths.
Add bubbles, floating debris, bones, rocks, or damaged vegetation.
Gloss varnish or clear resin can then provide a convincing liquid finish.
If you’re using resin, paint the colors underneath first so the transparent layer enhances rather than replaces your painted depth.
Adding Object Source Lighting to Poison
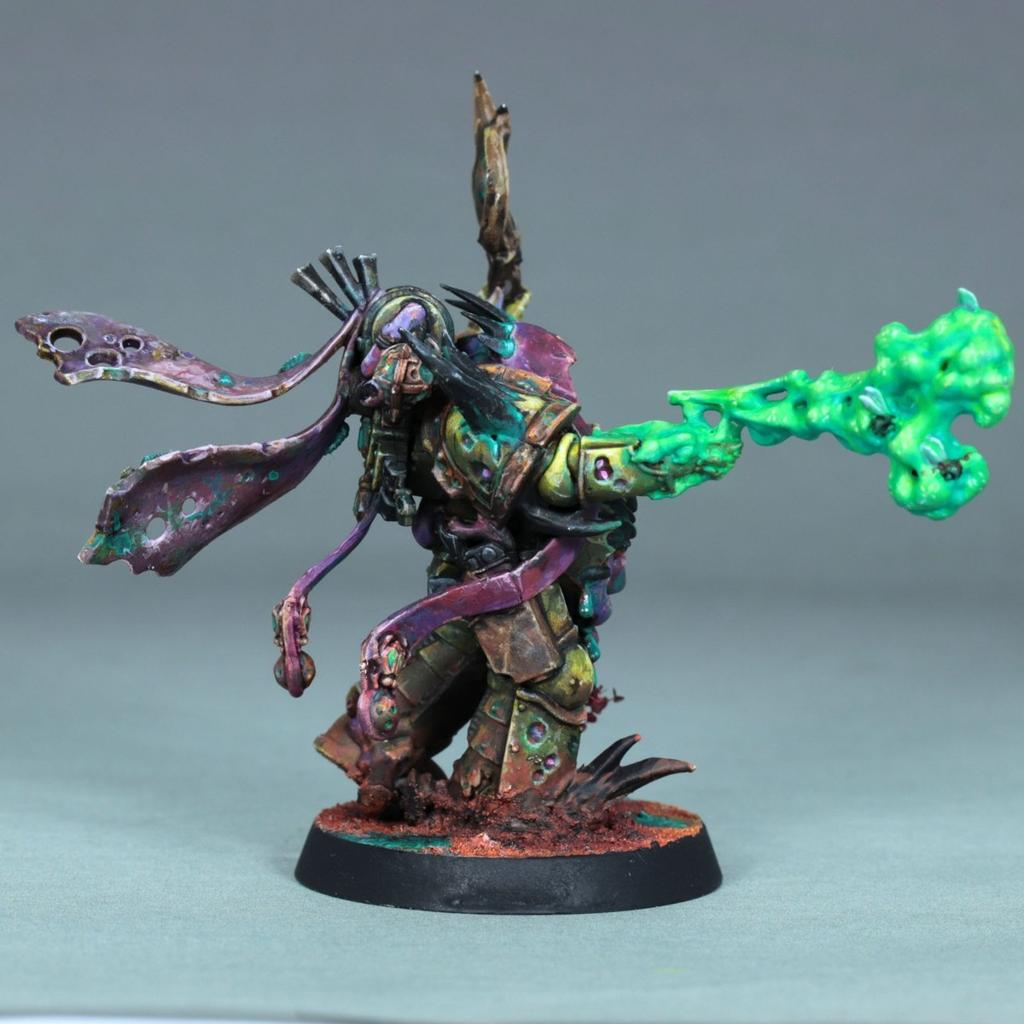
Fantasy poison can sometimes appear radioactive or magically luminous.
If you want this effect, treat the slime as a light source.
The poison itself must contain extremely bright yellow-green areas.
Then use thin green glazes on nearby surfaces.
A glowing toxic puddle might illuminate the underside of a monster’s legs.
A poisoned weapon could cast green reflections onto a hand or armor.
Slime inside a monster’s mouth could create subtle green illumination on nearby teeth and gums.
Keep these reflections weaker than the poison itself.
The farther a surface is from the toxic material, the weaker the green illumination should become.
Painting Acid Damage
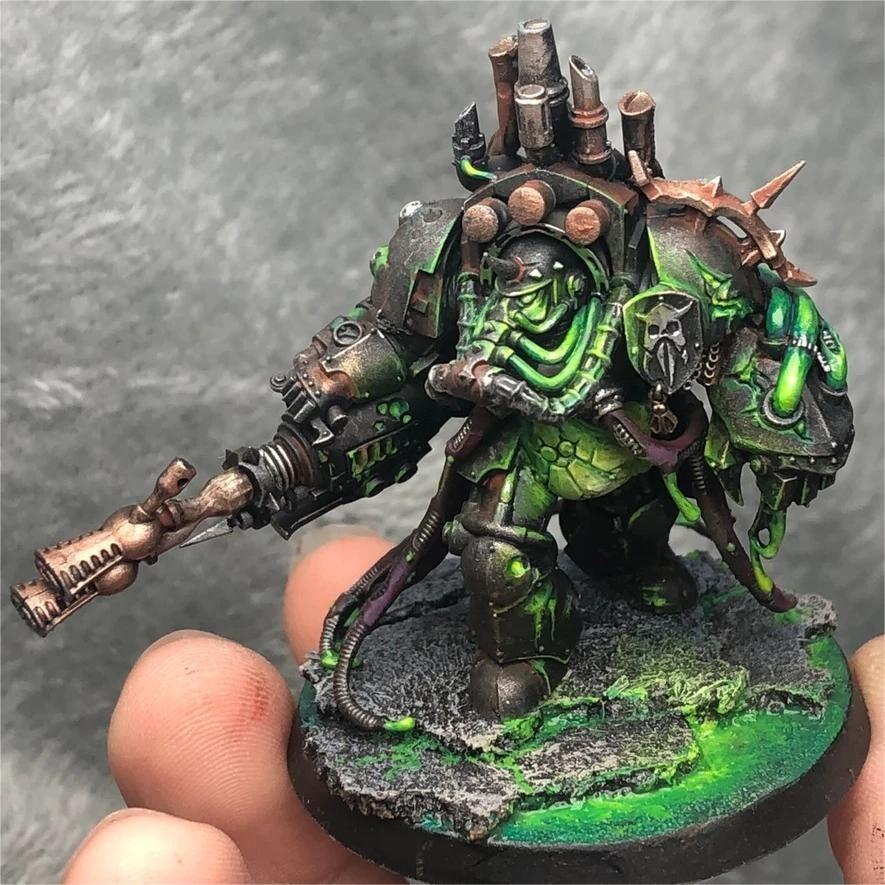
Poison doesn’t always need to appear as liquid.
You can also show the damage it has caused.
Around toxic areas, introduce dark brown, black, green, or yellow discoloration.
Metal can receive irregular dark stains suggesting corrosion.
Stone can be painted with green deposits around cracks.
Organic material can transition into unhealthy yellow, brown, purple, or black.
Keep the damaged edges irregular.
Perfect circles rarely look convincing.
Instead, create scattered stains and transitions that gradually disappear into the original material.
This makes the poison feel like part of the miniature’s story rather than simply a decorative green patch.
Making Slime Look Wet
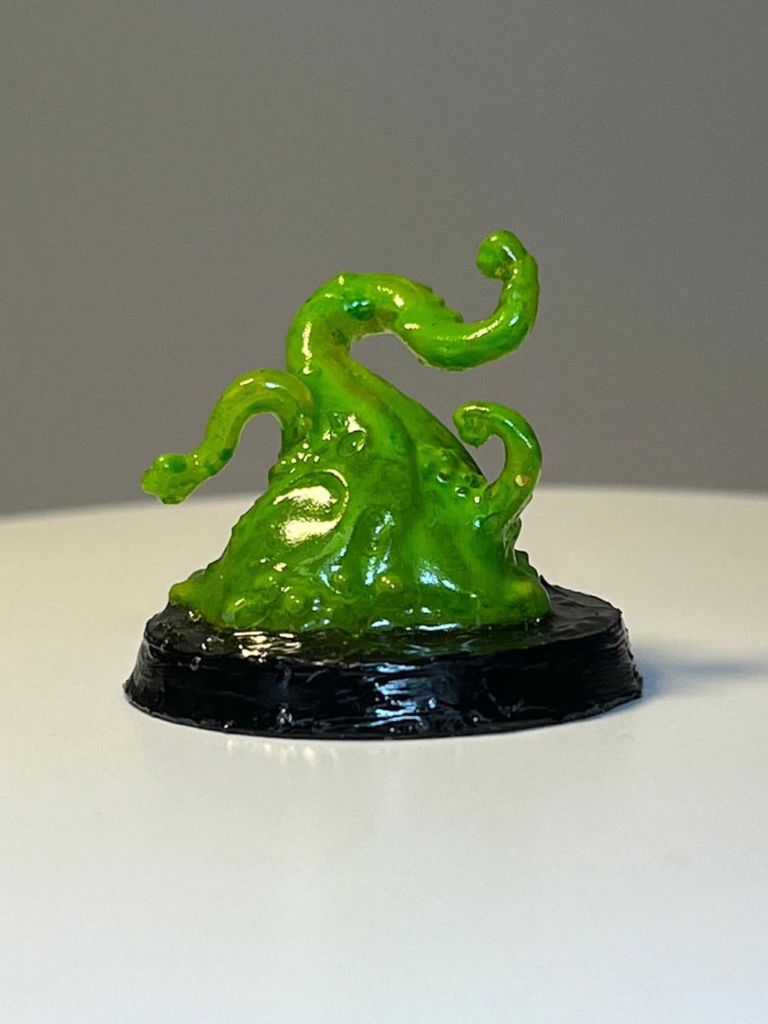
The wet appearance comes from two different effects: painted reflections and actual surface finish.
Always paint the reflections first.
Use pale yellow-green or white to create tiny dots, narrow streaks, and sharp highlights.
Then apply selective gloss varnish once the miniature is completely dry.
Gloss works particularly well on puddles, drips, tongues, slime strings, and bubbles.
Avoid covering the entire miniature.
The effect becomes much stronger when glossy slime sits beside matte skin, cloth, stone, or armor.
The viewer immediately recognizes the difference in material.
Common Mistakes When Painting Slime
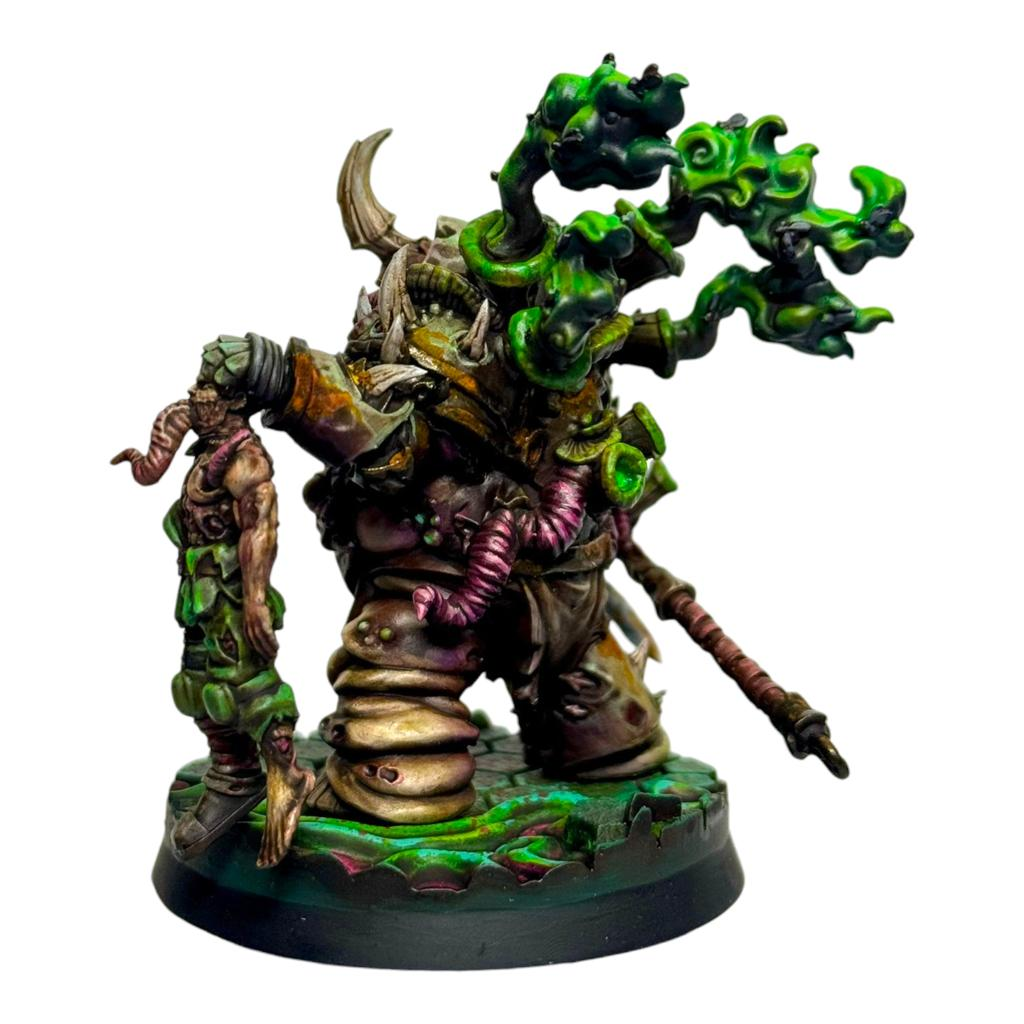
One of the biggest mistakes is using a single fluorescent green across the entire effect.
Bright paint alone does not create luminosity.
You need dark shadows beside those bright colors.
Another mistake is highlighting slime exactly like a solid object.
Liquid reflections are often sharper, smaller, and more irregular.
Avoid making every drip and bubble identical.
Organic effects become more convincing when their shapes and brightness vary.
Also be careful with gloss varnish.
Gloss enhances a well-painted slime effect, but it cannot compensate for missing shadows, highlights, or color transitions underneath.
Finally, don’t spread toxic colors everywhere.
A concentrated area of bright poison usually has more impact than covering half the miniature in fluorescent green.
Final Thoughts
Painting poison and slime is primarily about creating the illusion of depth, saturation, and wetness.
Begin with deep green shadows.
Build saturated emerald and lime midtones.
Introduce yellow-green only in the brightest areas.
Finish with tiny pale yellow or white reflections.
Use irregular shapes for puddles, bubbles, and drips rather than creating perfectly uniform patterns.
For supernatural poison, push the contrast even further and introduce subtle Object Source Lighting onto nearby surfaces.
Finally, selective gloss varnish can transform your painted colors into something that genuinely appears wet.
These techniques work on poisoned weapons, monsters, zombies, demons, dungeon terrain, swamp bases, toxic mutants, alchemists, fantasy creatures, and countless other miniatures.
Once you understand the basic technique, the same principles can also be adapted to blood, saliva, magical liquids, potions, acid, and other wet effects.
Frequently Asked Questions
What colors are best for painting toxic slime?
Dark green, emerald, lime, yellow-green, pale yellow, and white create a strong classic toxic effect.
Do I need fluorescent paint?
No. Fluorescent paint can increase intensity, but ordinary acrylic colors can produce excellent slime if the contrast is strong enough.
How do I make slime look wet?
Use sharp pale reflections followed by selective gloss varnish.
Should slime be completely bright green?
No. Thick and recessed areas should remain significantly darker. The brightest colors should be concentrated around highlights, thin liquid, and glowing areas.
How do I paint toxic bubbles?
Paint them dark first, then add a brighter crescent and a tiny white reflection to create a rounded glossy appearance.
Can I paint poison on metallic weapons?
Yes. Paint the metal first and then add poison selectively along edges, grooves, and the weapon tip.
How do I make poison look like it is glowing?
Make the poison extremely bright and apply thin green glazes to nearby surfaces. Keep the poison itself brighter than the reflected light.
Should I use gloss varnish on the entire miniature?
No. Apply it selectively to wet areas. The contrast between glossy slime and matte surrounding materials makes the effect more convincing.
If you would like free D&D STL miniatures, visit our homepage and download yours now: