How to Paint Orc Skin on Miniatures (Realistic Green Skin & Muscle Guide)

Orc skin is one of the most recognizable features in fantasy miniature painting. From savage warriors and tribal chieftains to heavily armored dungeon bosses, strong green skin immediately communicates the brutal personality of the character.
But simply covering an orc with green paint often creates a flat and artificial result.
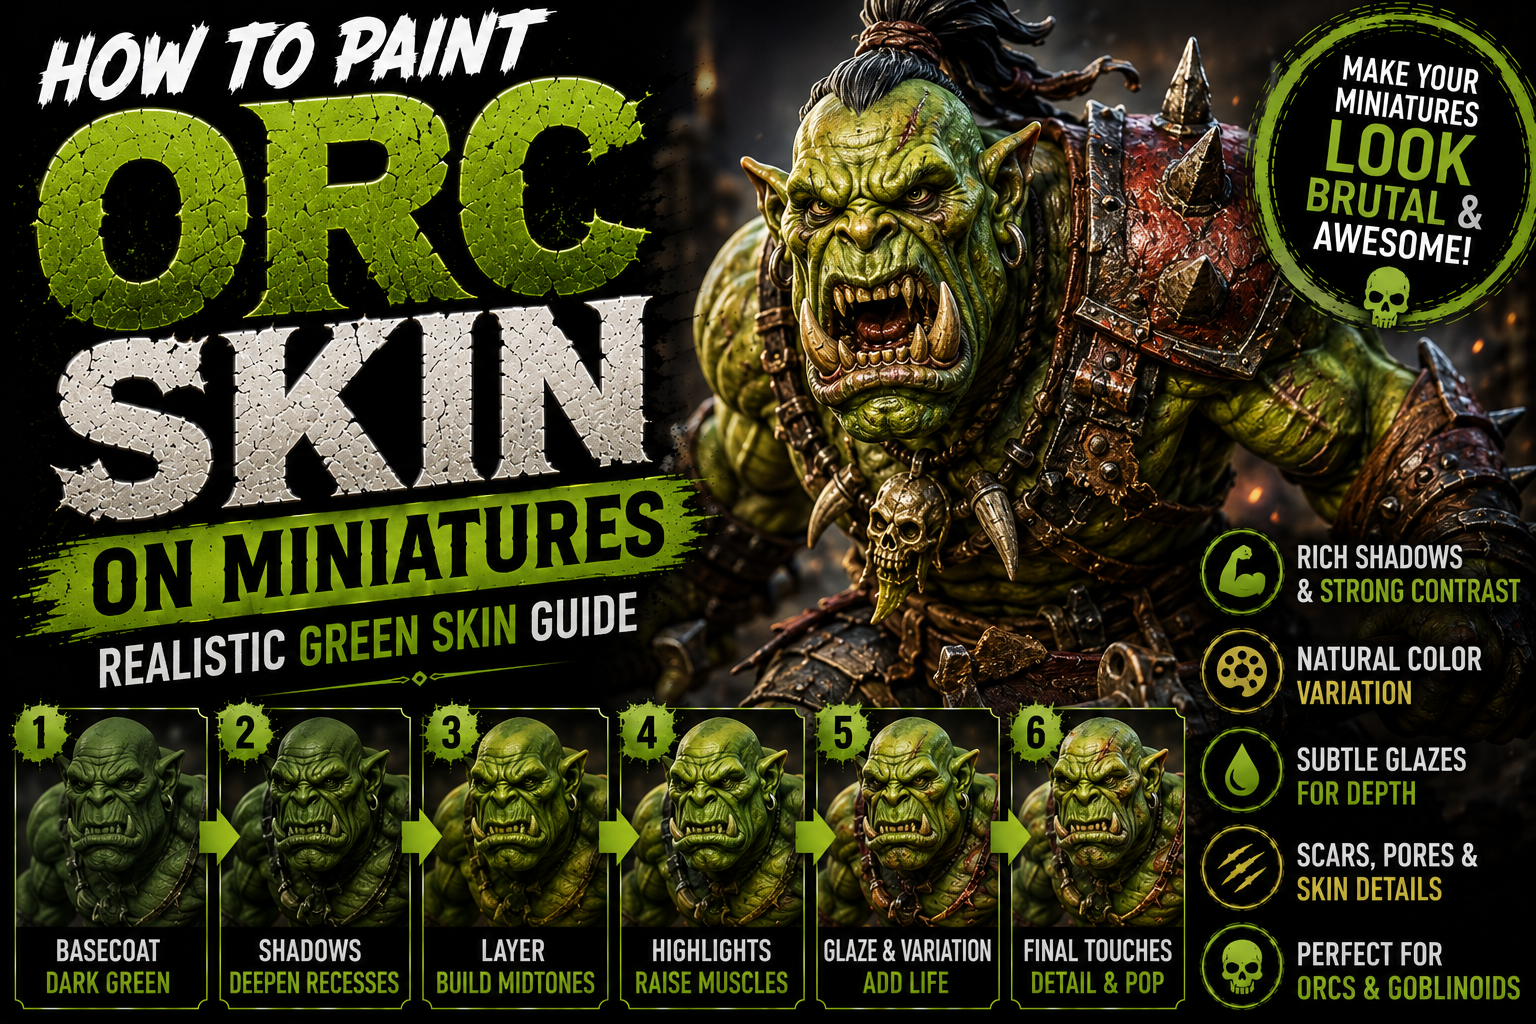
Convincing orc skin needs several colors working together. Deep green shadows establish the muscles, olive tones create natural variation, warm browns and reds add life to the skin, and carefully placed highlights define the powerful anatomy of the miniature.
In this guide, you’ll learn how to paint realistic orc skin using layering, glazing, muscle highlighting, color variation, and facial detailing.
Understanding Orc Skin

Orcs often have exaggerated anatomy.
Large shoulders, arms, muscles, hands, and facial features create plenty of opportunities for dramatic highlights and shadows.
Instead of treating the entire body as one green surface, divide it into individual volumes.
Raised muscles receive more light.
Areas beneath muscles remain darker.
Wrinkles and scars create additional shadows.
This approach makes even extremely muscular fantasy anatomy feel much more believable.
Choosing Your Orc Skin Palette

A versatile orc palette can include:
- Dark Forest Green
- Olive Green
- Medium Green
- Yellow Green
- Khaki
- Dark Brown
- Warm Beige
Avoid relying exclusively on bright green.
Olive and earthy tones make the skin appear much more natural, while yellow-green works beautifully for the final highlights.
You can also introduce small amounts of red, purple, or brown for additional variation.
Painting the Base Coat

Begin with a medium-dark olive or forest green.
Apply several thin coats until the skin has smooth, consistent coverage.
Don’t start too bright.
A darker foundation gives you plenty of room to build highlights while automatically creating deeper shadows inside the sculpted anatomy.
Keep the paint thin enough to preserve wrinkles, veins, scars, and muscle definition.
Creating Deep Skin Shadows

Dark green mixed with brown or purple creates excellent orc shadows.
Concentrate these colors around:
- Beneath the jaw
- Between muscles
- Under the arms
- Around the ribs
- Between fingers
- Inside facial wrinkles
- Around armor and straps
Avoid covering the entire miniature with an extremely dark wash.
Controlled shadows give you much more definition.
They also prevent the skin from becoming muddy.
Building the Green Midtones

Once the shadows are established, begin restoring your main green color across raised surfaces.
Gradually introduce lighter olive and green tones.
Each new layer should cover slightly less area than the previous one.
Follow the shape of the muscles rather than simply painting straight highlights.
This makes the light appear to naturally wrap around the anatomy.
Thin layers are particularly important because smooth transitions make the skin feel organic.
Adding Natural Skin Variation

Green doesn’t need to be the only color visible on your orc.
Thin glazes can introduce subtle variation.
Try adding muted red or purple around:
- Elbows
- Knuckles
- Nose
- Ears
- Lips
- Scars
Brown glazes work beautifully around rough skin and heavily weathered areas.
These additional colors make the creature feel alive rather than like a green plastic character.
Keep them subtle enough that the overall skin still reads as green.
Highlighting Orc Muscles

Muscular orcs benefit enormously from strong highlights.
Gradually mix yellow-green, khaki, or warm beige into your main green.
Focus highlights on:
- Shoulders
- Upper arms
- Chest
- Forehead
- Cheekbones
- Knuckles
- Upper thighs
Keep the brightest highlights relatively small.
This creates strong contrast while preserving the darker green underneath.
For extremely muscular characters, tiny highlights along the highest points can make individual muscles stand out dramatically.
Painting the Orc Face

The face should usually receive your strongest contrast.
Deepen the shadows around the eyes, nose, and mouth.
Then highlight the forehead, eyebrows, cheekbones, nose, and chin.
A subtle red or purple glaze around the nose and ears can add additional life.
Keep the eyes clearly defined.
Even tiny bright eyes surrounded by darker shadows can dramatically increase the character’s expression.
Painting Orc Tusks and Teeth

Large tusks are another important focal point.
Avoid painting them pure white.
Start with dark brown near the base and gradually transition through beige toward ivory at the tip.
This creates natural-looking depth.
Teeth can follow a similar process, although they should usually remain slightly darker and dirtier than the tusks.
Small brown glazes around the mouth can also help integrate the teeth with the surrounding face.
Painting Scars and Battle-Worn Skin

Orcs are perfect characters for scars.
Begin with a slightly darker red-brown or purple line.
Then place a thin lighter green or flesh-colored highlight along one side.
This creates the illusion that the scar is raised or recessed depending on its sculpted shape.
Older scars should remain subtle.
Fresh-looking scars can contain slightly stronger red or purple coloration.
Don’t cover the entire miniature with scars—just a few carefully placed details can tell an entire story.
Weathering the Orc

Orcs rarely look perfectly clean.
Subtle brown glazes around hands, feet, lower legs, and armor contact points can create accumulated dirt.
Armor can receive scratches, rust, and worn metallic edges.
Leather straps can be faded and weathered.
Combining dirty equipment with carefully painted skin creates a much more believable warrior.
Just make sure weathering doesn’t hide the highlights you’ve already created.
Common Mistakes to Avoid

Avoid these common mistakes:
- Using only one green color.
- Starting with extremely bright green.
- Using black for every shadow.
- Highlighting every muscle equally.
- Ignoring warm skin variation.
- Painting tusks pure white.
- Applying extremely heavy washes.
Orc skin becomes much more convincing when several earthy colors work together.
Final Thoughts
Painting realistic orc skin is about creating much more than a simple green surface.
Start with a darker olive or forest green, establish strong shadows, gradually build lighter midtones, and carefully highlight the raised muscles.
Then introduce subtle red, purple, and brown variation to make the skin feel organic.
Finish the character with detailed tusks, scars, facial highlights, and weathered equipment.
These techniques work beautifully on orcs, half-orcs, goblinoids, fantasy barbarians, tribal warriors, and countless D&D miniatures.
Once you begin treating green skin like real skin—with temperature changes, shadows, highlights, and imperfections—your orcs will immediately gain far more depth and personality.
Frequently Asked Questions
What’s the best base color for orc skin?
Medium-dark olive or forest green provides an excellent foundation for realistic orc skin.
Should orcs always be bright green?
No. Olive, yellow-green, brown-green, and desaturated greens often create much more believable results.
What’s the best shadow color for green skin?
Dark green mixed with brown or purple creates rich shadows without making the skin look dull.
How do I highlight orc muscles?
Gradually add yellow-green, khaki, or warm beige to your base color and concentrate the highlights on the highest parts of each muscle.
How do I make green skin look more natural?
Add subtle red, purple, and brown glazes around areas such as the nose, ears, elbows, knuckles, and scars.
What’s the biggest mistake when painting orcs?
Using a single bright green across the entire miniature without enough variation between shadows, midtones, and highlights.
If you would like free D&D STL miniatures, visit our homepage and download yours now:
https://echoartstudios.net/