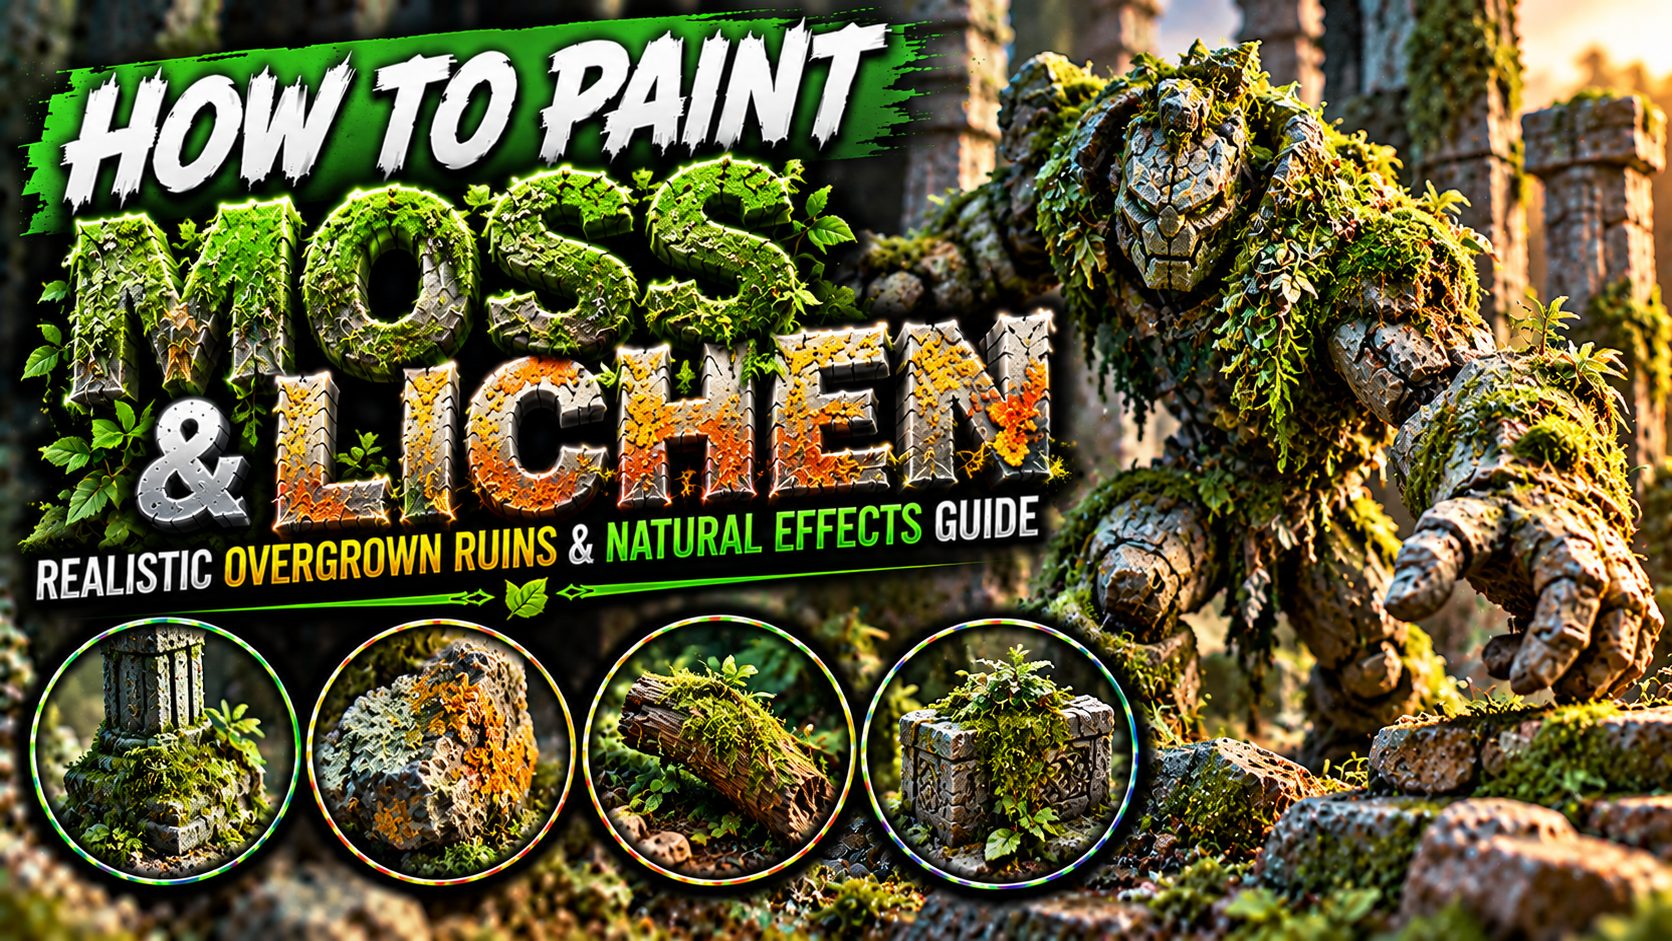
How to Paint Moss and Lichen on Miniatures (Realistic Overgrown Ruins, Forest Terrain & Weathering Guide)
Moss and lichen are some of the most effective natural details you can add to fantasy miniatures and scenic bases.
Whether you’re painting an ancient stone golem, a forgotten temple, a forest guardian, a ruined castle, or a mysterious dungeon entrance, realistic vegetation can make your miniature feel like part of a living world.
Unlike ordinary grass or large plants, moss and lichen grow directly across surfaces.
They spread through cracks, collect moisture, soften sharp edges, and gradually transform abandoned structures into overgrown environments.
These small details can communicate an enormous amount of storytelling.
A clean stone wall might look recently constructed.
The same wall covered in moss, stains, and tiny patches of lichen can appear centuries old.
However, realistic moss requires more than randomly painting green across rocks.
You need to understand natural growth patterns, texture, color variation, environmental moisture, controlled dry brushing, and how vegetation interacts with stone, wood, and ancient ruins.
In this guide, you’ll learn how to paint realistic moss, colorful lichen, overgrown stone, forest terrain, ancient ruins, moss-covered creatures, damp dungeon environments, and cinematic fantasy bases.

Understanding How Moss and Lichen Look
Moss and lichen are often grouped together in miniature painting, but they have different appearances.
Moss is a small, non-vascular plant that typically forms soft green cushions, mats, or delicate upright growth.
It often appears in moist, shaded environments.
Lichen is a partnership between a fungus and a photosynthetic organism, usually algae or cyanobacteria.
It can form flat crusts, leafy patches, or branching structures.
Lichen also appears in a wider range of colors, including pale green, grey, yellow, orange, and blue-grey.
For miniature painting, these differences are useful.
Moss creates soft, textured green growth.
Lichen introduces irregular spots and patches that break up otherwise uniform surfaces.
A convincing overgrown environment often combines both.
The most important principle is that vegetation should appear to grow naturally from the underlying material.
It should follow cracks, collect in sheltered areas, and vary in density.

Choosing the Best Moss and Lichen Color Palette
Natural moss rarely consists of one uniform bright green.
Different species, moisture levels, and lighting conditions create considerable variation.
Dark green suggests damp, shaded growth.
Olive green works well for older moss.
Yellow-green can represent fresh growth exposed to sunlight.
Brown-green creates the appearance of dry or dying vegetation.
Lichen can introduce pale grey, mint green, yellow, orange, and ivory.
| Vegetation type | Color progression |
|---|---|
| Deep forest moss | Black-Green → Dark Green → Olive → Yellow-Green |
| Fresh green moss | Dark Olive → Emerald → Leaf Green → Pale Green |
| Dry moss | Dark Brown → Olive-Brown → Khaki → Beige |
| Pale lichen | Grey-Green → Sage → Pale Grey → Ivory |
| Yellow lichen | Dark Ochre → Mustard → Yellow-Green → Pale Yellow |
| Orange lichen | Dark Brown → Terracotta → Orange → Pale Orange |
Choose colors that complement the surrounding terrain.
For grey stone, saturated green moss creates strong contrast.
For warm sandstone, olive and muted yellow-green often appear more natural.
For dark dungeon environments, deep green and blue-green can reinforce the damp atmosphere.
Avoid using only one green across the entire miniature.
Small variations create a much more convincing organic appearance.

Preparing the Miniature for Moss Effects
Before painting moss, decide where it would naturally grow.
This is one of the most important steps.
Moss commonly develops in areas that retain moisture and receive suitable light.
On miniature terrain, useful locations include cracks between stones, the base of walls, sheltered corners, tree roots, and the lower sections of ruins.
Lichen can also appear across exposed stone surfaces.
Avoid placing moss evenly across every object.
A convincing environment benefits from irregular distribution.
Start by painting the underlying material normally.
For stone, establish your shadows, midtones, and highlights.
For wood, paint the grain and weathering first.
For ancient ruins, complete the main stone colors before introducing vegetation.
This ensures that the moss looks like something growing on the surface rather than replacing the surface itself.

Painting the Dark Moss Base
Begin with a very dark green.
Black-green or dark olive works particularly well.
Use a fine brush to paint irregular patches in the selected areas.
Concentrate the color inside cracks, around stone joints, and near sheltered surfaces.
Avoid creating perfectly circular patches.
Natural moss grows in uneven shapes.
Some areas should contain dense clusters.
Others can have only a few small spots.
For larger moss-covered surfaces, use stippling to create irregular texture.
Stippling involves gently tapping the brush against the surface to create small marks.
Keep the initial layer dark.
This establishes depth and allows the brighter highlights to stand out.

Building Realistic Moss Texture
Texture is essential for convincing moss.
Unlike smooth paint, moss should appear soft and slightly irregular.
Begin with your dark green base.
Then introduce medium olive green.
Use a small brush to stipple the color across selected raised areas.
Avoid covering the entire dark foundation.
Next, introduce a brighter green.
Apply smaller marks across the most exposed portions.
Finish with a few yellow-green highlights.
The goal is to create many tiny irregular shapes rather than one smooth green patch.
For extremely small miniatures, exaggerated texture can improve readability.
For larger display bases, more subtle stippling creates a realistic appearance.

Painting Deep Forest Moss
Deep forest moss should feel damp, dense, and naturally shaded.
It works beautifully for woodland ruins, ancient statues, forest creatures, and forgotten temples.
Begin with black-green.
Introduce dark olive.
Build toward muted forest green.
Then add small yellow-green highlights.
Keep the brightest colors restrained.
Dense forest moss often appears darker than fresh grass because it grows in shaded environments.
You can introduce subtle brown into some areas.
This creates variation and prevents the moss from appearing artificially saturated.
Deep green moss looks particularly convincing against grey stone and dark weathered wood.

Painting Fresh Bright Green Moss
Fresh moss creates a vibrant, living appearance.
It works well for enchanted forests, magical groves, spring environments, and ancient ruins reclaimed by nature.
Begin with dark olive.
Introduce medium green.
Then build toward leaf green.
Add yellow-green highlights to the most exposed areas.
Keep some darker sections visible.
Bright moss should still contain shadows.
You can also introduce subtle variations using emerald and warm green.
Avoid making every patch equally bright.
A few concentrated highlights create a more natural appearance.
Fresh moss works especially well near tree roots, streams, and damp rocks.

Painting Dry and Dying Moss
Not all moss should appear bright and healthy.
Dry moss can add realism to abandoned ruins, exposed rocks, and environments experiencing seasonal changes.
Begin with dark olive-brown.
Introduce muted green.
Then add khaki.
Finish with small beige highlights.
Keep the overall palette desaturated.
You can also paint irregular brown patches within the moss.
These suggest areas that have dried out.
Dry moss is particularly useful when transitioning between forest and desert environments.
It can also make old stone surfaces appear more weathered.

Painting Pale Grey Lichen
Pale lichen is an excellent way to add age and realism to stone.
Unlike moss, many lichen forms create relatively flat patches across the surface.
Begin with muted grey-green.
Use a fine brush or small piece of sponge to create irregular spots.
Then introduce sage green.
Add pale grey highlights.
Finish selected sections with ivory.
Keep the patches uneven.
Some can be larger.
Others should be tiny dots.
Avoid creating perfectly circular patterns.
Pale lichen works beautifully on dark grey rocks, old gravestones, ancient walls, and weathered statues.

Painting Yellow and Orange Lichen
Yellow and orange lichen can create striking color variation.
These colors are especially effective on grey rocks and ancient stone structures.
For yellow lichen, begin with dark ochre.
Introduce mustard yellow.
Then add pale yellow highlights.
For orange lichen, begin with reddish-brown.
Build toward terracotta.
Add orange.
Finish with small pale orange highlights.
Apply the colors in irregular patches.
Avoid placing every color evenly across the surface.
A few small clusters can create a more convincing result than covering an entire rock.
These warm colors can also provide contrast against cool green moss.

Painting Moss Between Stone Bricks
Stone walls and pathways are ideal surfaces for moss.
Begin by painting the stones normally.
Use grey, brown-grey, or sandstone colors.
Then identify the joints between individual bricks.
Apply dark green inside selected cracks.
Avoid filling every joint.
Introduce olive green along the edges.
Then add tiny bright green highlights.
For larger gaps, you can create small moss clusters extending onto nearby stone surfaces.
This makes the growth appear more organic.
Keep the strongest vegetation in areas where moisture would naturally collect.

Painting Moss on Ancient Ruins
Ancient ruins provide excellent opportunities for environmental storytelling.
Broken columns, fallen statues, crumbling walls, and forgotten temples can all benefit from moss and lichen.
Begin with the stone colors.
Introduce dark weathering in cracks.
Then add moss near the lower sections and sheltered surfaces.
Apply lichen to selected exposed areas.
Use several green tones to create variation.
For heavily overgrown ruins, add small amounts of vegetation around the bases of columns.
Avoid covering every carved detail.
Important architectural features should remain visible.
The goal is to suggest that nature is gradually reclaiming the structure.

Creating Realistic Moss on Tree Roots
Tree roots often provide sheltered areas where moss can grow.
Begin by painting the roots with dark brown.
Introduce medium brown highlights.
Then add lighter wood tones along the raised grain.
Once the wood is complete, introduce dark green near the lower sections.
Use stippling to create irregular moss patches.
Build toward olive and yellow-green.
Keep the moss concentrated near areas where roots meet the ground.
Small patches can also appear along the upper surfaces.
Avoid covering all the wood grain.
The contrast between rough bark and soft moss creates a convincing natural texture.

Painting Moss on Fallen Logs
Fallen logs are excellent details for forest bases.
They provide a natural surface for moss, lichen, fungi, and other vegetation.
Begin with dark brown wood.
Highlight the grain using grey-brown and pale tan.
Then add dark green moss along the upper and sheltered sections.
Use irregular stippling.
Introduce olive green and small yellow-green highlights.
You can also add pale lichen patches across the bark.
For an old rotting log, introduce dark brown and grey into the wood.
This creates a weathered appearance.
Keep the vegetation uneven.
Some sections can be heavily covered while others remain exposed.

Painting Moss-Covered Stone Golems
Stone golems are among the most interesting fantasy creatures for moss effects.
Their bodies often resemble ancient statues or living rock formations.
Begin by painting the stone normally.
Use dark grey, medium grey, and pale edge highlights.
Then introduce moss into cracks between stone plates.
Concentrate the vegetation around shoulders, joints, the back, and lower sections.
Use dark green first.
Then add olive and yellow-green highlights.
You can also paint pale lichen patches on larger stone surfaces.
Avoid covering the entire creature.
The underlying stone should remain clearly visible.
This creates the impression of an ancient guardian that has remained motionless in a forest for centuries.

Painting Moss on Forest Trolls
Forest trolls can combine rough skin, rocky textures, and natural vegetation.
If the creature has sculpted stone-like skin, moss can grow between raised areas.
Begin by painting the skin normally.
Then introduce dark green in selected recesses.
Use olive green to create small moss patches.
Add yellow-green highlights.
Keep the growth concentrated around shoulders, back, and limbs.
You can also add small lichen patches to rocky protrusions.
For a creature that spends most of its time in damp forests, darker moss can create a more believable appearance.
Avoid covering important facial details.
The creature’s expression should remain readable.

Creating Moss with Texture Materials
Paint alone can create convincing moss, but physical texture materials can add additional realism.
Fine flock, miniature turf, and specialized moss products are useful options.
Begin by painting the underlying surface.
Then apply a small amount of adhesive to the selected areas.
Add the moss material carefully.
Avoid covering too much of the miniature.
For small tabletop figures, very fine flock is generally more appropriate than large fibers.
Once dry, you can introduce subtle paint highlights if necessary.
Physical texture works particularly well on large scenic bases, ruined buildings, tree trunks, and display miniatures.
However, it can be fragile.
For gaming pieces that are handled frequently, painted moss may be more durable.

Creating Damp Stone Effects
Moss often appears alongside moisture.
To make an overgrown environment convincing, paint the surrounding stone accordingly.
Begin with your normal stone colors.
Then introduce thin dark green or brown-green glazes near damp areas.
Keep the effect irregular.
Moisture can collect in cracks and lower sections.
For wet stone, introduce darker patches with slightly smoother transitions.
You can also apply selective satin or gloss varnish to create a subtle damp appearance.
Avoid making every surface glossy.
The contrast between dry stone, damp patches, and moss creates a more realistic environment.

Painting Moss in Dungeon Environments
Damp dungeons provide ideal conditions for dark moss and algae-like growth.
Use a desaturated palette.
Begin with black-green.
Introduce dark olive.
Add muted green highlights.
Keep the brightest colors restrained.
Concentrate the growth near water sources, cracks, and lower walls.
You can also introduce dark brown stains.
These suggest long-term moisture exposure.
For ancient underground ruins, combine moss with pale lichen and weathered stone.
Avoid making the environment too colorful.
A limited palette helps create a cold, damp atmosphere.

Painting Moss on Gravestones
Gravestones are excellent surfaces for moss and lichen.
Begin with dark grey stone.
Introduce medium grey highlights.
Then add pale edge highlights.
Apply dark green moss around the base and inside carved details.
Use small olive highlights.
Add pale grey-green lichen patches across selected surfaces.
Avoid covering every inscription.
The carved details should remain visible.
For an abandoned graveyard, you can introduce additional vegetation around the lower edges.
A few scattered leaves and small roots can reinforce the atmosphere.
The combination of weathered stone and natural growth creates a convincing sense of age.

Creating Overgrown Forest Bases
Forest bases can combine moss with rocks, roots, fallen leaves, and small vegetation.
Begin with dark earth.
Introduce brown and grey highlights.
Add rocks and roots.
Then apply moss to selected surfaces.
Use different green tones to create depth.
Keep some areas darker.
Add small patches of lichen to exposed rocks.
You can also introduce fallen leaves using muted brown, orange, and yellow.
Avoid covering the entire base with bright green.
A convincing forest floor contains a mixture of living vegetation, dead organic material, soil, and stone.
The miniature should remain the main focal point.

Creating Magical Glowing Moss
Fantasy environments can include supernatural moss that emits light.
This works especially well for enchanted forests, ancient magical ruins, and mysterious caves.
Begin with a dark version of your chosen magical color.
For blue glowing moss, use navy.
Build toward turquoise.
Then introduce cyan.
Finish with pale blue highlights.
For green magical moss, use dark green, emerald, lime, and pale yellow-green.
Keep the brightest areas concentrated.
You can also apply subtle Object Source Lighting to nearby stones and roots.
The moss itself should remain brighter than the reflected light.
Avoid making every patch glow equally.
A few luminous clusters create a stronger magical atmosphere.

Common Mistakes When Painting Moss and Lichen
One of the most common mistakes is painting moss as large, smooth green patches.
This can make the surface look stained rather than covered in vegetation.
Use stippling and irregular texture.
Another mistake is placing moss everywhere.
Natural growth follows environmental conditions.
Concentrate it in believable locations.
Avoid using only one green.
Introduce dark olive, muted green, and brighter highlights.
Don’t make every lichen patch perfectly circular.
Natural lichen forms irregular shapes.
Another problem is using oversized flock or texture materials.
Large fibers can destroy the illusion of scale.
Finally, avoid covering important sculpted details.
Moss should enhance the miniature’s appearance rather than hide its design.

Final Thoughts
Painting convincing moss and lichen requires natural growth patterns, irregular texture, subtle color variation, and careful integration with the surrounding environment.
Start by painting the underlying material normally.
Then identify where vegetation would naturally grow.
Apply a dark green foundation.
Use stippling to build texture.
Gradually introduce olive, medium green, and yellow-green highlights.
For lichen, experiment with pale grey-green, yellow, orange, and ivory.
Keep the shapes irregular.
Avoid distributing every color evenly.
For ancient ruins, concentrate moss around cracks, joints, and sheltered areas.
For forest bases, combine moss with roots, rocks, leaves, and weathered wood.
For stone golems and forest creatures, use vegetation to suggest age and environmental exposure.
For magical environments, introduce luminous moss and subtle Object Source Lighting.
These techniques work beautifully for forest guardians, stone golems, trolls, ancient ruins, gravestones, dungeon terrain, enchanted forests, and fantasy display bases.
The most important principle is that moss and lichen should look like living growth rather than decoration randomly painted onto a surface.
When placed thoughtfully, these small details can make a miniature feel ancient, atmospheric, and connected to a believable fantasy world.
Frequently Asked Questions
What colors should I use for realistic moss?
Black-green, dark olive, forest green, yellow-green, and muted brown create an effective natural progression.
How do I paint moss on miniature rocks?
Paint the rock normally, then stipple irregular dark green patches into cracks and sheltered areas before adding lighter green highlights.
What is the difference between painting moss and lichen?
Moss usually benefits from soft textured green growth, while lichen often appears as flatter irregular patches in grey, green, yellow, or orange.
How do I make moss look realistic?
Use irregular shapes, varied green tones, subtle texture, and believable placement based on moisture and exposure.
Can I use flock to create miniature moss?
Yes. Fine flock and specialized moss materials can create convincing texture, especially on scenic bases and terrain.
How do I paint moss on ancient ruins?
Concentrate dark green growth around cracks, lower walls, stone joints, and sheltered areas, then introduce olive and yellow-green highlights.
How do I paint glowing magical moss?
Use a dark-to-bright color progression and add subtle reflected light to nearby surfaces.
Should I use gloss varnish on moss?
Usually not. Moss generally benefits from a matte finish, although nearby wet stone can receive selective satin or gloss effects.
If you would like free D&D STL miniatures, visit our homepage and download yours now:https://echoartstudios.net/