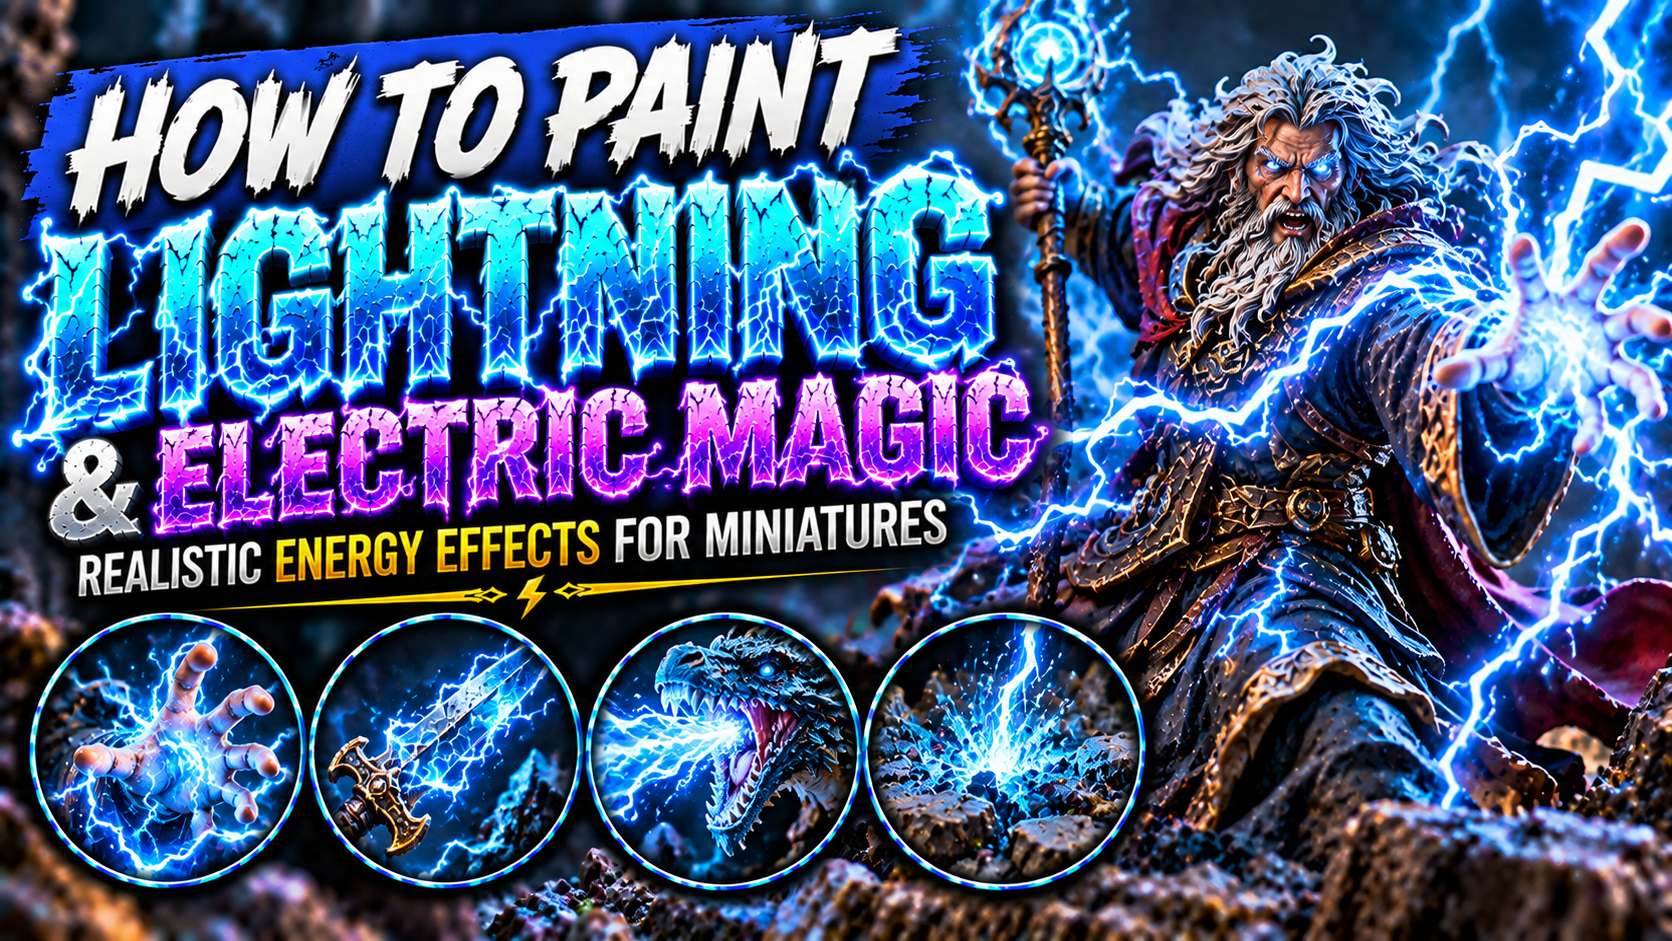
How to Paint Lightning and Electric Magic on Miniatures (Realistic Energy, Thunder & OSL Guide)
Lightning is one of the most dramatic magical effects you can paint on fantasy miniatures.
Whether you’re painting a storm sorcerer, a lightning-wielding wizard, an enchanted sword, a thunder elemental, or a powerful dragon, electric energy can instantly make your miniature look more dynamic and powerful.
Unlike ordinary materials such as leather, metal, or stone, lightning doesn’t have a solid surface. It is a brilliant, unpredictable burst of energy that illuminates everything around it.
That makes it especially interesting for miniature painters.
A convincing lightning effect requires more than painting a few blue or white lines. You need to understand contrast, branching patterns, color temperature, energy intensity, and Object Source Lighting (OSL).
In this guide, you’ll learn how to paint realistic lightning bolts, electrical arcs, glowing weapons, magical energy, storm effects, and powerful reflected lighting on fantasy miniatures.

Understanding How Lightning Looks
Lightning is an extremely bright electrical discharge.
In miniature painting, the most important characteristic to reproduce is its contrast against the surrounding environment.
The center of a powerful lightning bolt should appear much brighter than the colors surrounding it.
For blue lightning, a useful progression is:
Dark Blue → Electric Blue → Cyan → Ice Blue → White
The brightest portion is usually a thin central line.
Around that line, softer blue illumination creates the impression of glowing energy.
Lightning also has an irregular shape. It branches, changes direction, and creates smaller secondary arcs.
Perfectly straight lines rarely look convincing unless you’re deliberately painting a stylized magical effect.

Choosing the Best Lightning Color Palette
Blue and white are the most recognizable choices, but fantasy lightning can use almost any color.
Different palettes communicate different magical themes.
| Lightning type | Color progression |
|---|---|
| Arcane blue | Navy → Blue → Cyan → White |
| Purple lightning | Dark Violet → Purple → Magenta → Pale Pink |
| Necromantic green | Dark Green → Emerald → Lime → Yellow-White |
| Demonic red | Burgundy → Red → Orange → Pale Yellow |
| Golden lightning | Brown → Ochre → Yellow → Ivory |
| Celestial white | Blue-Grey → Pale Blue → White |
Whatever palette you choose, maintain a clear brightness progression.
A saturated color alone does not necessarily appear luminous.
The illusion comes from placing very bright colors against much darker surroundings.

Preparing the Miniature for Lightning Effects
Before painting electrical energy, identify where the lightning originates.
It might come from a wizard’s hand, a magical staff, an enchanted weapon, a creature’s eyes, or a sculpted spell effect.
Decide where the light is strongest.
Then consider which surfaces will receive the reflected glow.
For example, if a sorcerer holds a lightning spell in the right hand, the right side of the face, robe, chest, and arm may receive blue illumination.
The opposite side should remain relatively dark.
Paint the miniature’s normal colors first, including shadows and highlights.
This provides a foundation for the lighting effect.

Painting the Dark Energy Base
Begin with a dark version of your chosen lightning color.
For blue lightning, use navy or dark blue.
For purple, use dark violet.
For green, use black-green.
Apply the color to the sculpted energy or the area where you’ll paint the lightning.
Keep nearby surfaces darker.
This creates space for the brightest highlights.
If you’re painting lightning directly onto armor or a weapon, begin with a thin dark line outlining the electrical pattern.
The dark line helps separate the magical effect from the underlying material.

Painting the Main Lightning Bolts
Use a fine brush with a sharp point.
Start with a medium-bright version of your lightning color.
Paint irregular lines that change direction.
Avoid making every section the same length.
A convincing bolt often contains sharp directional changes.
Think of a jagged path rather than a smooth curve.
You can create a main bolt that branches into several smaller lines.
Keep the primary bolt thicker.
Secondary branches should be thinner and shorter.
Don’t distribute branches evenly.
Natural-looking lightning benefits from controlled randomness.

Adding Secondary Electrical Arcs
Smaller arcs make the effect appear more energetic.
Use a slightly lighter color to paint thin branches extending away from the main bolt.
Some branches can reconnect.
Others can disappear.
Create a few small sparks around the strongest electrical areas.
These can be tiny dots or very short lines.
Avoid filling every available space with electrical arcs.
Empty dark areas are important because they help the bright energy remain readable.
For small miniatures, three or four well-placed branches can be more effective than dozens of tiny lines.

Creating the Bright Lightning Core
The central highlight is what makes the lightning appear powerful.
After painting the main bolt, use a brighter color to paint a thinner line inside it.
For blue lightning, move from blue into cyan.
Then add pale blue.
Finally, paint an extremely thin white line through selected sections.
Don’t cover the entire original bolt.
Allow the darker blue to remain visible around the white center.
This creates the illusion of a brilliant core surrounded by electrical energy.
Place the strongest white highlights at major intersections, sharp bends, and the origin of the spell.

Painting Blue Lightning Magic
Blue lightning is especially effective for storm sorcerers, wizards, magical weapons, and elemental creatures.
Begin with dark navy.
Build toward saturated blue.
Introduce cyan along the main energy lines.
Then add ice blue.
Finish with tiny white highlights.
Keep the surrounding surfaces relatively dark.
Blue lightning becomes particularly dramatic when placed against black armor, dark robes, grey stone, or desaturated skin.
For additional realism, introduce soft blue glazes around the electrical source.
These create the impression that the energy is illuminating the surrounding material.

Painting Purple Lightning
Purple lightning creates a supernatural or psychic appearance.
Begin with black-purple.
Introduce violet.
Then build toward saturated magenta.
Use pale pink or lavender for the brightest surrounding energy.
Finish selected sections with white.
You can introduce a small amount of blue in the darker portions to create more visual complexity.
Purple lightning works especially well for eldritch creatures, psychic monsters, corrupted sorcerers, and dimensional magic.
Keep the surrounding reflections softer than the central bolt.

Painting Green and Necromantic Lightning
Green lightning can suggest toxic energy, necromancy, corrupted magic, or supernatural electricity.
Start with dark green.
Build toward emerald.
Introduce lime green.
Then add yellow-green.
Finish with a very pale yellow or white.
The brightest areas should remain small.
Green light looks especially effective against dark stone, black armor, skeletal creatures, and undead monsters.
You can also paint faint green reflections on nearby bones, weapons, and clothing.
This helps the magical effect feel integrated with the miniature.

Painting Lightning on Magical Weapons
Lightning-covered swords, axes, hammers, and spears are excellent opportunities for energy effects.
First, paint the weapon normally.
For metal, establish your shadows and highlights.
Then sketch irregular lightning lines across the blade or weapon head.
Use a dark saturated color first.
Add brighter lines inside the pattern.
Finish with small white highlights.
The lightning can follow the length of the blade or branch across its surface.
For a powerful enchanted weapon, add a soft colored glaze to nearby parts of the hilt, hand, and armor.
This makes the magic appear to radiate beyond the weapon itself.

Painting Lightning Around a Wizard’s Hands
Lightning spells become particularly convincing when the energy appears to originate from the character.
Paint the main spell effect first.
Then apply reflected light to the fingers and palm.
The closest surfaces should receive the strongest illumination.
For blue lightning, use blue glazes across the hand.
Then introduce small cyan highlights along the knuckles and fingertips.
If the spell is extremely bright, add tiny pale blue reflections.
The arm and nearby clothing can receive weaker illumination.
Keep the light directional.
The back of the hand should not receive the same brightness as the palm facing the spell.

Creating Object Source Lighting from Lightning
Object Source Lighting is one of the most important techniques for convincing magical electricity.
The idea is simple: the lightning acts as a light source.
Nearby surfaces reflect its color.
Imagine a glowing blue electrical arc between a wizard’s hands.
The fingers might receive strong cyan illumination.
The face could receive a softer blue reflection.
The chest and robes may receive even weaker blue light.
Surfaces facing away from the lightning should remain dark.
Start with thin glazes.
Build the color gradually.
Avoid immediately painting nearby surfaces bright cyan.
The light should become weaker with distance.
Most importantly, the lightning itself must remain brighter than everything it illuminates.

Painting Lightning on Armor
Electrical energy can travel across magical armor, mechanical constructs, and elemental creatures.
Begin with the armor’s normal colors.
Then choose where the electrical patterns will appear.
Paint irregular branching lines across selected plates.
Use a dark version of the energy color underneath.
Build toward brighter colors.
Add a thin pale core.
You can also paint small reflected highlights around the lines.
For dark armor, electric blue creates especially strong contrast.
For golden armor, purple lightning can produce an interesting complementary color scheme.
Avoid covering every plate with the same amount of electricity.
Concentrate the strongest effects around important areas.

Painting Storm Elementals
Storm elementals provide an opportunity to combine lightning with clouds, mist, and supernatural energy.
Start with dark blue-grey.
Build toward lighter grey and blue across the raised cloud-like surfaces.
Keep deep recesses dark.
Then introduce lightning between the swirling shapes.
Use bright blue, cyan, and white.
The lightning should appear significantly brighter than the surrounding storm clouds.
Apply subtle blue reflections onto nearby cloud surfaces.
For an especially dramatic result, concentrate the brightest electricity around the creature’s head, chest, or hands.

Painting Lightning Dragons
Lightning dragons can combine reptilian textures with powerful electrical effects.
Paint the dragon’s scales normally first.
Then decide where the electricity originates.
It might gather around the mouth, horns, claws, or wings.
Add bright electrical lines around these areas.
For a blue dragon, pale cyan and white can provide strong highlights.
For a dark dragon, saturated blue lightning creates dramatic contrast.
If the creature is breathing lightning, the mouth should receive intense illumination.
Nearby teeth, scales, and the tongue can reflect the energy color.
The brightest point should remain near the source of the electrical breath.

Creating Lightning Strikes on Miniature Bases
Lightning can also interact with the environment.
A bolt striking the ground should create a focal point.
Paint the impact area using a bright version of the energy color.
Add small branching lines spreading across the surface.
Introduce darker cracks in the stone or earth.
Then place bright highlights inside selected cracks.
You can add dust, broken rocks, or small pieces of debris around the impact point.
For a particularly powerful magical strike, paint reflected light across nearby stones and terrain.
The impact should feel connected to the environment rather than simply placed on top of it.

Creating Physical Lightning Effects
Painted lightning can be combined with sculpted effects for a more dramatic result.
Thin wire, transparent resin pieces, or purpose-made spell effects can represent electrical arcs.
Paint these structures using your chosen color progression.
Keep the outer areas darker.
Introduce brighter colors along the exposed edges.
Finish with white highlights at selected points.
When using physical lightning pieces, consider the direction of the energy.
Arcs should connect meaningful locations, such as a wizard’s hand and an enemy, or a magical staff and the ground.
Avoid placing too many separate pieces around a small miniature.
The silhouette should remain readable.

Painting Electrical Sparks
Sparks add movement and intensity to a lightning effect.
Paint small dots and short lines around the main electrical source.
Use saturated blue, cyan, or another color from your chosen palette.
Add a few white points.
Keep most sparks smaller and dimmer than the main lightning.
Vary their placement.
Some can appear close to the bolt.
Others can extend farther outward.
Don’t distribute them in a perfect circle.
A few irregular clusters create a more convincing sense of chaotic electrical energy.

Combining Lightning with Weather Effects
Lightning becomes even more dramatic when combined with stormy environments.
Dark clouds, rain, wet rocks, and wind-blown clothing can all reinforce the effect.
Use blue-grey and charcoal colors for storm clouds.
Paint wet surfaces darker than dry areas.
Add selective gloss to rain-soaked rocks or armor.
If lightning illuminates the environment, introduce blue-white highlights on exposed surfaces.
Keep the scene relatively dark.
The lightning should dominate the composition.
This approach works beautifully for large display miniatures, storm dragons, elemental monsters, and cinematic fantasy dioramas.

Common Mistakes When Painting Lightning
One of the most common mistakes is painting the lightning entirely white.
Without surrounding saturated colors, the effect loses much of its visual depth.
Another mistake is making the lines too thick.
Thin, irregular bolts generally look more convincing.
Avoid perfectly symmetrical branches.
Lightning should feel unpredictable.
Don’t make every surrounding surface equally bright.
OSL needs to follow the direction and distance of the light source.
Another problem is overusing bright colors.
If the entire miniature is covered in cyan, purple, or green, the electrical effect loses its importance.
Preserve dark areas.
Finally, remember to keep the energy source brighter than its reflections.
This is essential for convincing magical illumination.

Final Thoughts
Painting convincing lightning requires a combination of extreme contrast, irregular energy patterns, bright central highlights, and carefully controlled OSL.
Start with a dark foundation.
Choose a saturated magical color.
Paint the main lightning using jagged lines.
Add smaller branches and sparks.
Gradually build toward a very thin, nearly white center.
Then allow the surrounding miniature to react to the light.
Hands, faces, robes, weapons, armor, and terrain should receive reflections based on their distance and orientation.
Blue lightning works beautifully for traditional arcane and storm magic.
Purple creates a supernatural atmosphere.
Green suggests necromantic or corrupted electricity.
Red and gold can communicate demonic or celestial energy.
These techniques work especially well for storm sorcerers, wizards, thunder elementals, lightning dragons, enchanted weapons, magical constructs, and fantasy battlefield effects.
The secret is not simply making the lightning bright.
It’s making the surrounding miniature dark enough—and the reflections believable enough—that the lightning appears to illuminate the entire scene.
Frequently Asked Questions
What colors should I use for blue lightning?
Dark navy, electric blue, cyan, pale blue, and white create an effective progression.
How do I make miniature lightning look like it’s glowing?
Use a very bright central line surrounded by saturated colors, then apply reflected light to nearby surfaces.
Should lightning be painted pure white?
Only the brightest portions should be pure white. Most of the bolt should contain saturated colors and intermediate highlights.
How do I paint realistic lightning branches?
Use irregular jagged lines with smaller branches extending from the main bolt. Vary their length and direction.
How do I paint lightning on a sword?
Paint the weapon normally, add branching electrical lines, highlight their centers, and apply subtle reflected light to the blade and hilt.
How do I paint lightning OSL?
Apply thin glazes of the lightning color to nearby surfaces, keeping the strongest reflections closest to the source.
What is the best lightning color for fantasy miniatures?
Blue and cyan are versatile choices, but purple, green, red, and gold can all create impressive magical effects.
How do I paint lightning on a storm elemental?
Paint the cloud-like body using dark blue-grey tones, then add bright electrical arcs between the forms and reflect the light onto nearby surfaces.
If you would like free D&D STL miniatures, visit our homepage and download yours now: