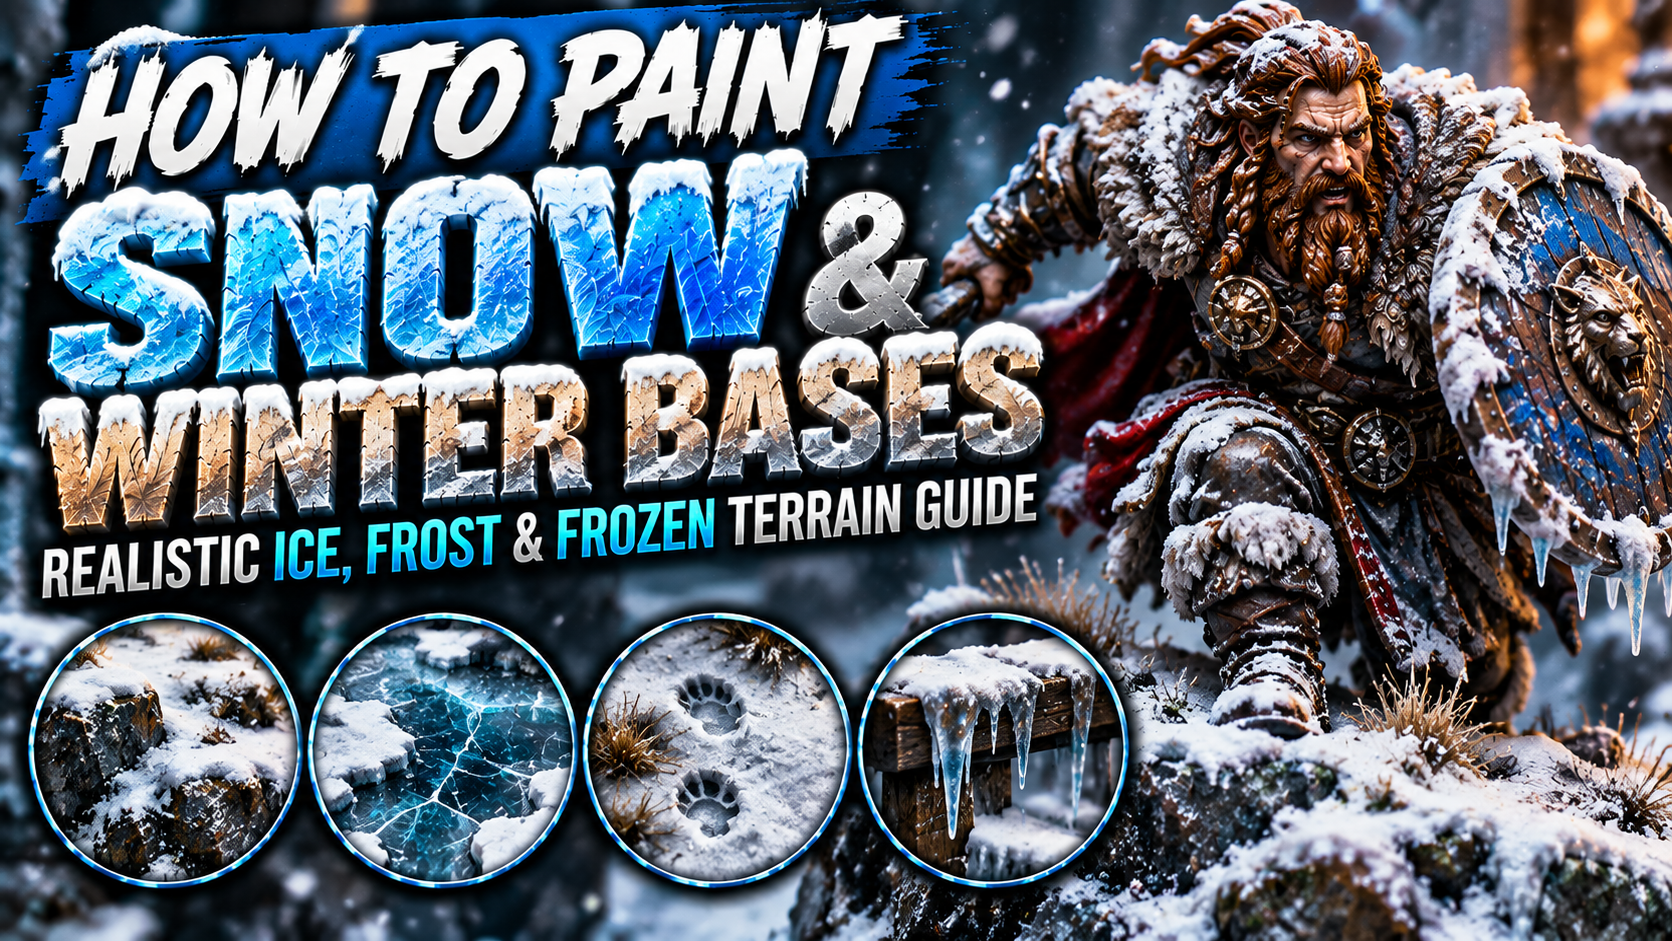
How to Paint Snow and Winter Bases for Miniatures (Realistic Ice, Frost & Frozen Terrain Guide)
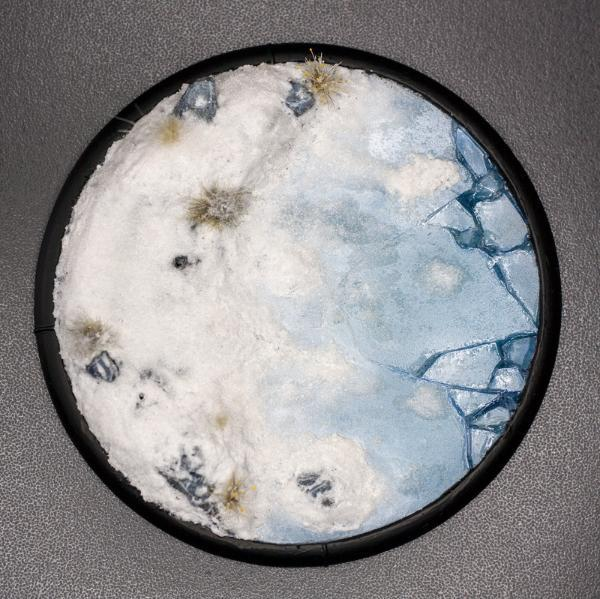
Snow-covered bases can completely change the atmosphere of a fantasy miniature.
A warrior standing on ordinary brown dirt tells one story. Put that same warrior on frozen ground surrounded by snow, ice, and frost, and suddenly the miniature feels like it belongs in a dangerous northern wilderness.
Winter bases work especially well with frost giants, barbarians, undead warriors, wolves, dragons, dwarves, adventurers, monsters, and almost any character from a cold fantasy environment.
The challenge is that realistic snow is not simply white texture pasted onto a base.
Natural snow contains shadows, different depths, partially melted areas, exposed rocks, ice, dirt, footprints, and subtle variations in color. Ice behaves differently again, requiring sharper reflections and stronger contrast.
In this guide, you’ll learn how to paint realistic snow, frozen ground, ice, frost, icicles, footprints, winter rocks, and atmospheric frozen bases for fantasy miniatures.
Planning a Winter Miniature Base
Before applying snow, decide what kind of winter environment you’re creating.
Fresh snowfall looks very different from an old battlefield covered in dirty snow.
A frozen mountain might contain large rocks, thin snow coverage, and exposed ice.
A deep winter forest could contain snow-covered logs, vegetation, mud, and footprints.
An enchanted frozen dungeon might contain blue ice, magical crystals, and unnatural frost.
Planning these details first prevents the base from becoming one flat white surface.
A convincing winter base usually contains at least two or three materials.
For example:
Snow + Rock + Ice
or:
Snow + Mud + Dead Vegetation
This variety makes the environment much more believable.
Painting the Ground Before Adding Snow
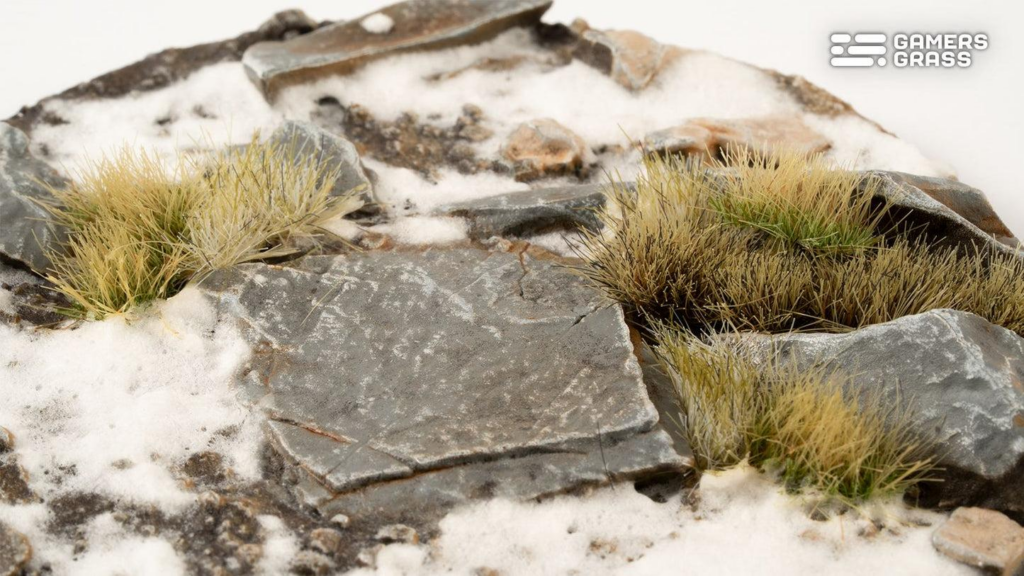
Always paint the terrain underneath the snow first.
Even if most of it will eventually be covered, small exposed sections help sell the illusion.
For frozen earth, begin with dark brown or brown-grey.
Introduce patches of grey, beige, and muted blue.
For rocky terrain, use dark grey followed by progressively lighter dry brushing.
Keep the overall colors relatively muted.
Bright warm earth can sometimes conflict with the cold atmosphere you’re trying to create.
You can introduce blue-grey into shadows to visually cool the environment.
Paint everything completely before applying snow materials.
Trying to paint around finished snow later is much more difficult.
Creating Realistic Snow Coverage
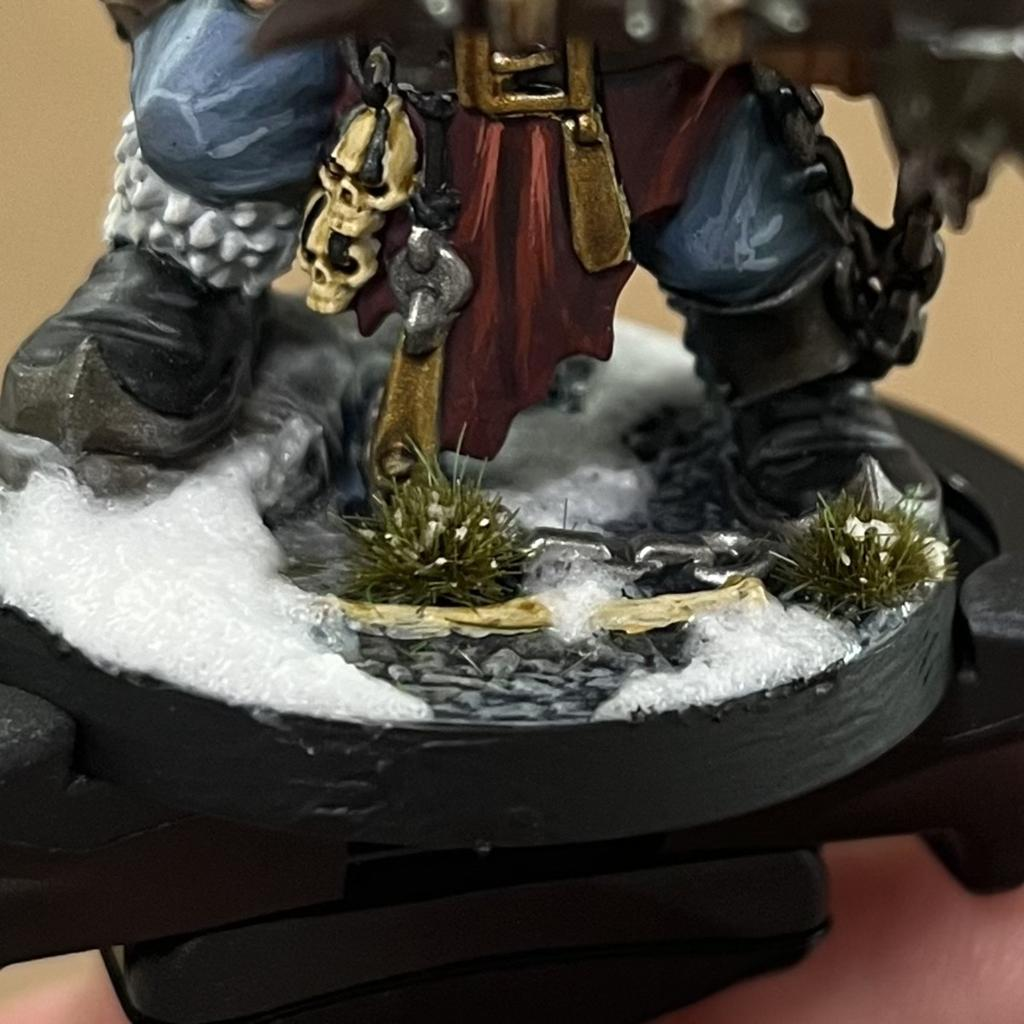
Snow should accumulate naturally.
Think about where gravity and wind would deposit it.
Flat surfaces can hold thick layers.
Small recesses can collect snow.
Vertical surfaces should contain much less.
Don’t cover every part of the base equally.
Allow exposed ground, rocks, roots, and debris to remain visible.
This immediately makes the snow feel more realistic.
You can create several depths as well.
Some areas might have only a thin dusting while others contain deeper piles.
The transitions between exposed terrain and snow should be irregular.
Perfect circular patches usually look artificial.
Shading Snow Without Making It Look Dirty
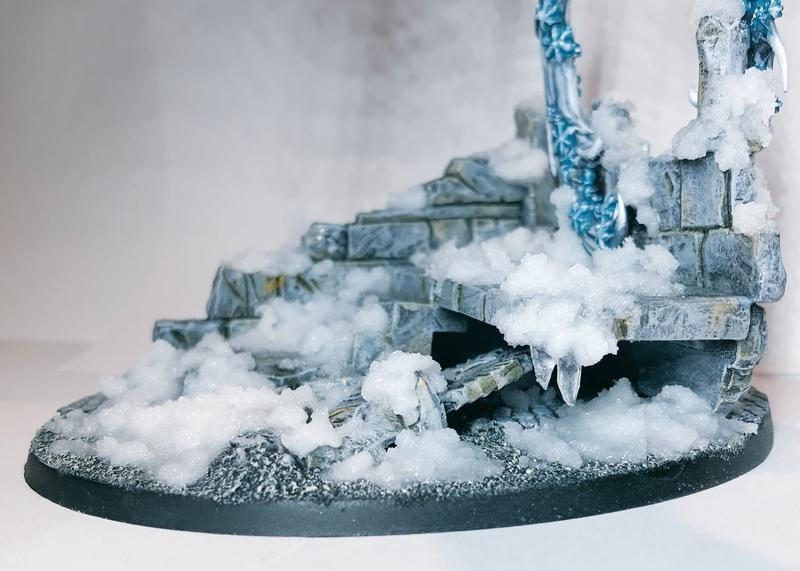
One of the biggest challenges with snow is creating depth while keeping it visually white.
If everything is pure white, sculpted texture disappears.
Instead, use extremely pale blue-grey in recessed areas.
A small amount of cold grey can also work.
Then build toward off-white and finally pure white on the highest areas.
The viewer will still perceive the entire surface as white snow.
Avoid using heavy black or dark grey washes.
These can make the snow look dirty rather than naturally shadowed.
Thin, controlled glazes are much safer.
Keep the strongest blue-grey shadows underneath deep snowbanks and around objects emerging from the snow.
Creating Fresh Powder Snow
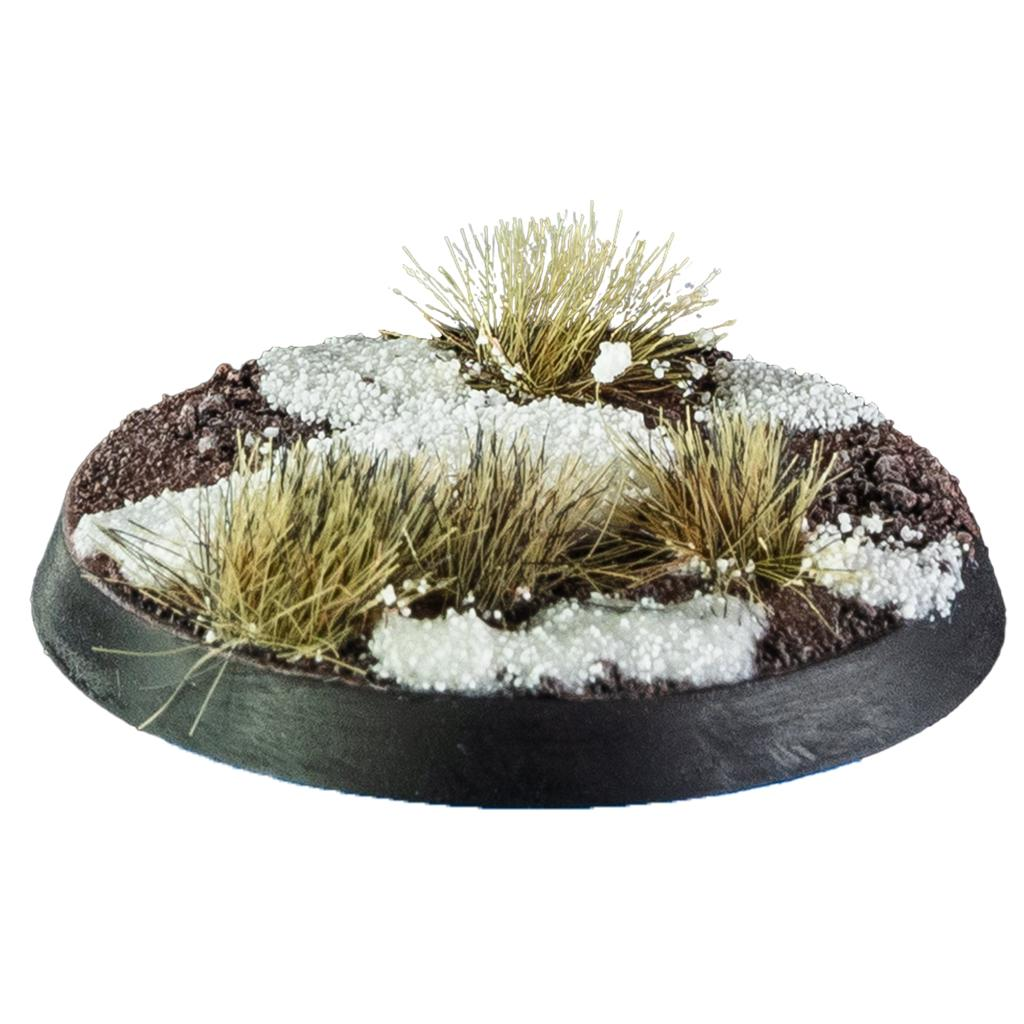
Fresh powder should look soft, bright, and relatively clean.
Use a fine snow texture rather than extremely coarse material.
Build small piles around rocks, boots, logs, and terrain features.
Keep the upper surface bright white.
Introduce only minimal blue-grey shading underneath deeper sections.
Fresh snow can also partially cover objects.
A rock shouldn’t simply sit beside the snow.
Allow small amounts of snow to accumulate on top of it.
This visually connects every element to the same environment.
Fresh powder works especially well for clean winter scenes, snowy forests, and recently frozen landscapes.
Painting Old and Dirty Snow
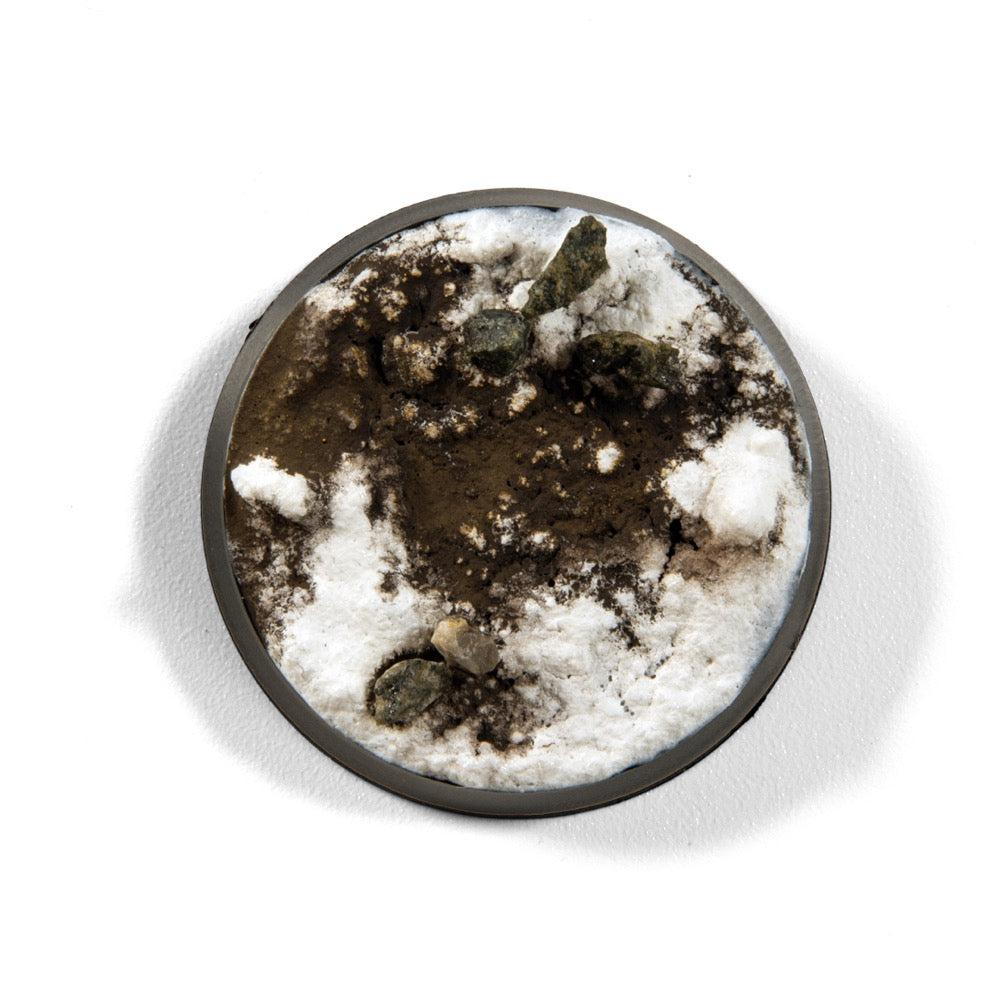
Not every snowy environment should look pristine.
Battlefields, roads, villages, and frequently traveled areas quickly develop dirty snow.
Begin with your normal white snow.
Then introduce very thin beige, grey, and brown discoloration near the ground.
Concentrate dirt around footprints, roads, wheels, debris, and areas where the snow has partially melted.
Don’t turn the entire surface brown.
The contrast between clean white snow and dirty patches is what makes the effect believable.
You can also reveal dark earth underneath selected areas.
This works particularly well around the miniature’s feet.
Painting Frozen Rocks
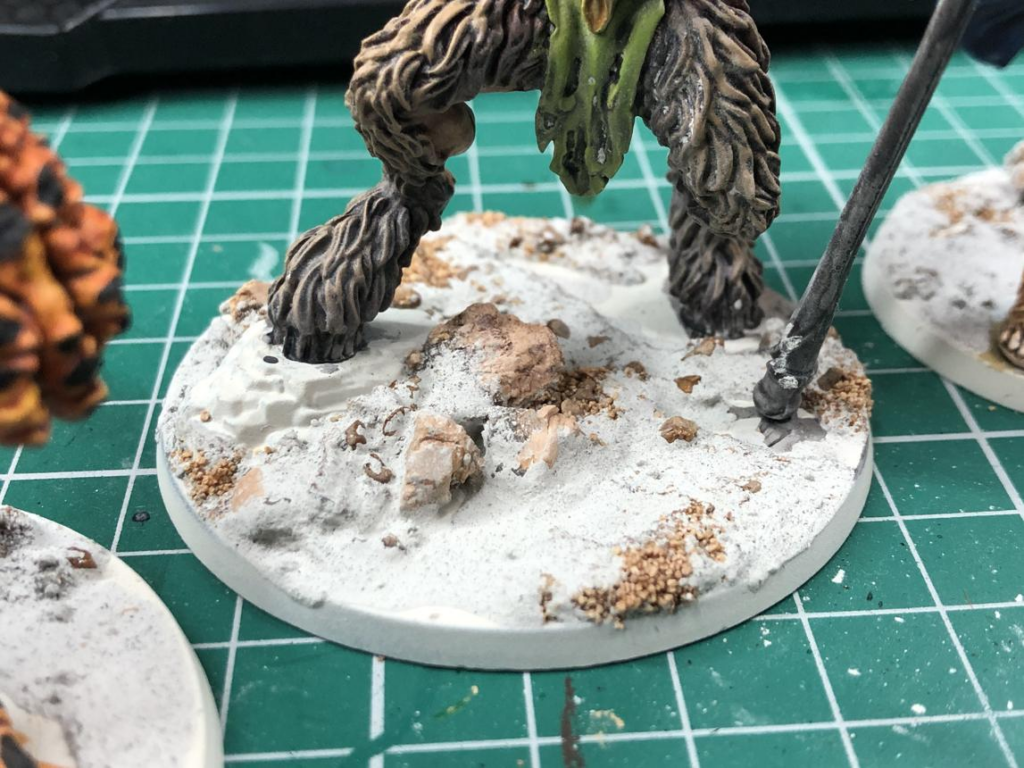
Rocks provide excellent contrast against white snow.
Begin with dark grey or blue-grey.
Dry brush progressively lighter greys across raised surfaces.
Then introduce subtle blue glazes into some shadows.
Snow can accumulate on the upward-facing portions of each rock.
Keep vertical faces mostly exposed.
This immediately communicates how the snow settled naturally.
You can also add tiny frost highlights along exposed edges.
For extremely cold environments, pale blue-grey along cracks creates the impression of frozen moisture.
Avoid making every rock identical.
Slight variation in grey, brown, and blue makes the terrain more natural.
Painting Frozen Puddles and Ice
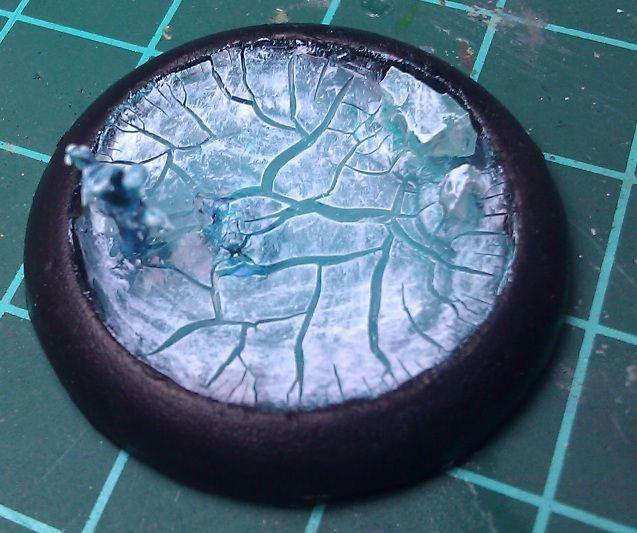
Ice adds another material to the base and prevents the environment from becoming visually repetitive.
Begin with a dark blue-grey surface.
Introduce lighter blue toward selected areas.
You can also include turquoise or green-blue if the ice is thick.
Paint thin irregular cracks across the surface.
Use pale blue first.
Then add a very thin white highlight to selected sections.
The cracks should branch and change direction.
Avoid creating perfectly straight lines.
Finally, gloss varnish can make the frozen surface appear reflective.
The contrast between matte snow and glossy ice is extremely effective.
Painting Ice Cracks
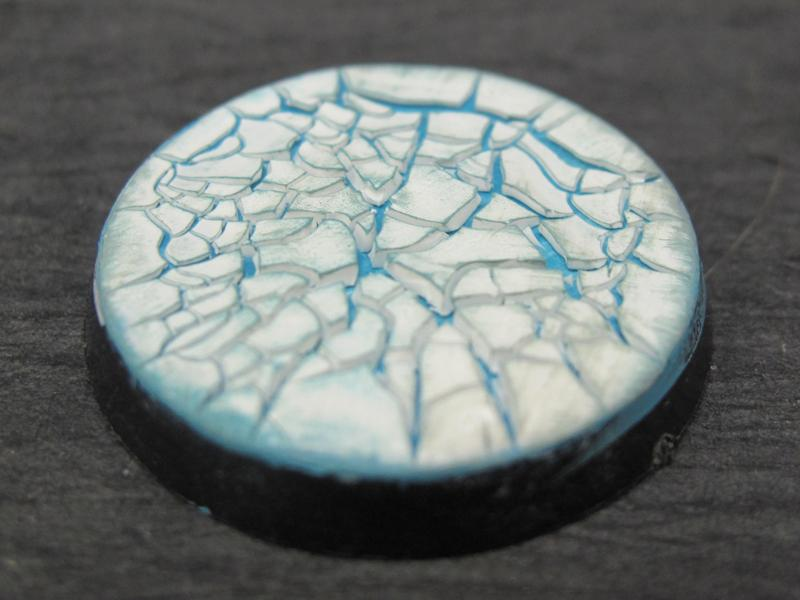
Cracks create the illusion that you’re looking through a frozen surface.
Start with a thin dark blue or blue-grey line.
Branch the crack into smaller sections.
Then paint a thinner pale blue or white line beside selected portions.
This creates depth.
Some cracks can remain subtle.
Others can become brighter.
Avoid creating one giant symmetrical spiderweb unless the story specifically requires an impact point.
Natural ice tends to contain irregular networks.
You can also place darker colors underneath selected cracks to suggest deeper frozen water.
Creating Frost on Miniatures
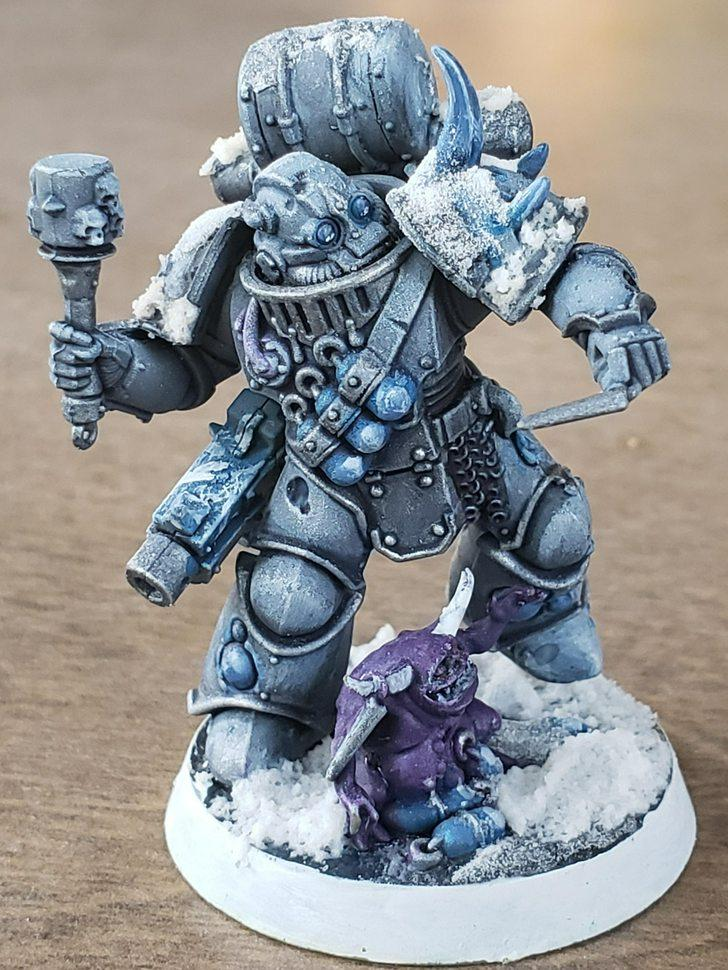
Frost doesn’t need to remain exclusively on the base.
Adding a small amount to the miniature itself can connect the character to the environment.
Apply pale blue-grey to selected edges of boots, armor, shields, weapons, or clothing.
Then stipple small amounts of off-white.
Finish with tiny white highlights.
Keep the effect strongest near the lower portions of the miniature or areas directly exposed to freezing conditions.
Don’t cover everything.
A subtle amount of frost usually creates a stronger result than making the entire character white.
Painting Icicles
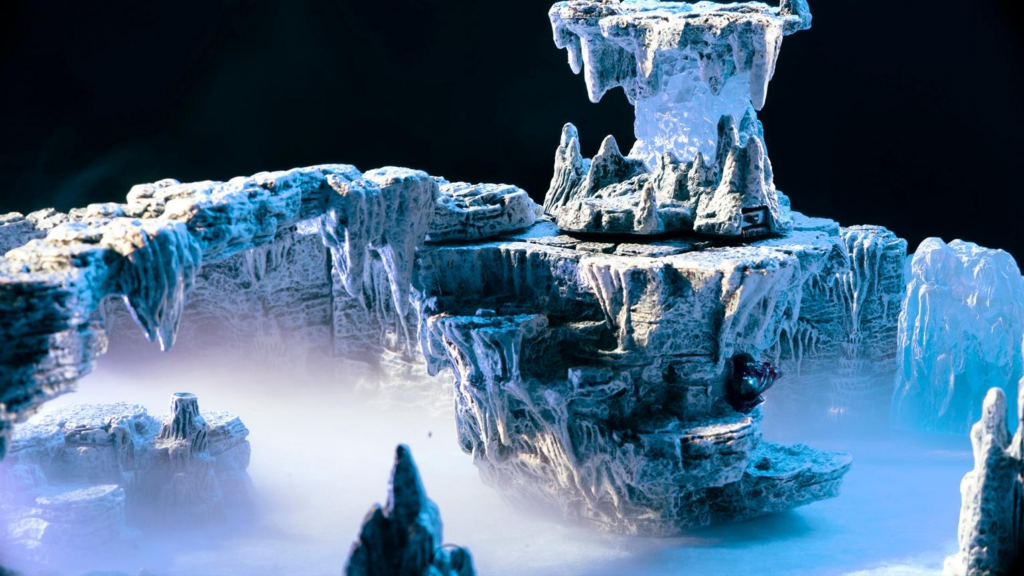
Icicles are excellent additions to winter terrain, frozen monsters, and ruined structures.
If the icicles are opaque, begin with pale blue.
Shade the thicker attachment point slightly darker.
Gradually transition toward pale blue and white near the edges and tip.
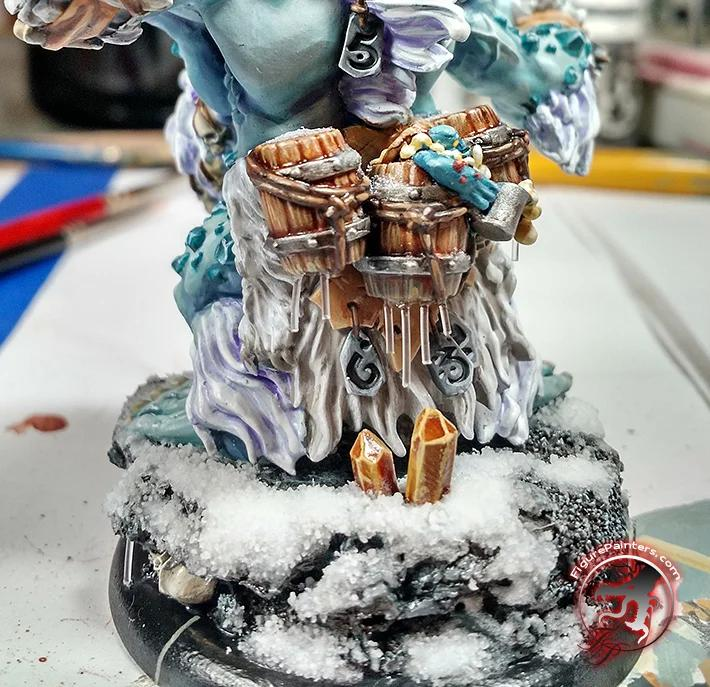
If you’re using transparent resin icicles, preserve much of the transparency.
Apply only subtle blue glazes around thicker areas.
A small amount of gloss varnish can increase the frozen appearance.
Keep icicle lengths irregular.
Several identical icicles lined up perfectly will look artificial.
Creating Footprints in Snow
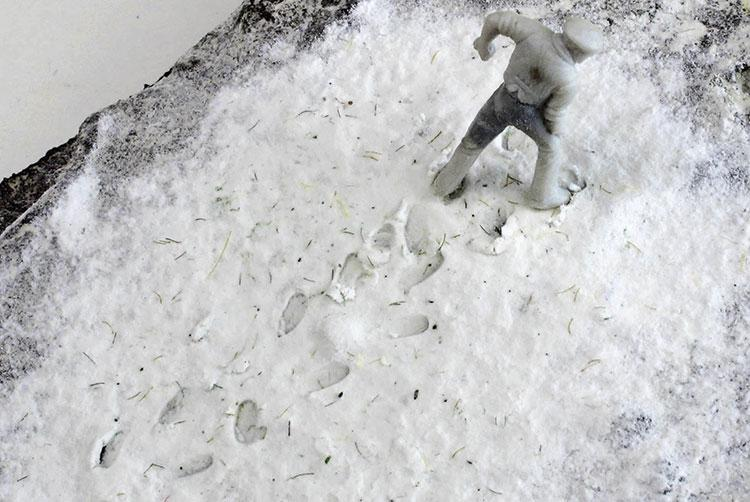
Footprints immediately add storytelling.
A clean snow base shows the environment.
Footprints show that something has moved through it.
Press footprints into the snow material while it is still workable or sculpt them into the base before painting.
Keep the interior slightly darker.
Blue-grey or dirty beige can work depending on the environment.
Around heavily traveled areas, expose some of the darker ground underneath.
You can also create monster tracks, paw prints, dragged objects, or wheel marks.
Make sure the tracks have a logical direction.
They should lead somewhere.
This simple detail can make even a small base feel like part of a much larger scene.
Adding Dead Winter Vegetation
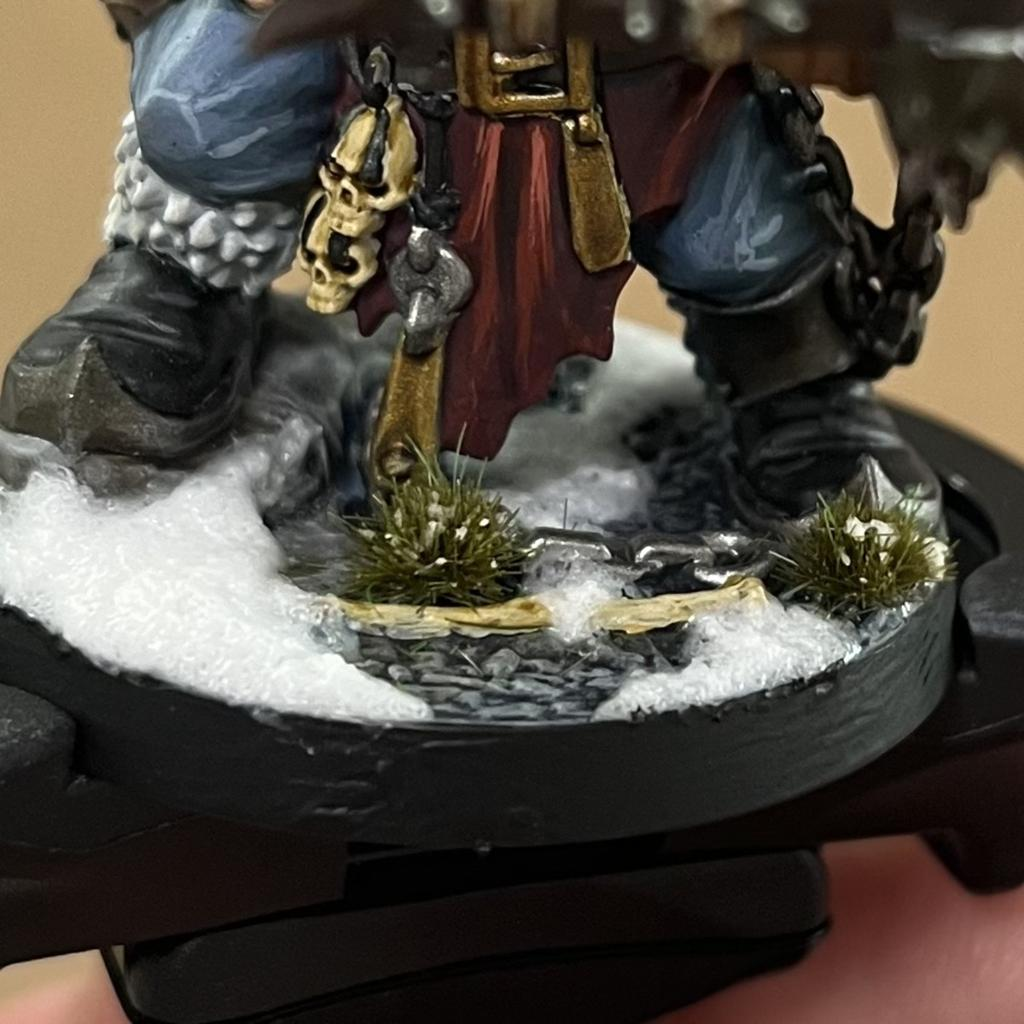
Vegetation prevents winter bases from becoming nothing but white and grey.
Use dead grass, small roots, branches, or tiny shrubs.
Keep the colors muted.
Beige, tan, dark brown, and grey-brown work particularly well.
Add small amounts of snow to the upper surfaces.
The lower sections can disappear partially underneath deeper snow.
Avoid using vibrant summer greens unless you intentionally want evergreen vegetation.
Even then, reduce the saturation slightly to match the cold environment.
Small plants provide useful vertical detail without distracting from the miniature.
Creating a Frozen Battlefield
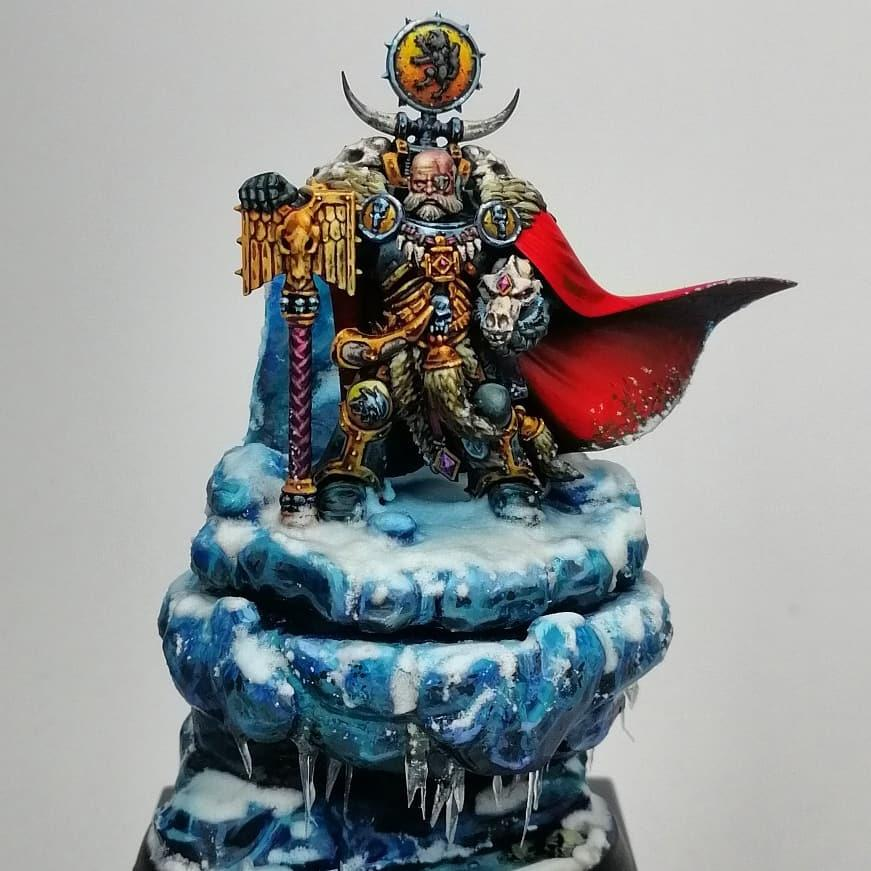
A frozen battlefield allows you to combine many winter effects.
Start with dark earth and rock.
Add irregular snow coverage.
Introduce dirty areas around heavily traveled sections.
Broken weapons, shields, arrows, bones, or abandoned equipment can partially disappear beneath the snow.
Add frozen puddles and subtle bloodstains if appropriate to the scene.
The important part is integration.
Snow should accumulate on battlefield debris rather than simply surrounding it.
A broken shield lying in the snow should have white deposits across its upward-facing surfaces.
This makes every object feel like it has existed in the same environment.
Creating Magical Frozen Terrain
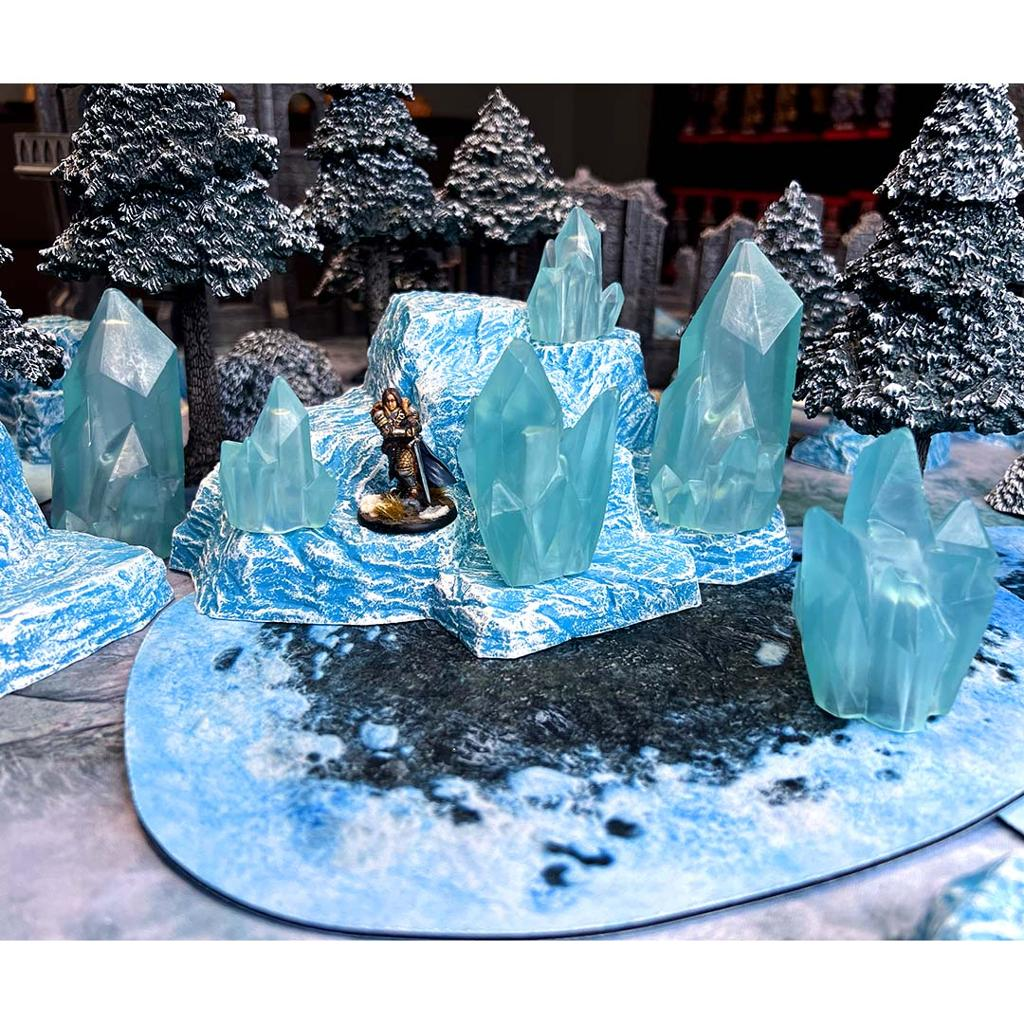
Fantasy winter environments don’t need to follow reality completely.
You can introduce glowing blue crystals, magical ice, frozen runes, or supernatural frost.
Use more saturated cyan and turquoise than you would for ordinary ice.
Place extremely bright pale blue or white near magical areas.
Then apply thin blue glazes onto nearby rocks and snow.
This creates Object Source Lighting.
Keep the magical source brighter than the surrounding reflections.
A few controlled blue reflections can transform an ordinary snow base into an enchanted frozen landscape.
Making Snow Look Wet or Partially Melted
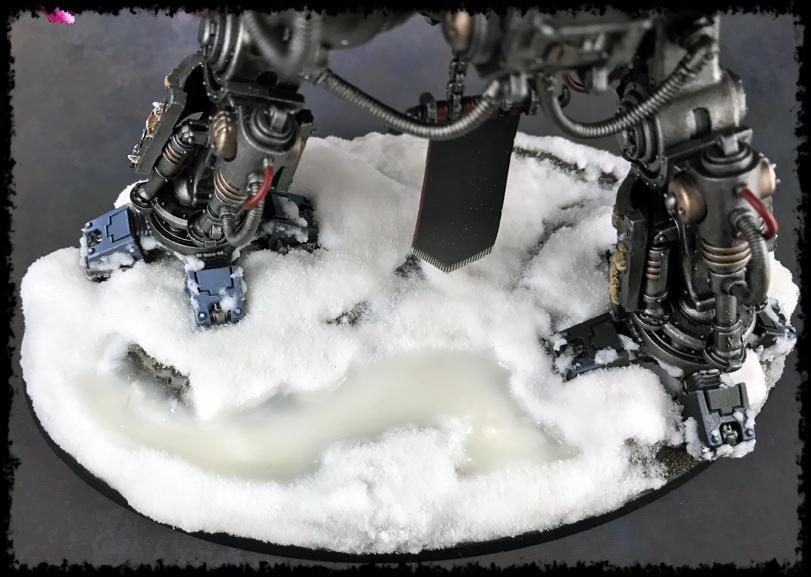
Snow near warmer objects can begin melting.
This creates an opportunity to introduce another layer of realism.
Reduce the amount of snow around torches, lava, campfires, warm machinery, or recently traveled ground.
Expose darker wet earth underneath.
Apply gloss varnish to selected areas.
This creates the appearance of moisture.
The remaining snow can become slightly darker and dirtier near the melting zone.
Don’t make the transition perfectly circular.
Heat, terrain, and water movement create irregular boundaries.
Common Mistakes When Painting Snow Bases
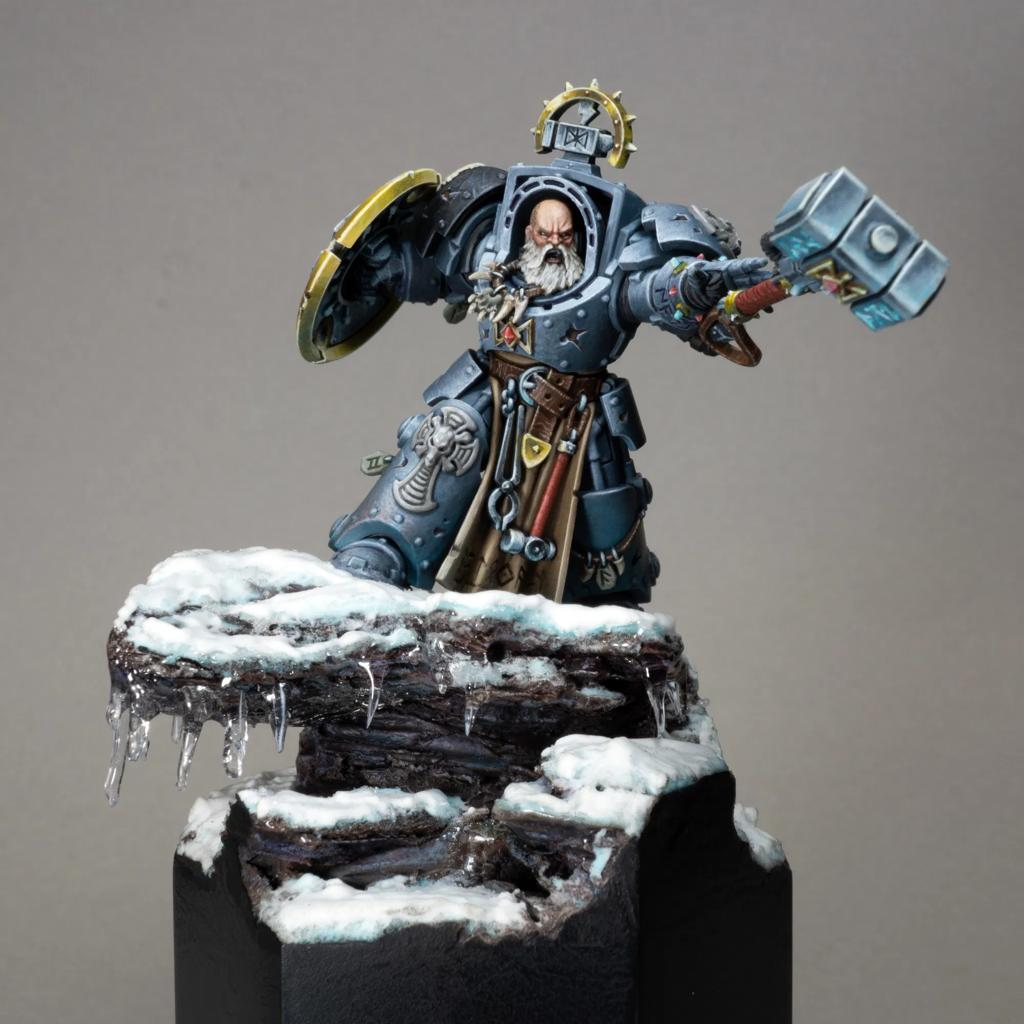
The most common mistake is covering the entire base with identical white snow.
Real environments contain variation.
Leave some terrain visible.
Another mistake is using dark washes directly across white snow.
This can make it appear dirty very quickly.
Use pale blue-grey shadows instead.
Avoid placing snow equally on every surface.
It should accumulate primarily on upward-facing areas.
Don’t forget material contrast either.
Matte snow beside glossy ice immediately makes both materials easier to recognize.
Finally, make sure the base matches the miniature.
A heavily snow-covered environment looks much more convincing when the character’s boots and lower clothing contain at least subtle traces of frost, moisture, or snow.
Final Thoughts
A convincing winter base is about much more than simply adding white texture.
Think about snow depth, exposed terrain, temperature, moisture, and environmental storytelling.
Paint the ground underneath first.
Add snow in irregular patches and allow it to accumulate naturally around rocks and terrain features.
Use pale blue-grey to create snow shadows without making the surface look dirty.
Introduce frozen puddles, cracks, icicles, footprints, vegetation, and weathering where appropriate.
Use gloss selectively for ice and wet melting areas while keeping most snow matte.
For magical environments, introduce saturated blue or turquoise light and subtle OSL.
These techniques work beautifully for frost giants, barbarians, winter warriors, wolves, undead, monsters, frozen ruins, snowy forests, icy dungeons, and almost any fantasy miniature set in a cold environment.
Most importantly, tell a story with the base.
Fresh untouched snow creates one atmosphere.
A muddy frozen battlefield creates another.
An enchanted landscape filled with glowing ice tells something completely different.
The more the environment supports the character standing on it, the more convincing the finished miniature becomes.
Frequently Asked Questions
What color should I use to shade snow?
Pale blue-grey is one of the best choices. It creates cold shadows while allowing the snow to remain visually white.
Should miniature snow be pure white?
The brightest areas can be pure white, but recessed sections should contain subtle blue-grey or off-white variation.
How do I make miniature ice look realistic?
Use dark blue-grey underneath, lighter blue highlights, irregular cracks, sharp white reflections, and selective gloss varnish.
How should snow accumulate on rocks?
Place it primarily on upward-facing surfaces while leaving vertical sides exposed.
How do I create dirty snow?
Use thin beige, grey, and brown discoloration around footprints, roads, mud, and heavily traveled areas.
Should snow bases be glossy?
Most snow should remain relatively matte. Use gloss primarily for ice, melting areas, and wet surfaces.
How do I create footprints?
Press or sculpt tracks into the snow material and shade the deeper areas slightly darker.
How do I make a fantasy snow base look magical?
Add saturated cyan or turquoise to magical ice, crystals, or runes and reflect small amounts of that color onto nearby snow and terrain.
If you would like free D&D STL miniatures, visit our homepage and download yours now: