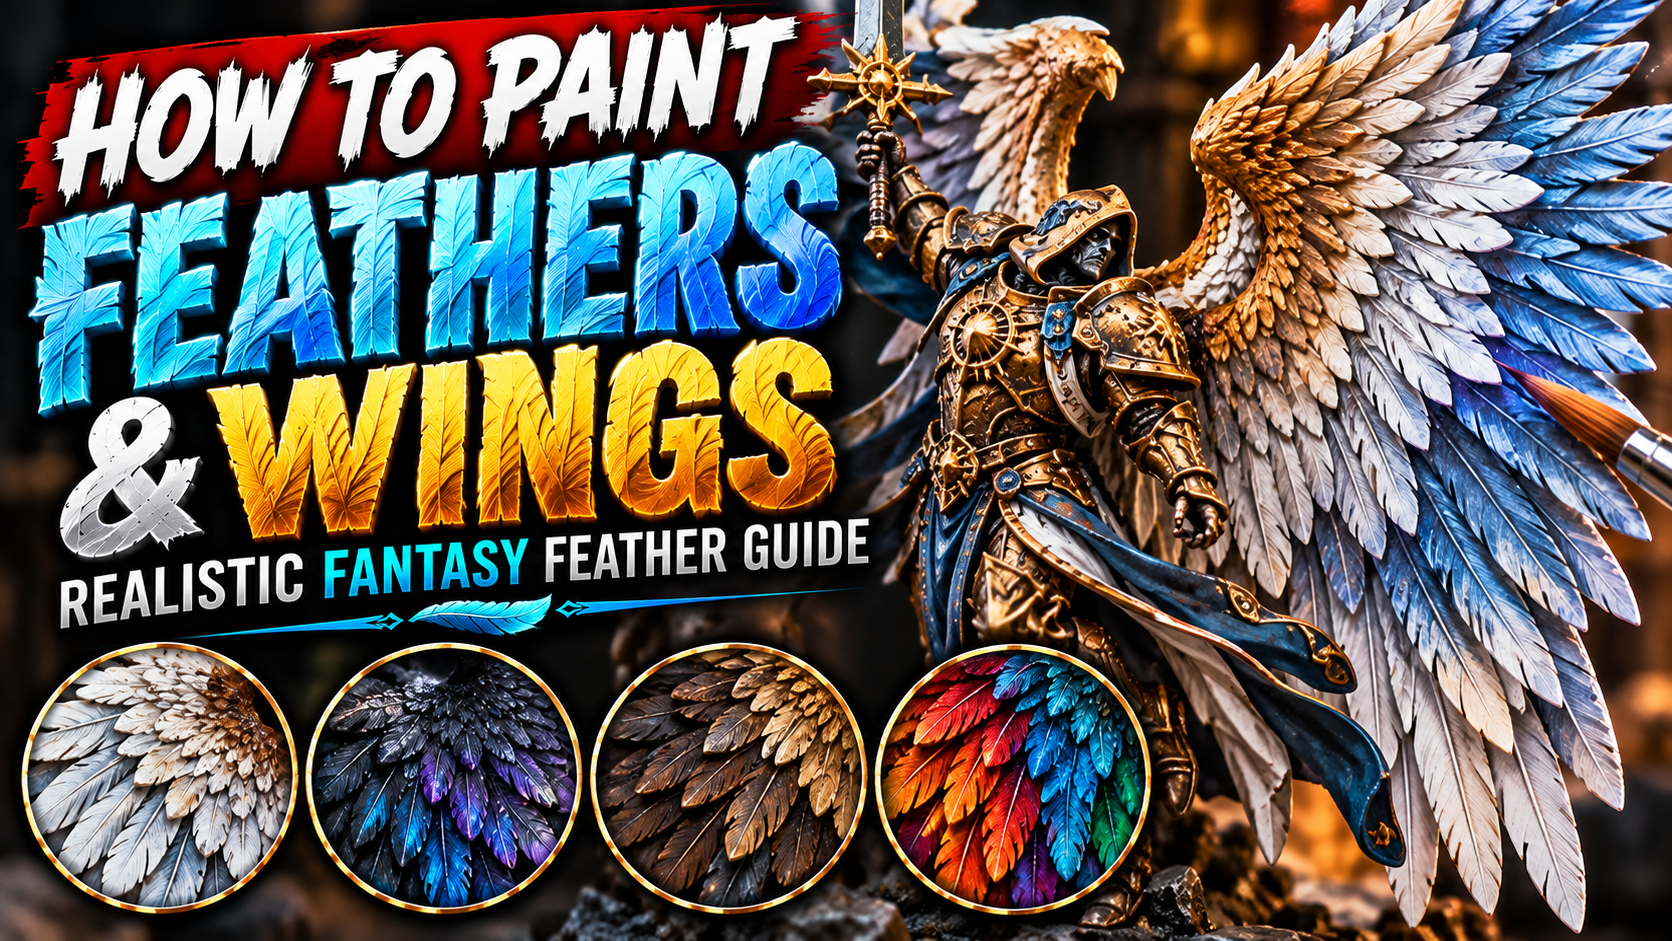
How to Paint Feathers and Wings on Miniatures (Realistic Fantasy Feather Guide)
Feathers and wings can become some of the most impressive parts of a fantasy miniature.
Angels, griffins, harpies, birdfolk, demons, celestial warriors, giant eagles, dragons, and countless other fantasy creatures use wings as major visual elements. Because wings often occupy a large percentage of a miniature’s silhouette, painting them well can completely transform the finished model.
The challenge is avoiding wings that look like one large flat surface.
Real feathers contain overlapping layers, subtle color variation, deep shadows, fine texture, and different levels of brightness depending on their position.
Fortunately, the sculpt usually provides most of the structure for you.
By combining controlled washes, layering, dry brushing, glazing, and selective edge highlights, you can create wings that appear detailed and natural without individually painting every microscopic strand.
In this guide, you’ll learn how to paint realistic feathers, white angel wings, dark wings, colorful fantasy plumage, weathered feathers, and magical wing effects.
Understanding Feather Structure
Before choosing colors, look carefully at how the feathers are arranged.
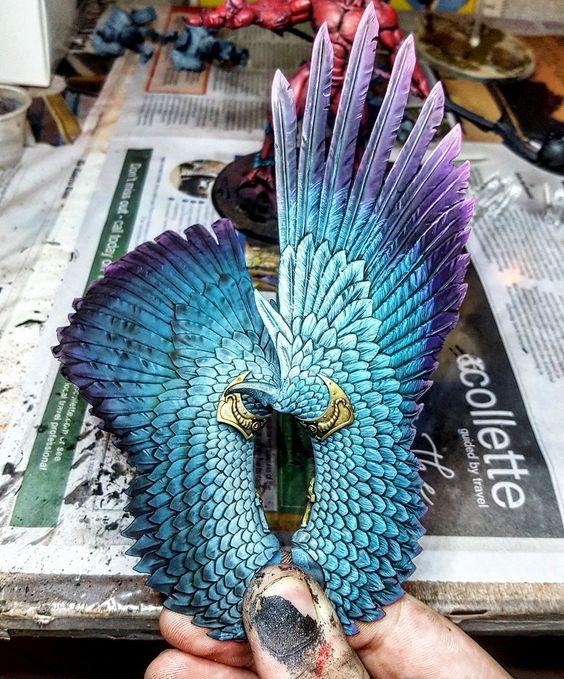
Most sculpted fantasy wings contain several overlapping rows.
The smaller feathers usually sit closer to the body while the longest flight feathers extend toward the outer edge of the wing.
This overlapping structure is extremely important when painting.
Each feather should visually separate from the feather underneath it.
That doesn’t mean outlining every feather with black.
Instead, use shadows inside the recessed areas between feathers while keeping the raised portions lighter.
The result creates depth naturally.
Also remember that wings should be viewed as one large form first and hundreds of individual feathers second.
If every feather receives exactly the same highlight, the wing can become visually noisy.
Establish the overall light direction before adding small details.
Choosing a Feather Color Palette
Fantasy wings allow enormous freedom.
White, brown, black, grey, red, blue, green, and even purple can all create convincing feathers.
A natural brown wing might use dark chocolate shadows, medium brown, tan, beige, and ivory.
Black wings can contain dark blue, charcoal, grey, and small pale highlights.
White wings should rarely be painted using pure white from the beginning.
Instead, start with grey, beige, pale blue-grey, or another off-white color.
Then gradually work toward white.
For magical creatures, you can introduce saturated colors such as turquoise, violet, crimson, or emerald.
The important principle is maintaining a clear progression from shadow to highlight.
Starting with a Dark Base Coat
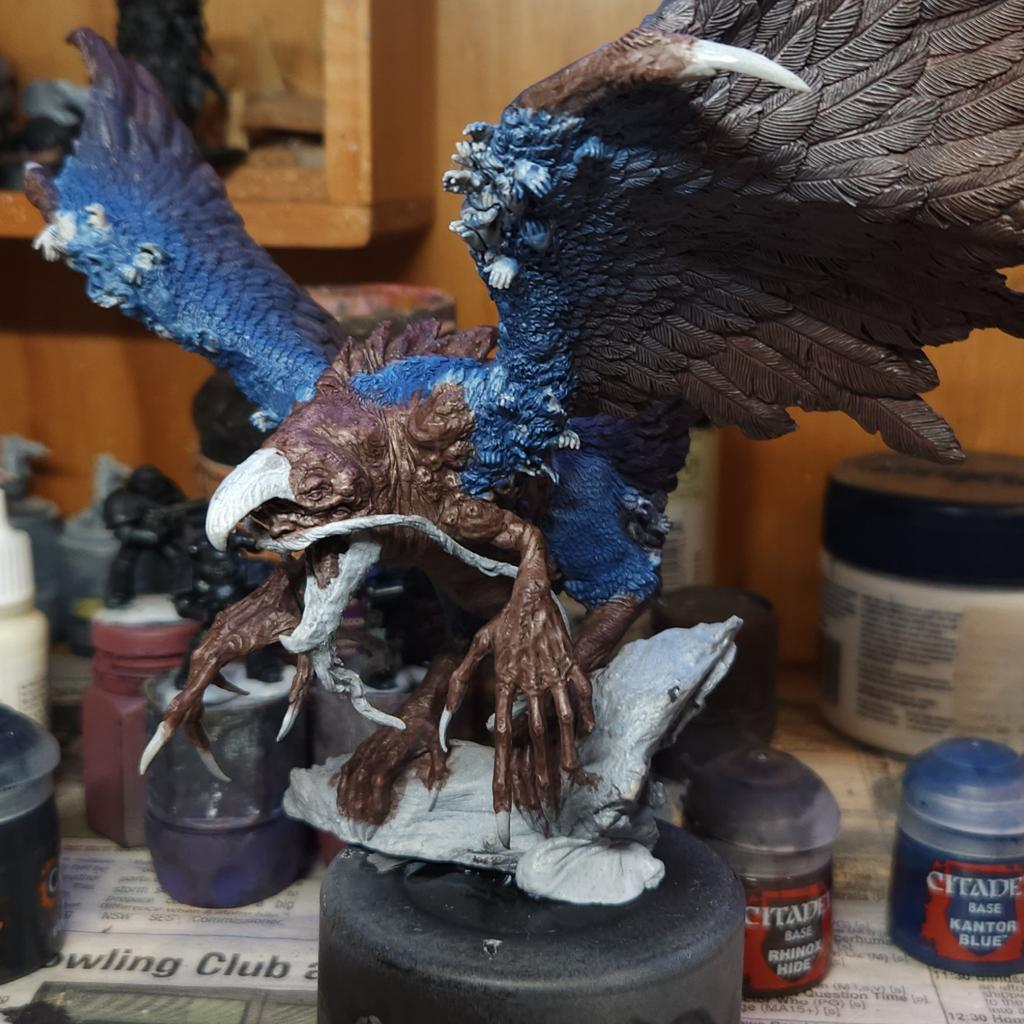
A darker foundation makes feather separation much easier.
For brown wings, begin with dark brown.
For black wings, use nearly black grey or dark blue-grey.
For white wings, begin with medium grey, blue-grey, or warm beige depending on the atmosphere you want.
Apply the base coat carefully across the entire wing.
Make sure paint reaches the recessed lines between overlapping feathers.
Those dark recesses will eventually provide much of the definition.
Don’t worry if the wings initially look too dark.
Most of the visual transformation happens when progressively lighter colors are introduced.
Shading Between Individual Feathers
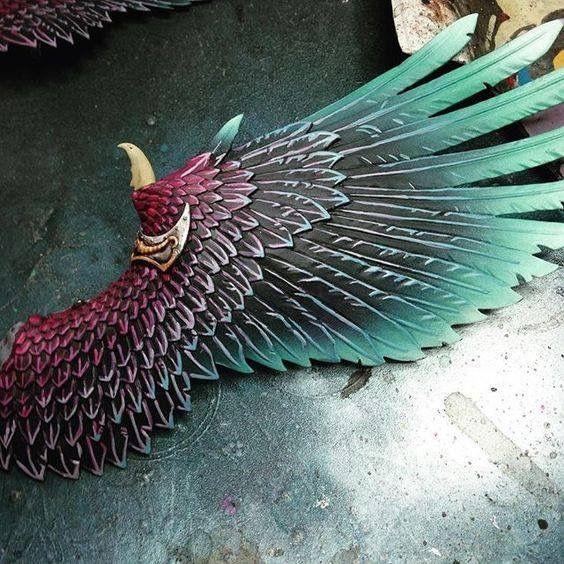
Once the base coat is established, strengthen the deepest shadows.
Apply a controlled wash into the spaces where feathers overlap.
Avoid flooding the entire wing unless you’re intentionally creating a very dark result.
Instead, guide the wash into recesses.
For brown wings, dark brown or brown-black works well.
White feathers can be shaded with blue-grey, neutral grey, or subtle brown.
Black feathers can use extremely dark blue, purple, or black.
Colored fantasy wings should use darker versions of their primary color.
Allow these shadows to dry completely before beginning the highlighting process.
A properly shaded wing already begins to show strong three-dimensional separation.
Building the Feather Midtones
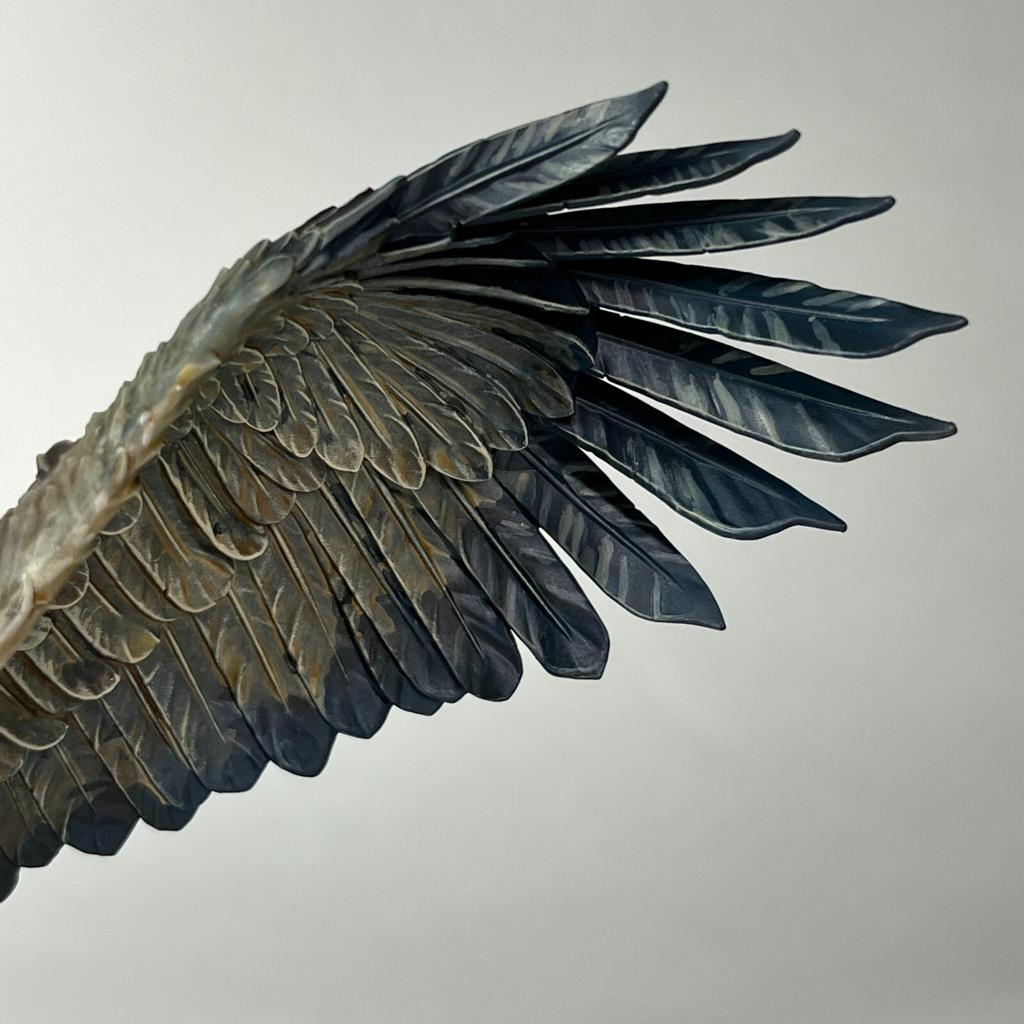
Now restore your primary feather color across the raised surfaces.
Work from the base of each feather toward the tip.
You don’t need to paint every feather individually during the first pass.
A carefully controlled dry brush can quickly catch the raised texture.
However, for display-quality miniatures, combining dry brushing with manual layering usually produces better results.
After the initial midtone, begin painting individual feathers selectively.
Leave the darker base visible where one feather disappears underneath another.
This immediately reinforces the overlapping structure.
As you progress toward the outer feathers, you can introduce subtle color variation.
Nature rarely creates perfectly identical feathers.
Highlighting Individual Feathers
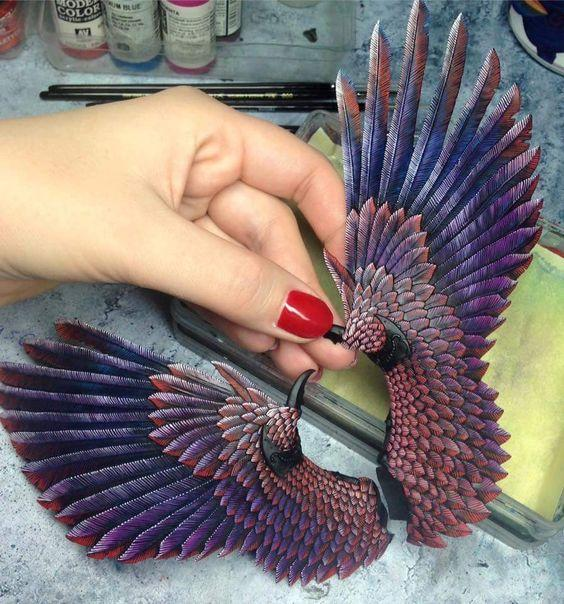
The brightest highlights should usually appear along the feather shafts, tips, and selected outer edges.
Mix a lighter version of your main feather color.
Paint thin lines along the raised center of selected feathers.
Then place slightly brighter highlights toward the tips.
Avoid highlighting every feather equally.
The upper surfaces facing your imaginary light source should receive stronger highlights.
Feathers underneath other feathers should remain darker.
For the final stage, use a very pale version of your color on only the most exposed tips.
This selective brightness makes the entire wing look more natural.
It also prevents the miniature from becoming visually overloaded.
Painting Realistic White Angel Wings
White wings are deceptively difficult.
Painting the entire wing pure white immediately removes most of your ability to create highlights.
Instead, begin with grey or off-white.
Use darker grey, blue-grey, or beige in the deepest recesses.
Then layer progressively lighter colors across the feathers.
Save pure white for the final highlights.
Apply it to feather tips, upper edges, and areas receiving the strongest light.
You can also introduce subtle warm and cool variations.
For example, pale blue-grey shadows combined with slightly warm ivory highlights can create a beautiful celestial appearance.
The viewer will perceive the wing as white even though much of the surface isn’t actually painted pure white.
Painting Black and Raven Wings
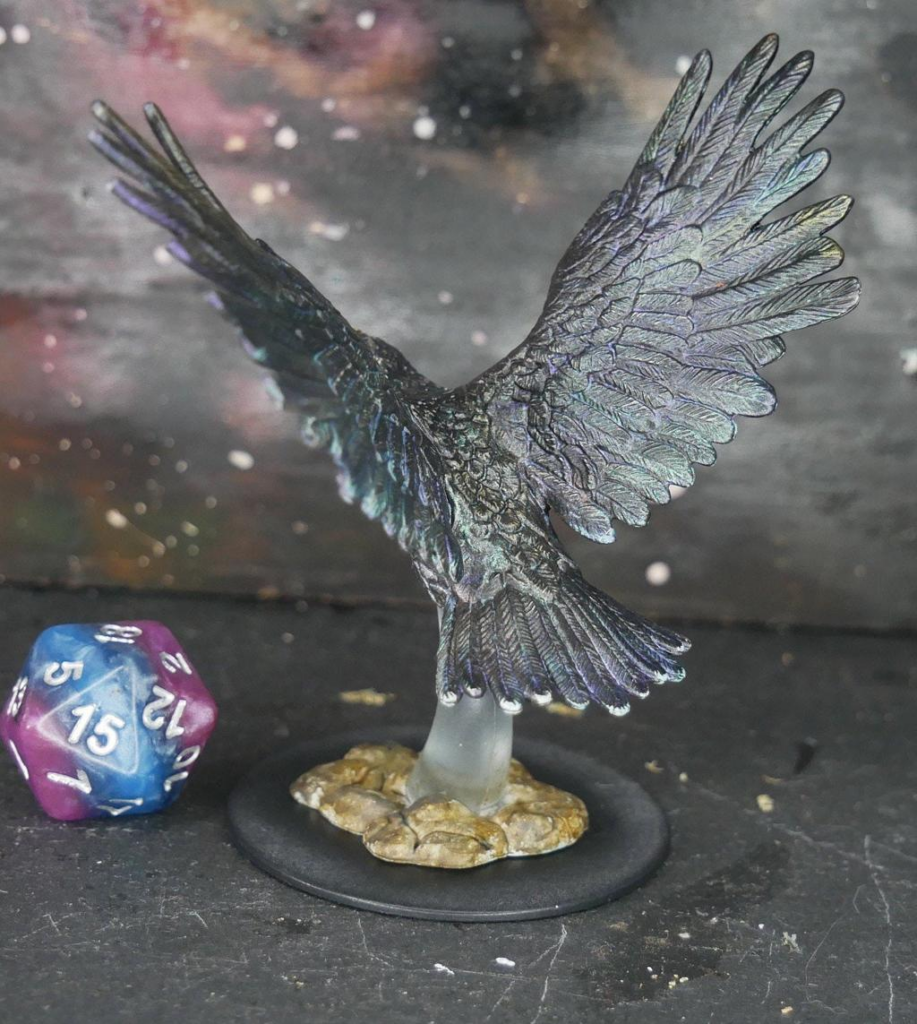
Black feathers need highlights just as much as white feathers need shadows.
If you paint everything pure black, almost all sculpted detail disappears.
Instead, start with very dark grey, blue-black, or purple-black.
Keep pure black in the deepest recesses.
Introduce dark blue-grey across raised areas.
Then use increasingly lighter grey-blue highlights on selected feather edges.
For a raven-like appearance, glaze small amounts of blue, purple, or even turquoise across different sections.
Real black feathers can display beautiful iridescent coloration under strong light.
Keep these colors subtle.
The wings should still read as black overall.
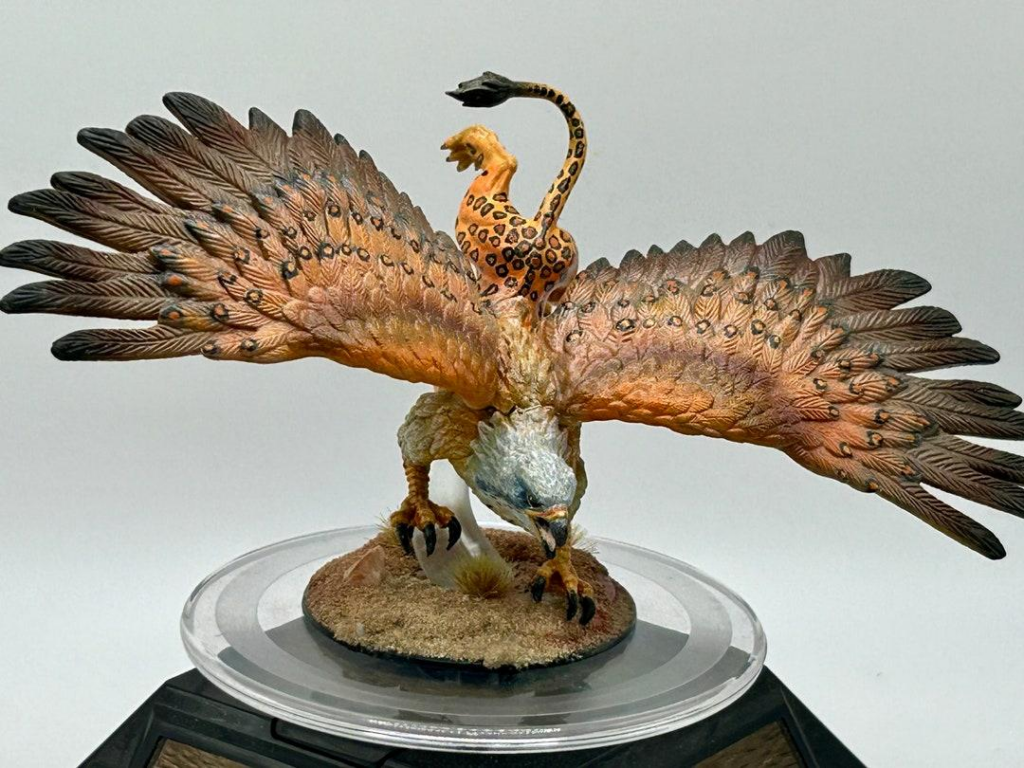
Painting Brown Eagle and Griffin Wings
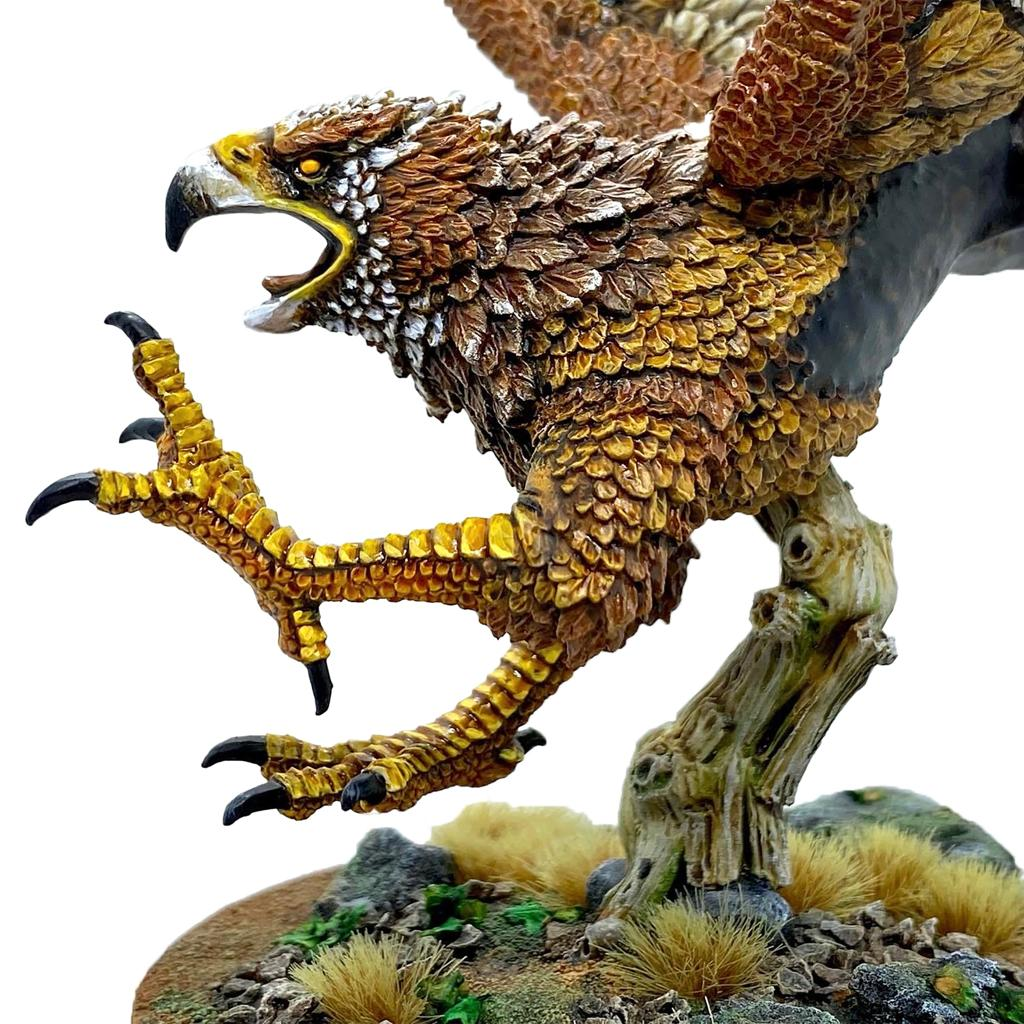
Brown wings work particularly well on griffins, giant eagles, birdfolk, and natural fantasy creatures.
Begin with deep brown.
Introduce medium brown across raised feathers.
Then add tan and beige toward the outer portions.
One excellent technique is changing the feather colors gradually across different rows.
The inner feathers might remain dark brown while the longest flight feathers become lighter.
You can also paint selected feathers almost black or cream to create natural variation.
Use thin dark lines to separate overlapping feathers and pale highlights along selected tips.
This creates a much richer result than using one brown across the entire wing.
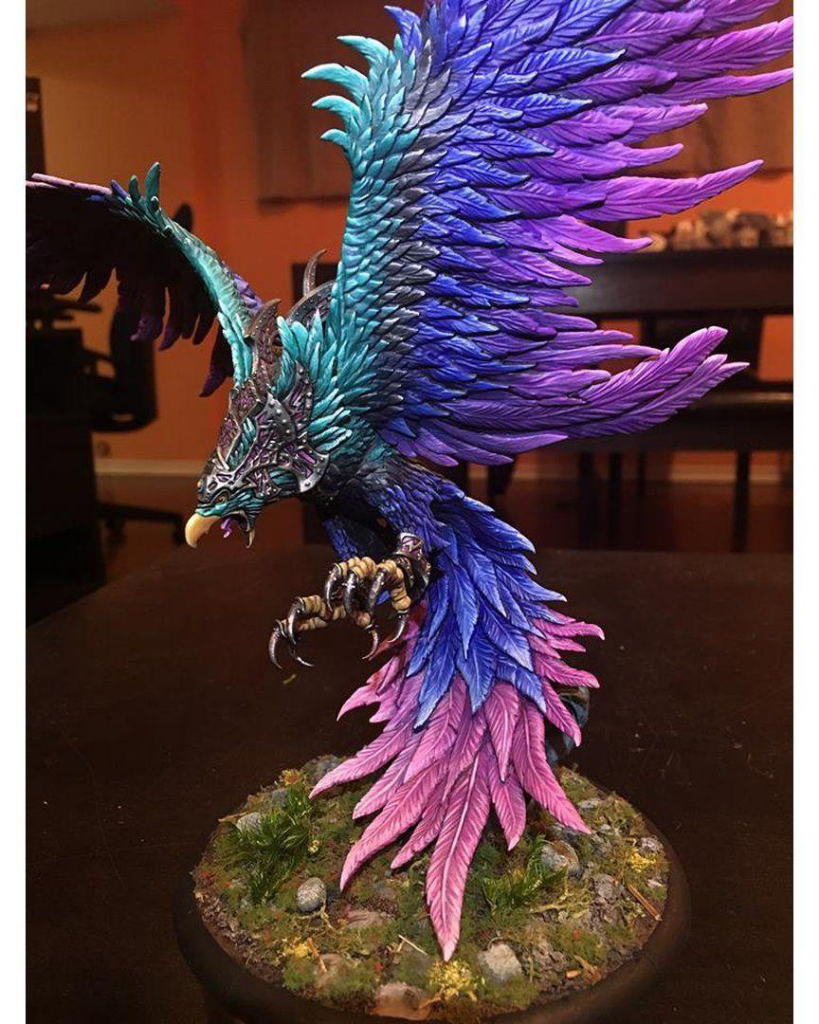
Painting Colorful Fantasy Feathers
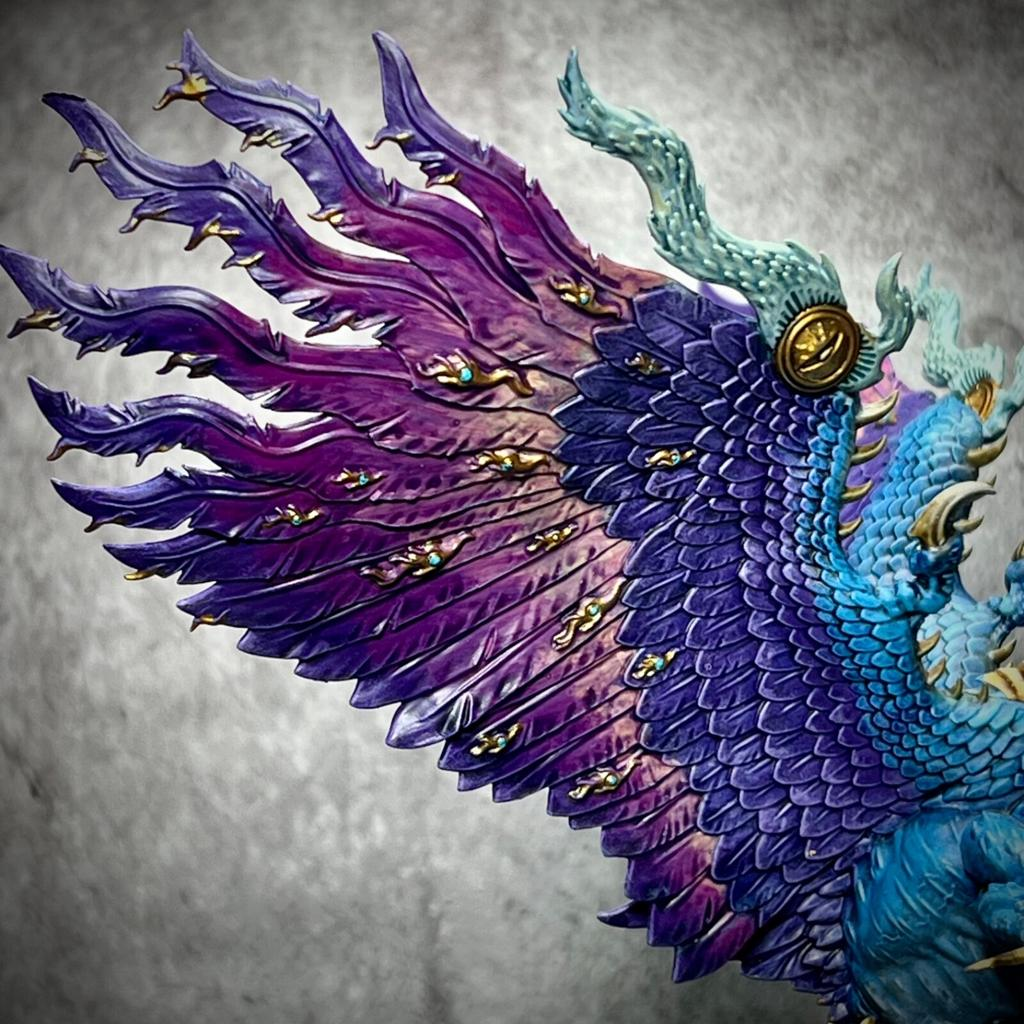
Fantasy creatures allow you to ignore natural bird coloration completely.
A magical bird might have turquoise wings transitioning into blue and purple.
A phoenix could move from deep red through orange into yellow.
A corrupted creature might combine black feathers with purple or toxic green tips.
The easiest way to create colorful wings is to establish the transition across large areas first.
Don’t paint each feather separately from the beginning.
Create your overall gradient.
Then reinforce individual feathers with shadows and highlights.
This keeps the color transition coherent across the entire wing.
For particularly vibrant feathers, glazing can increase saturation without covering previous highlights.
Painting Damaged and Dirty Feathers
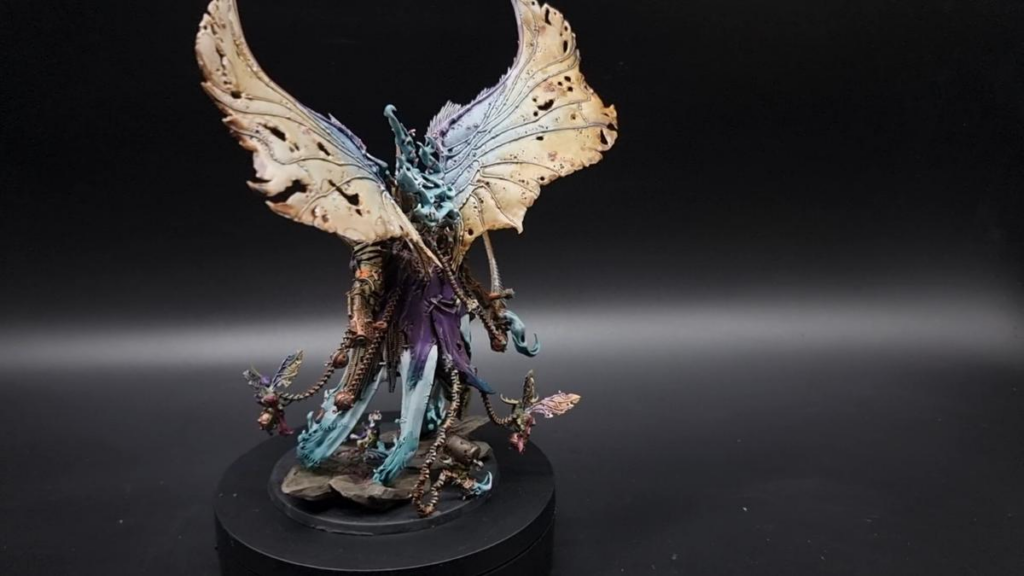
Not every fantasy creature should have perfectly clean wings.
Battle-worn angels, undead birds, harpies, demons, and creatures living in harsh environments can benefit from damaged feathers.
Start with your normal feather painting process.
Then introduce irregular brown, grey, or black discoloration.
Concentrate dirt near feather bases and damaged areas.
Small scratches or splits can be emphasized using thin dark lines.
You can also paint selected feather tips darker to suggest wear.
Keep the damage asymmetrical.
Natural wear rarely affects every feather identically.
A few damaged areas surrounded by cleaner feathers usually look more believable than uniformly dirty wings.
Painting Magical Glowing Wings
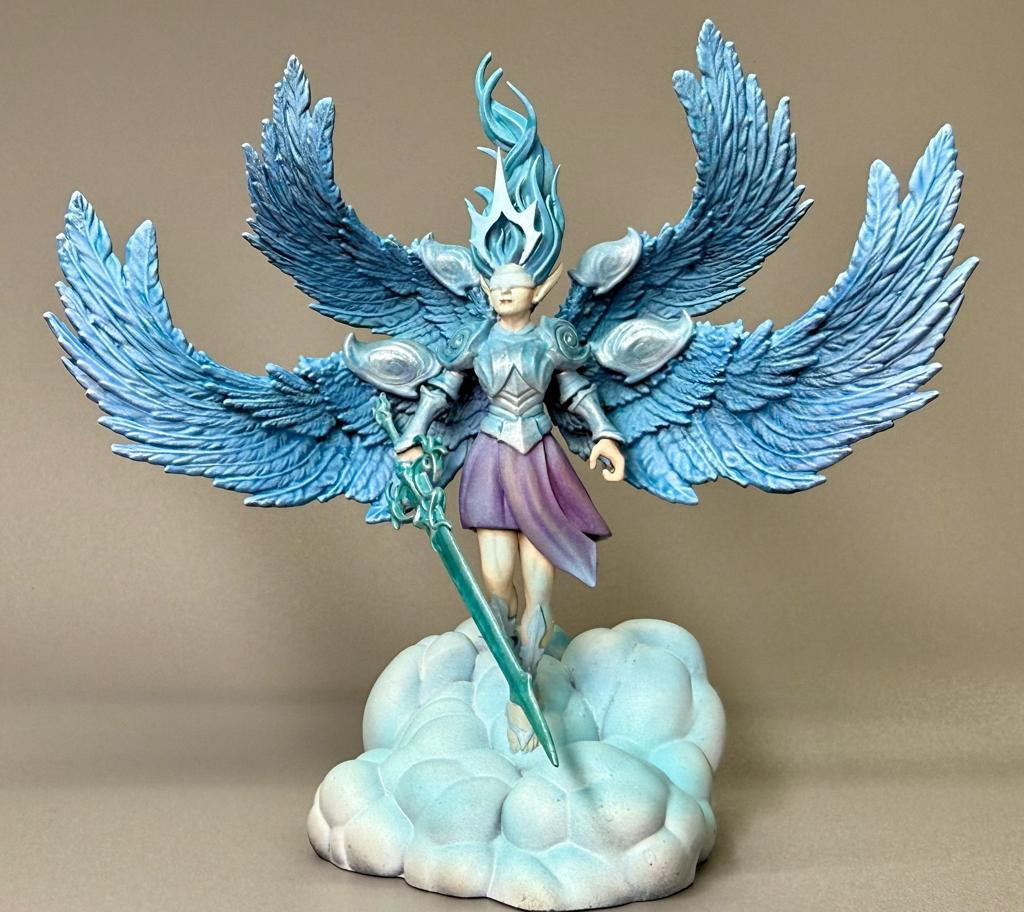
Celestial and supernatural characters sometimes have wings that appear to emit light.
For this effect, your brightest colors must be significantly lighter than the surrounding miniature.
Begin with your normal wing colors.
Then gradually introduce increasingly bright tones toward the area producing the glow.
A magical blue wing could transition from deep blue into turquoise, cyan, pale blue, and almost white.
You can then glaze the surrounding armor, skin, or clothing with a small amount of the wing color.
This creates Object Source Lighting.
Keep the reflected light weaker than the wings themselves.
Otherwise, the viewer will no longer understand where the light originates.
Creating Feather Texture with Fine Lines
Large feathers can benefit from additional texture.
Use a fine brush and paint extremely thin lines following the direction of feather growth.
Don’t cover the entire feather.
Place a few lines near the outer portions and tips.
Use colors slightly lighter and darker than the surrounding surface.
This creates the impression of individual barbs without requiring you to paint hundreds of microscopic details.
Keep the lines aligned with the feather.
Random cross-hatching will make the surface look scratched rather than feathered.
This technique is particularly useful on large display miniatures where individual flight feathers are clearly visible.
Connecting the Wings to the Body
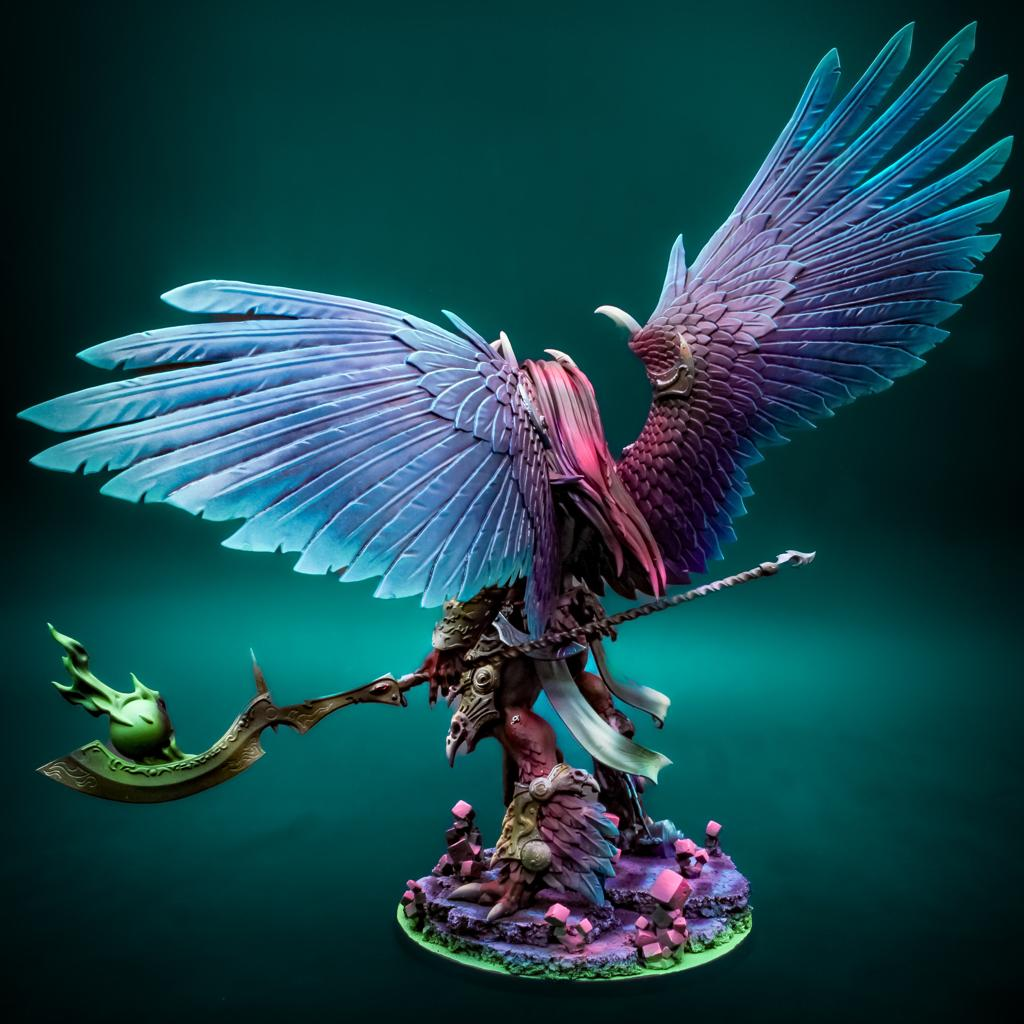
One frequently overlooked area is where the wings connect to the creature.
This transition should feel natural.
Strengthen the shadows where feathers disappear underneath armor, fur, skin, or clothing.
This creates depth and visually separates the wing.
You can also allow some of the creature’s body colors to influence nearby feathers.
A brown griffin might have darker warm feathers near its fur.
A celestial warrior wearing blue armor might receive subtle cool reflections across nearby white feathers.
These small color relationships help make the miniature feel like one unified object rather than separate pieces assembled together.
Common Mistakes When Painting Feathers
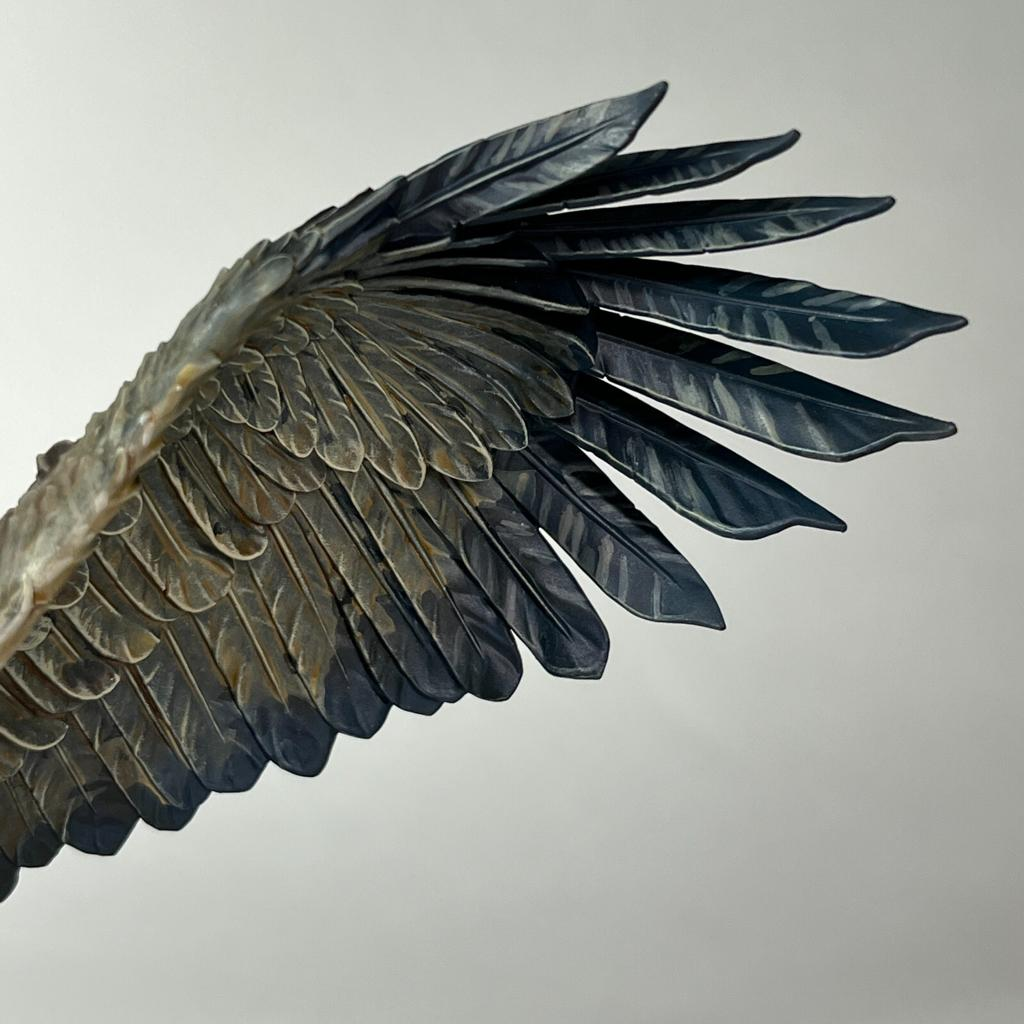
One common mistake is highlighting every feather exactly the same way.
This creates excessive visual noise.
Think about the wing as one large object first.
Another mistake is painting white wings completely white or black wings completely black.
Both approaches eliminate most of your available contrast.
Avoid making every feather identical in color.
Small variations create a much more natural result.
Also be careful with heavy dry brushing.
Dry brushing is extremely useful for wings, but excessive dry brushing can create a dusty or chalky appearance.
Combine it with controlled layering and glazing for cleaner results.
Finally, don’t forget the deepest shadows between feather layers.
Those shadows are what make individual feathers readable.
Final Thoughts
Painting realistic feathers and wings is primarily about layering, separation, texture, and controlled contrast.
Start with a darker foundation.
Establish strong shadows between overlapping feathers.
Restore your midtones across raised areas and gradually introduce lighter colors toward selected feather tips.
Use fine highlights and texture lines only where they add visual interest.
For white wings, build toward pure white instead of starting with it.
For black wings, introduce blue-grey and subtle iridescent colors rather than relying entirely on black.
Natural brown wings benefit from color variation, while fantasy wings allow you to experiment with dramatic gradients, magical colors, and glowing effects.
Most importantly, treat the wing as a complete shape before focusing on individual feathers.
These techniques can be used on angels, griffins, harpies, giant birds, birdfolk, demons, celestial warriors, monsters, and countless other fantasy miniatures.
Once the overall lighting and color structure works, the individual feather details become the finishing touch that brings the entire wing to life.
Frequently Asked Questions
What is the easiest way to paint miniature feathers?
Start with a dark base, shade the recesses, restore the main color across raised feathers, and gradually add lighter highlights toward the tips.
Should I dry brush miniature wings?
Yes. Dry brushing can quickly emphasize feather texture, but combining it with controlled layering produces a cleaner result.
How should I paint white wings?
Begin with grey, beige, or blue-grey and gradually build toward white. Reserve pure white for the strongest highlights.
How do I paint black feathers without losing detail?
Use dark grey or blue-black as your main color, keep pure black in the shadows, and highlight with blue-grey or subtle purple.
How can I make feathers look more realistic?
Add slight color variation, preserve dark separation between overlapping feathers, and use thin directional lines on larger feathers.
How do I paint griffin wings?
Brown, tan, beige, cream, and dark brown create a strong natural palette. Vary the colors slightly between different feather rows.
Can fantasy wings use bright colors?
Absolutely. Turquoise, purple, red, orange, green, and other saturated colors work beautifully when the overall gradient remains coherent.
How do I make wings appear magical or glowing?
Create extremely bright areas on the wings and add weaker reflections of the same color onto nearby surfaces using thin glazes.
If you would like free D&D STL miniatures, visit our homepage and download yours now: